The Freshdesk: Add note to Ticket integration allows you to connect OneBlink forms to your Freshdesk account. Once configured, a OneBlink form can be used to add a public note to an existing Freshdesk ticket.
TABLE OF CONTENTS
- Setting up the Freshdesk Integration
- Setting up the Workflow Event
- Setting up Freshdesk
- Sending the Form Link from Freshdesk
- Getting Help
Setting up the Freshdesk Integration
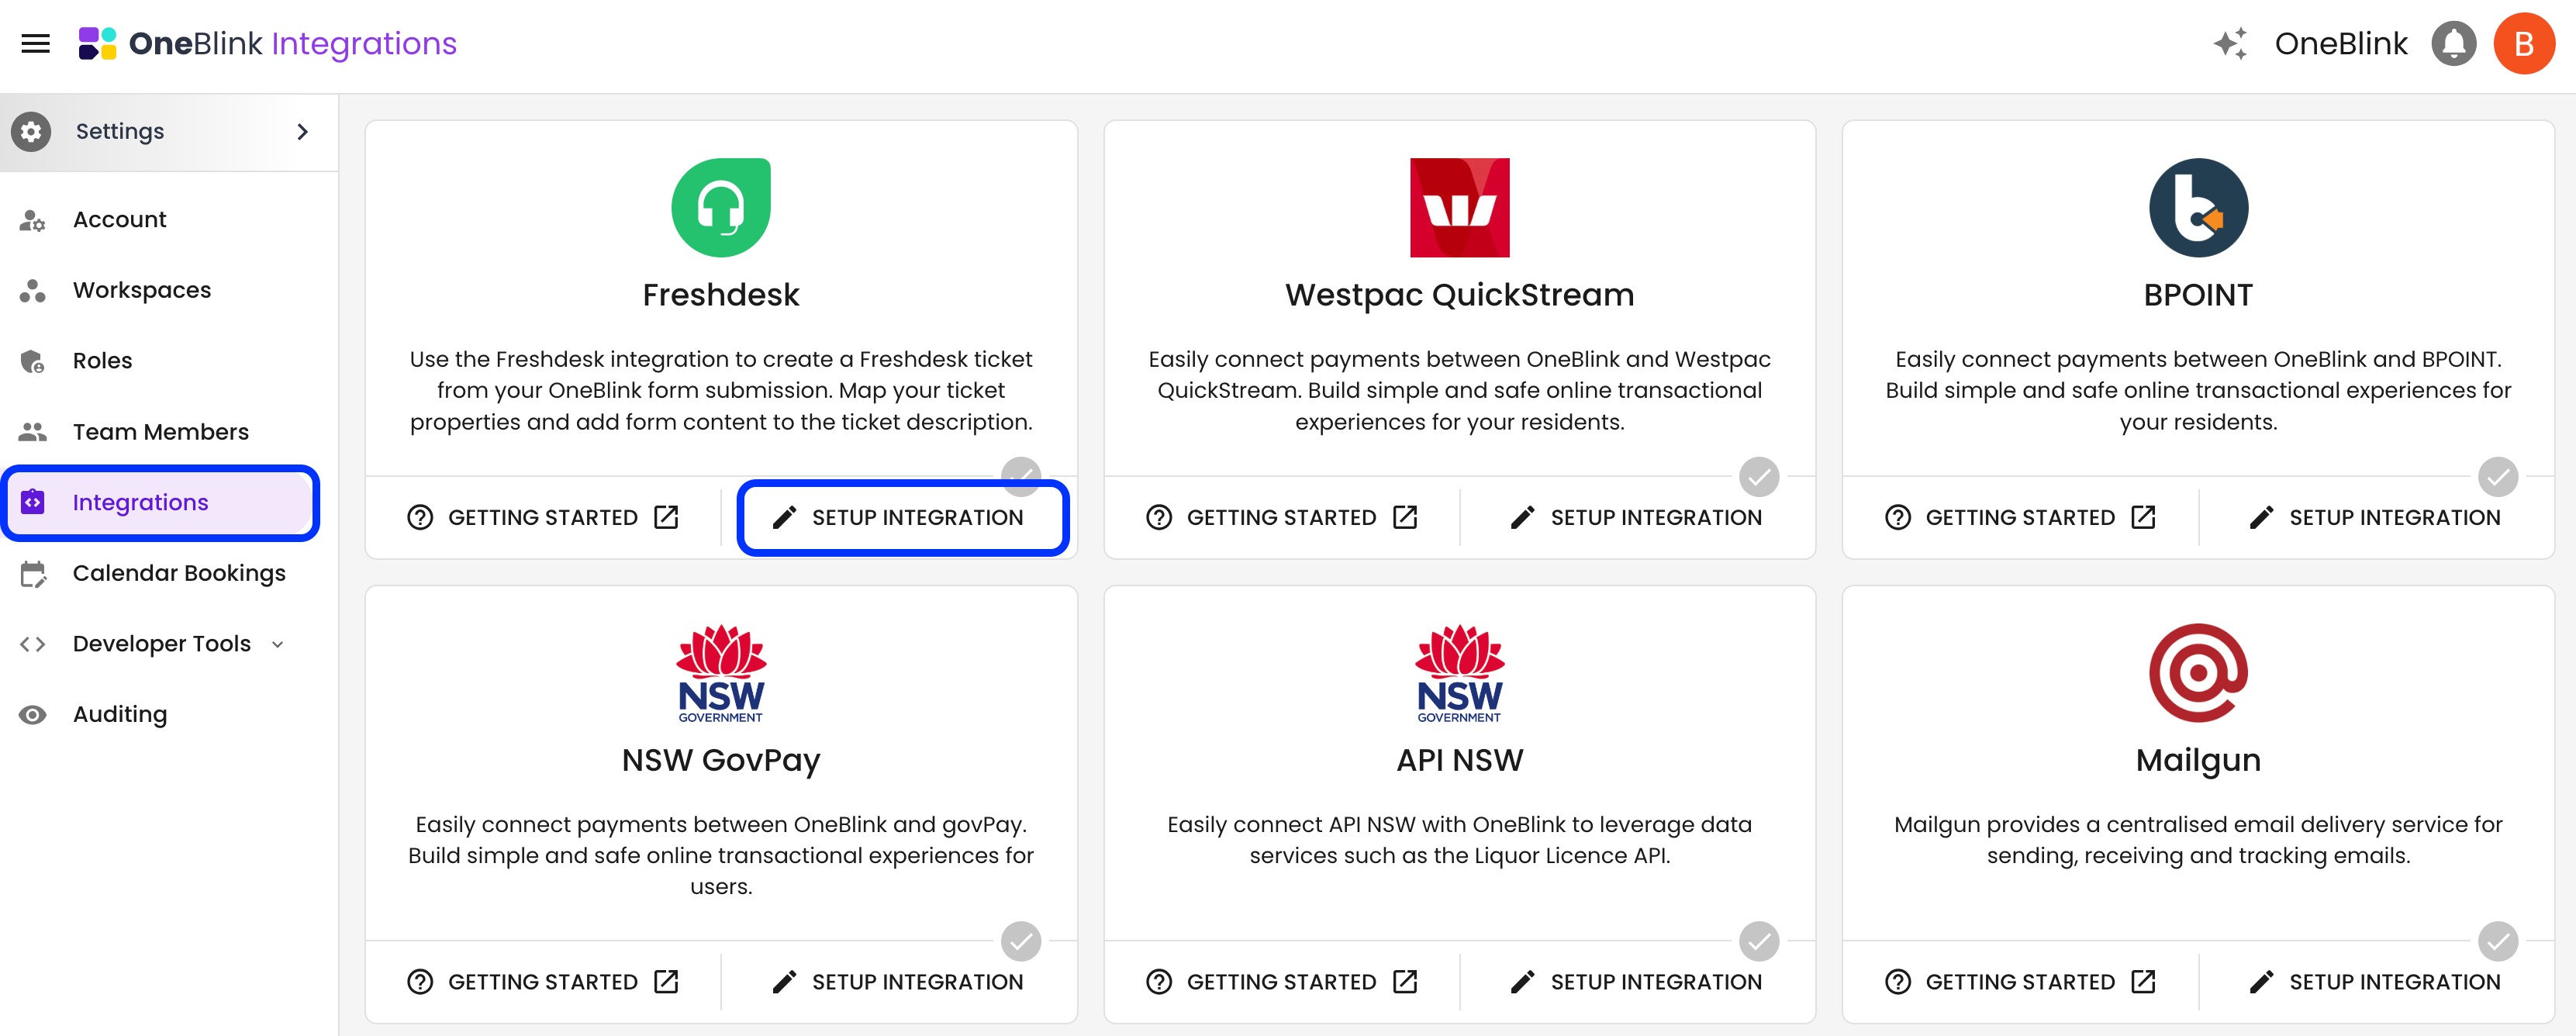
Step 1: Open the Integrations menu and navigate to the Freshdesk integration card.
Step 2: Click Setup Integration.
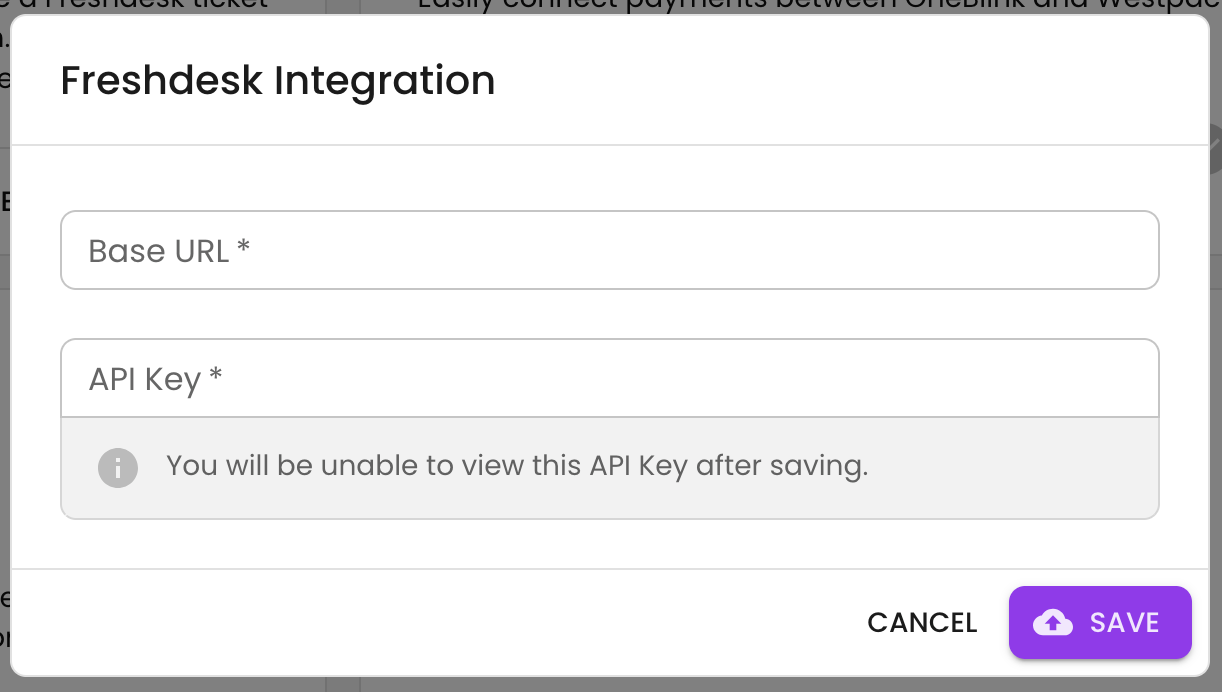
Step 3: Add your Freshdesk base URL and Agent API key, then click SAVE.
If you are using a custom domain for your Freshdesk portal, use the original Freshdesk URL, for example yourcompany.freshdesk.com.
An Agent API key can be found by clicking the agent icon in the top-right corner of your Freshdesk portal and selecting Profile settings.
Note: The Agent API key used for this integration will appear as the agent creating the tickets in Freshdesk. We recommend adding an agent to your Freshdesk account with a generic name, such as “OneBlink Form”. This makes it clear that new tickets were created from a OneBlink form rather than manually added by an agent.
Setting up the Workflow Event
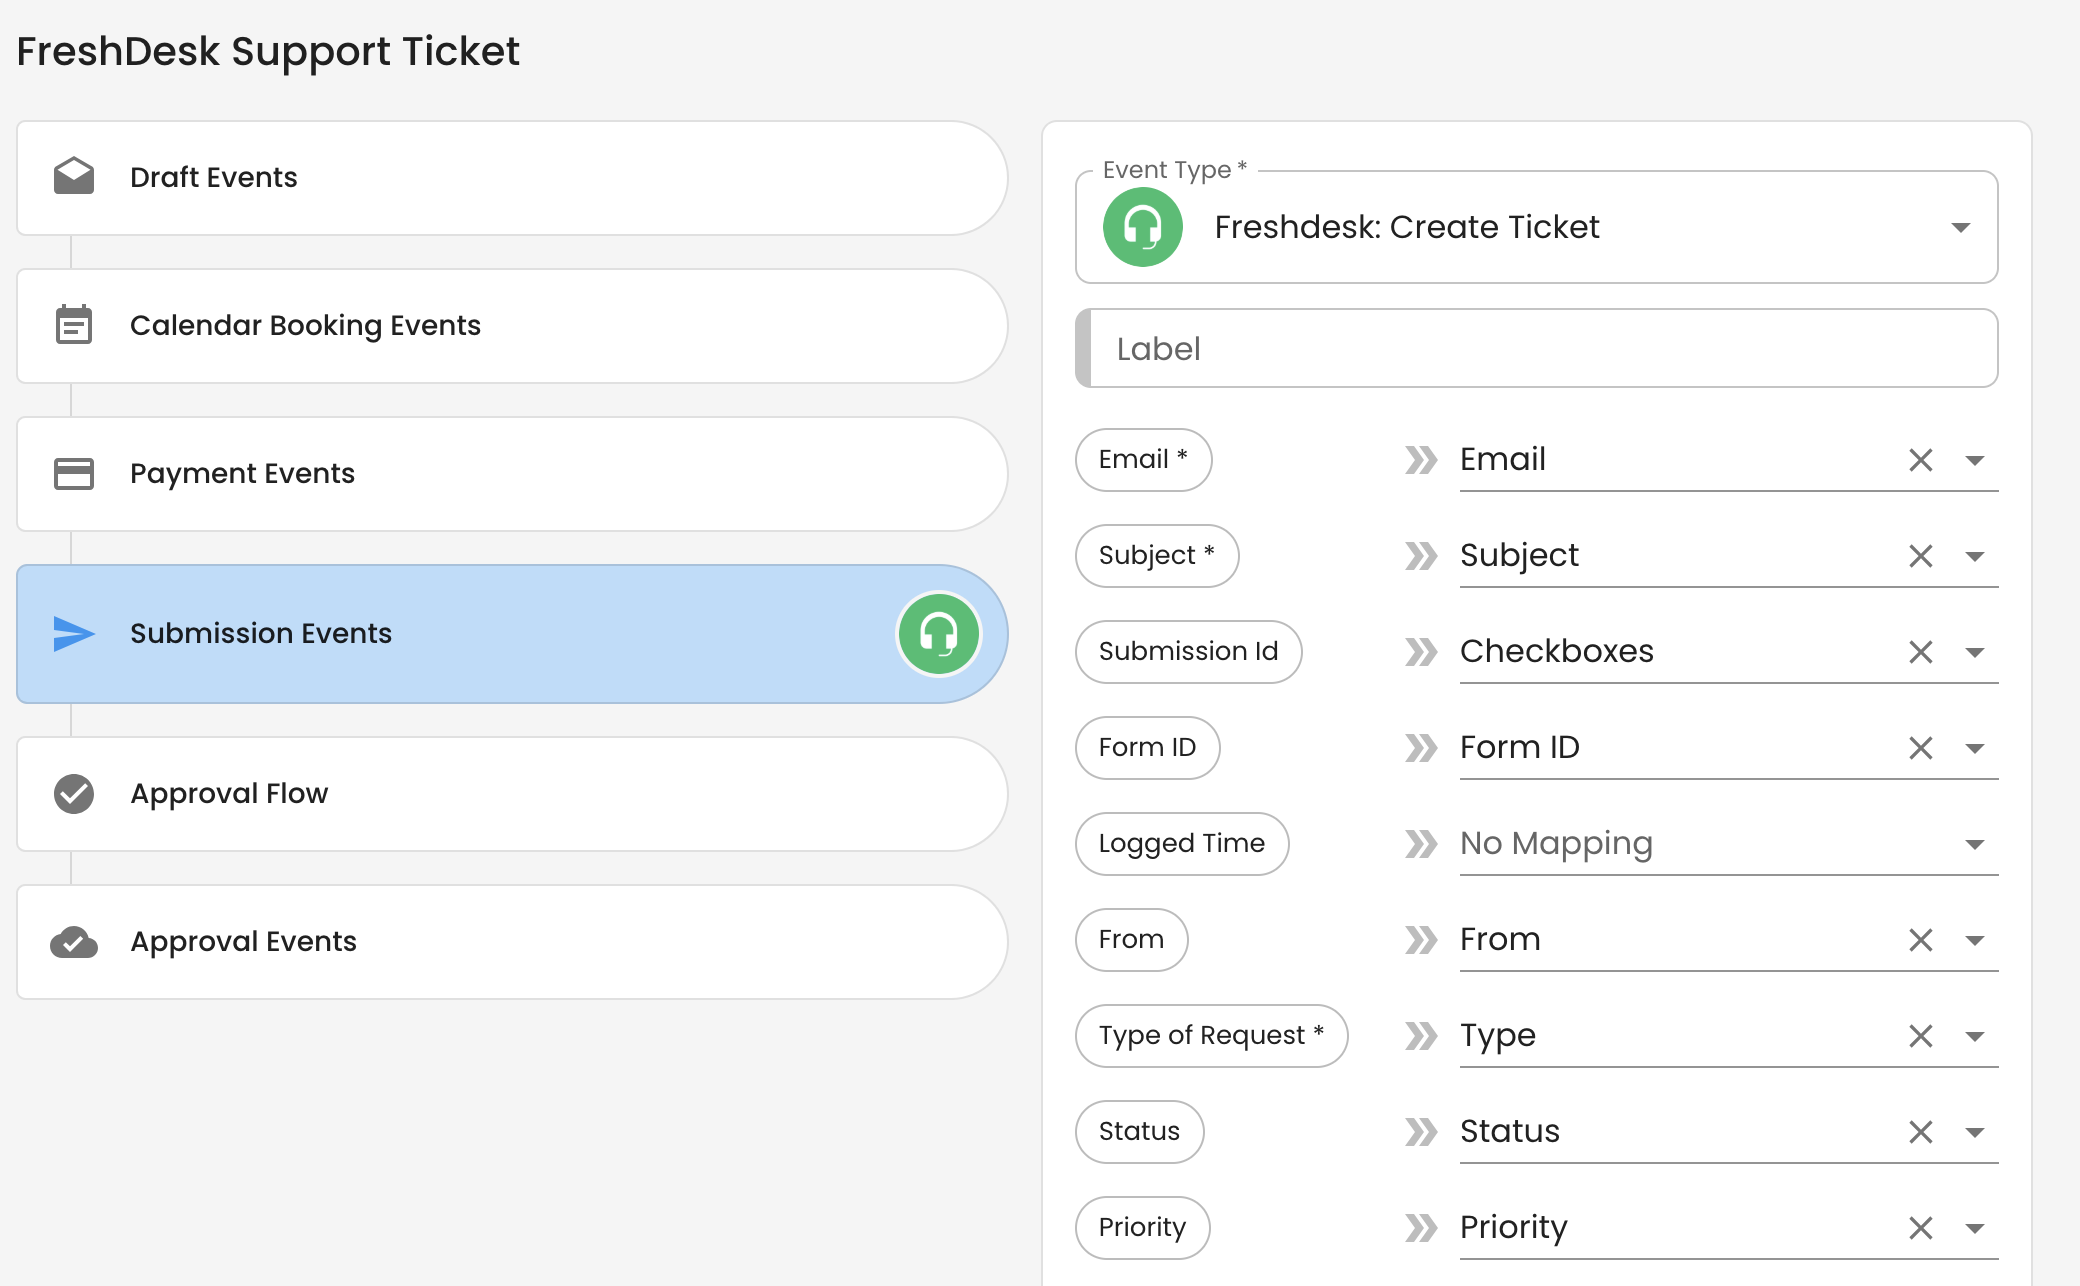
The Add a note to Ticket workflow event requires minimal configuration. Add the workflow event to the form you want to use.
If you add the integration as an approval event, you can choose whether to include approval form data. For more information, check out the Workflow article.
Setting up Freshdesk
To make sure submitted forms update the correct Freshdesk tickets, you will need to create a canned response in Freshdesk using the template from your OneBlink workflow event.
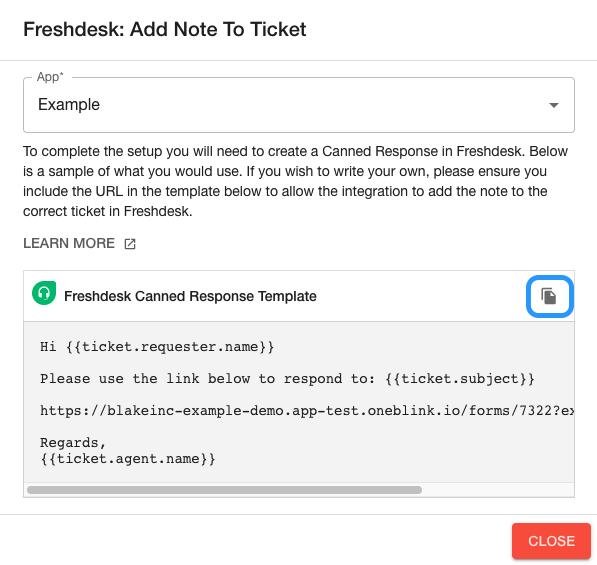
Step 1: Click the more information button on your Freshdesk: Add Note To Ticket workflow event.
Select the app you are using for the form. If you only have one app, this selection will be hidden.
Copy the Freshdesk Canned Response Template.
Step 2: Open your Freshdesk account.
Click Admin in the left side menu, then click Canned Responses.
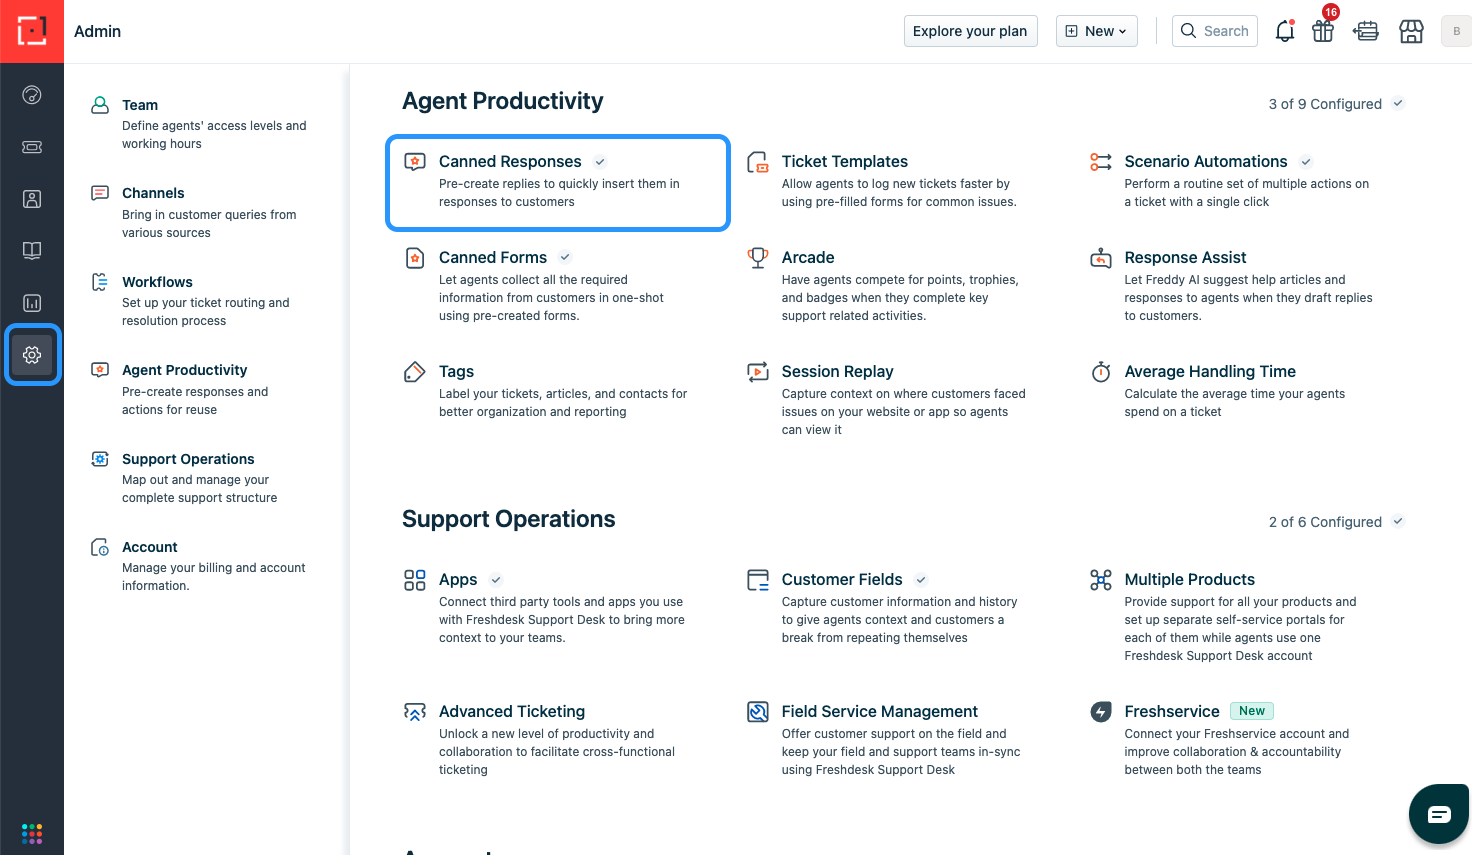
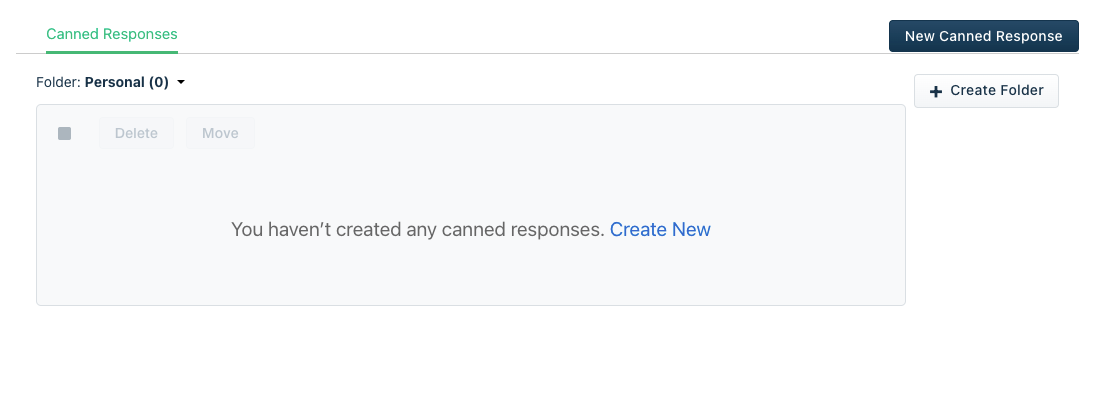
Step 3: Click Create New.
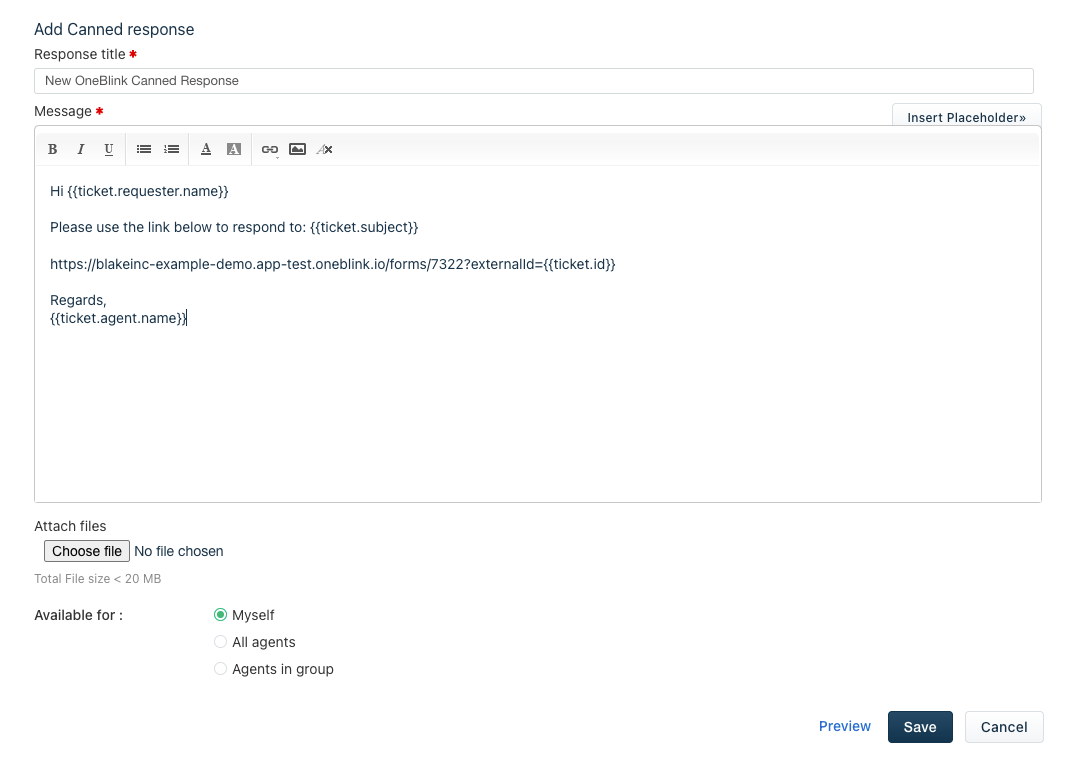
Step 4: Add a response title, paste in the Canned Response Template copied from OneBlink, then click Save.
The canned response must include the full form link. This includes the external ID that connects the form submission to the Freshdesk ticket.
Sending the Form Link from Freshdesk
Once the canned response has been created, Freshdesk agents can use it when replying to a ticket.
Step 1: Open the ticket and click Reply.
Step 2: Select Canned Response.
Step 3: Click Insert canned response and choose the canned response created for the OneBlink form.
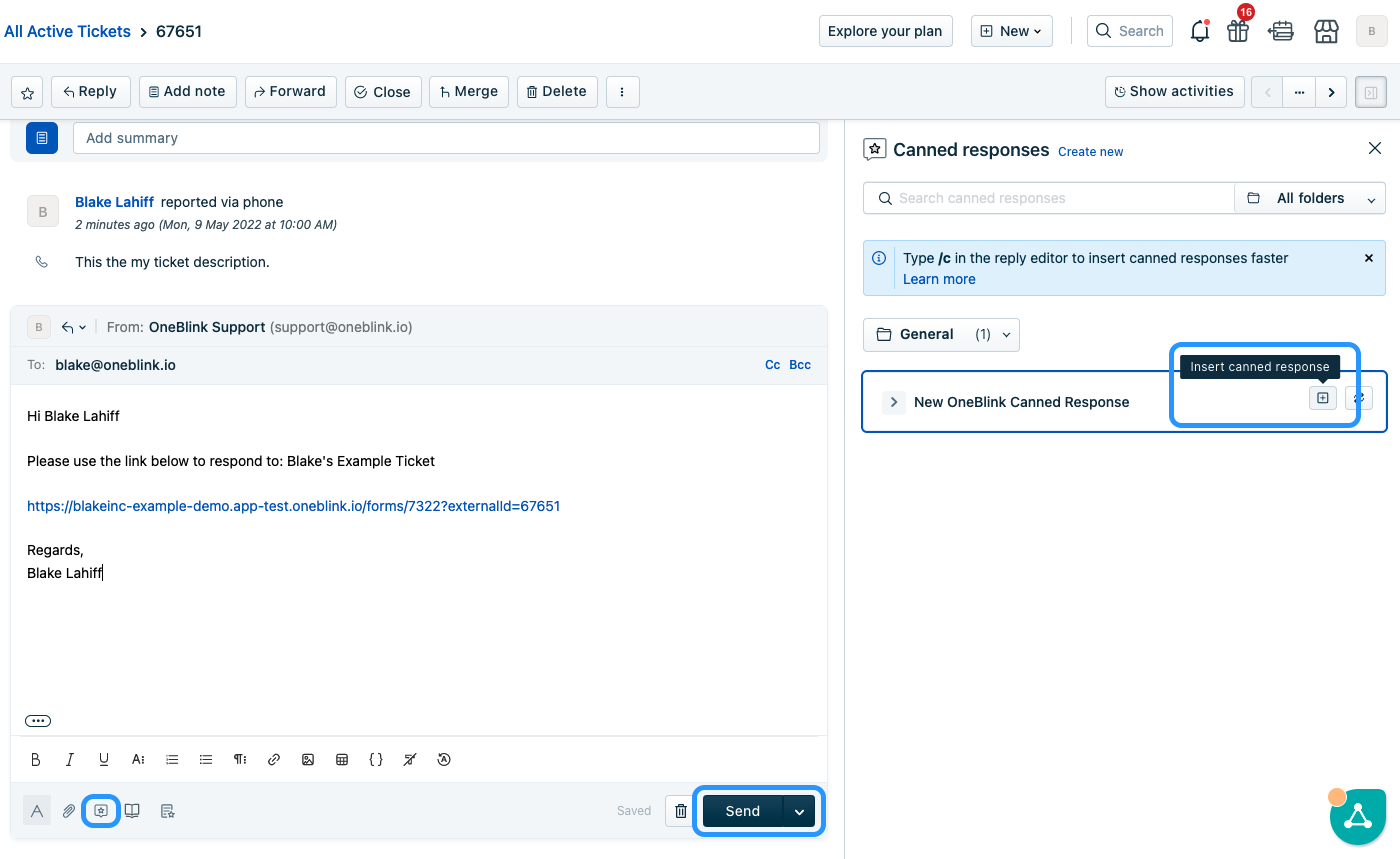
Step 4: Click Send to send the canned response and form link to the requester.
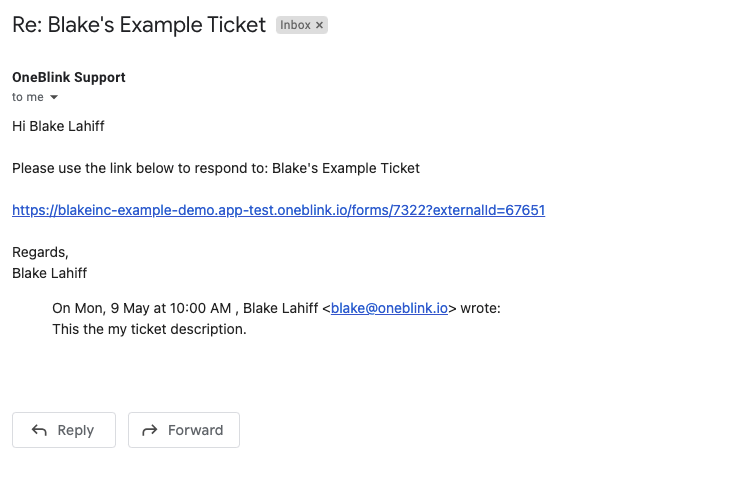
The requester will receive an email containing the form link.
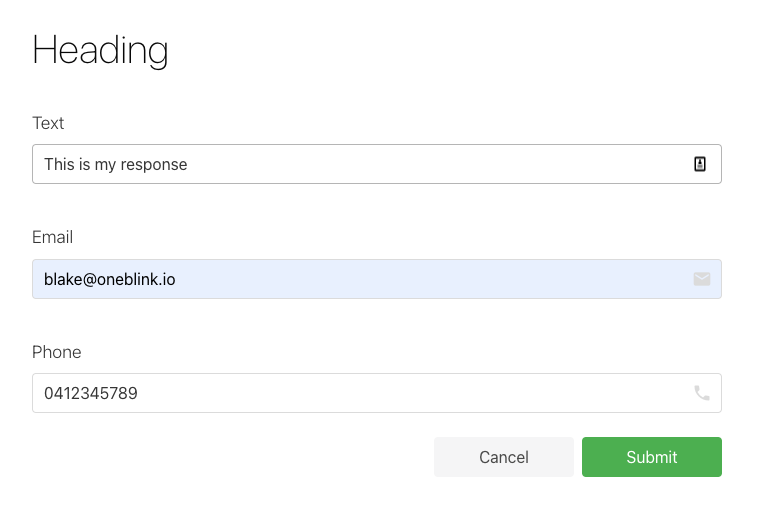
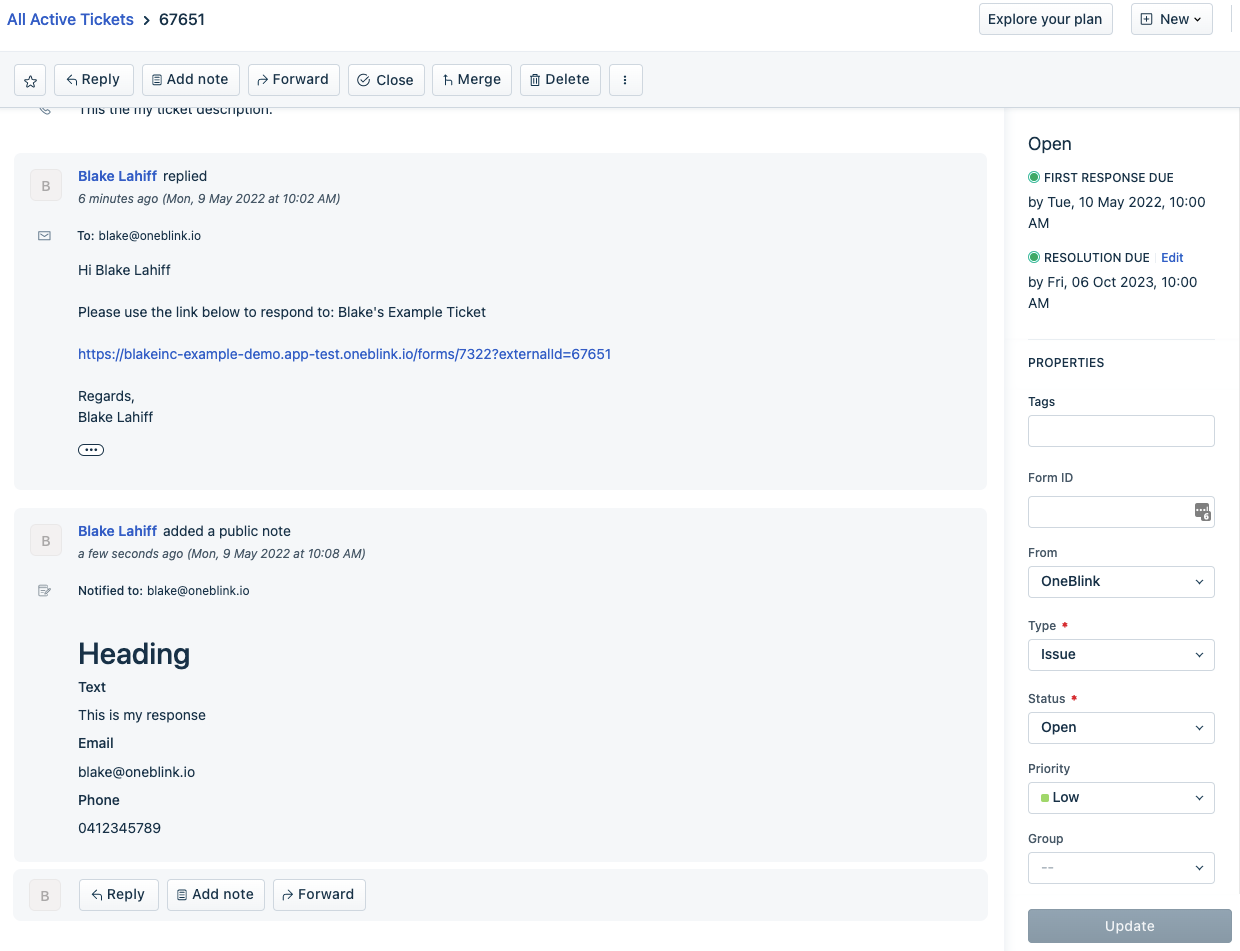
Once the form is completed and submitted, the form submission content will be added to the Freshdesk ticket as a public note.
Getting Help
If you need any assistance with Freshdesk Add Note to Ticket, please reach out through the Report Issue menu or email support@oneblink.io.
Was this article helpful?
That’s Great!
Thank you for your feedback
Sorry! We couldn't be helpful
Thank you for your feedback
Feedback sent
We appreciate your effort and will try to fix the article