This tutorial explains how to add submitted OneBlink form data to a Microsoft SQL Server table using Power Automate.
Before starting this tutorial, read the Power Automate Integration article. You should already have your OneBlink flow configured and your submission data available through the Parse JSON connector.
TABLE OF CONTENTS
- Adding SQL Server to Your Flow
- Connecting to Your Database
- Mapping Form Data to SQL Columns
- Testing the Flow
- Getting Help
Adding SQL Server to Your Flow
Microsoft SQL Server is a relational database management system. In Power Automate, the SQL Server connector can be used to create, update, retrieve and delete rows in a database table.
This tutorial focuses on the Insert row action, which adds a new row to a selected SQL Server table.
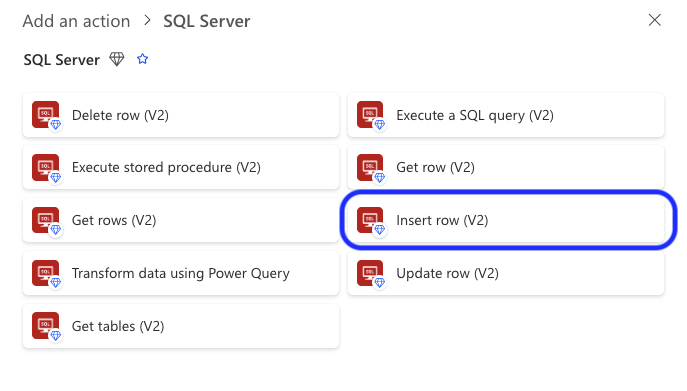
Step 1: In Power Automate, add a new action to your flow.
Step 2: Search for SQL Server.
Step 3: Select the Insert row action.
Connecting to Your Database
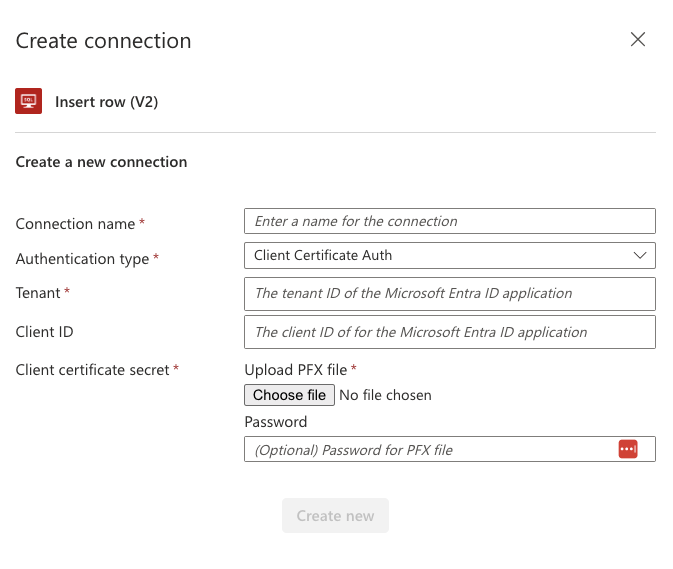
After selecting the SQL Server action, connect Power Automate to the database you want to use.
The connection details required will depend on your SQL Server configuration and the database you are connecting to.
Mapping Form Data to SQL Columns
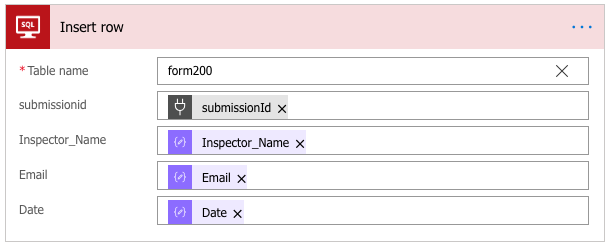
Once the SQL Server database connection has been configured, select the table you want to populate.
The columns from the selected table will display automatically. Map each SQL Server column to the relevant form submission value from your parsed OneBlink form data.
Testing the Flow
After mapping the required fields, save the flow.
Submit the connected OneBlink form, then check the SQL Server table to confirm that the form submission data has been added.
You can also check whether the flow ran successfully by opening the flow in Power Automate and reviewing the Run History.
Getting Help
If you need any assistance with Power Automate SQL Server integration, please reach out through the Report Issue menu or email support@oneblink.io.
Was this article helpful?
That’s Great!
Thank you for your feedback
Sorry! We couldn't be helpful
Thank you for your feedback
Feedback sent
We appreciate your effort and will try to fix the article