The Freshdesk integration allows you to connect OneBlink forms to your Freshdesk account. Once configured, a OneBlink form submission can automatically create a Freshdesk ticket.
TABLE OF CONTENTS
- Setting up the Freshdesk Integration
- Setting up the Submission Event
- Setting Freshdesk Ticket Properties
- Required Properties
- Creating a Ticket
- Getting Help
Setting up the Freshdesk Integration
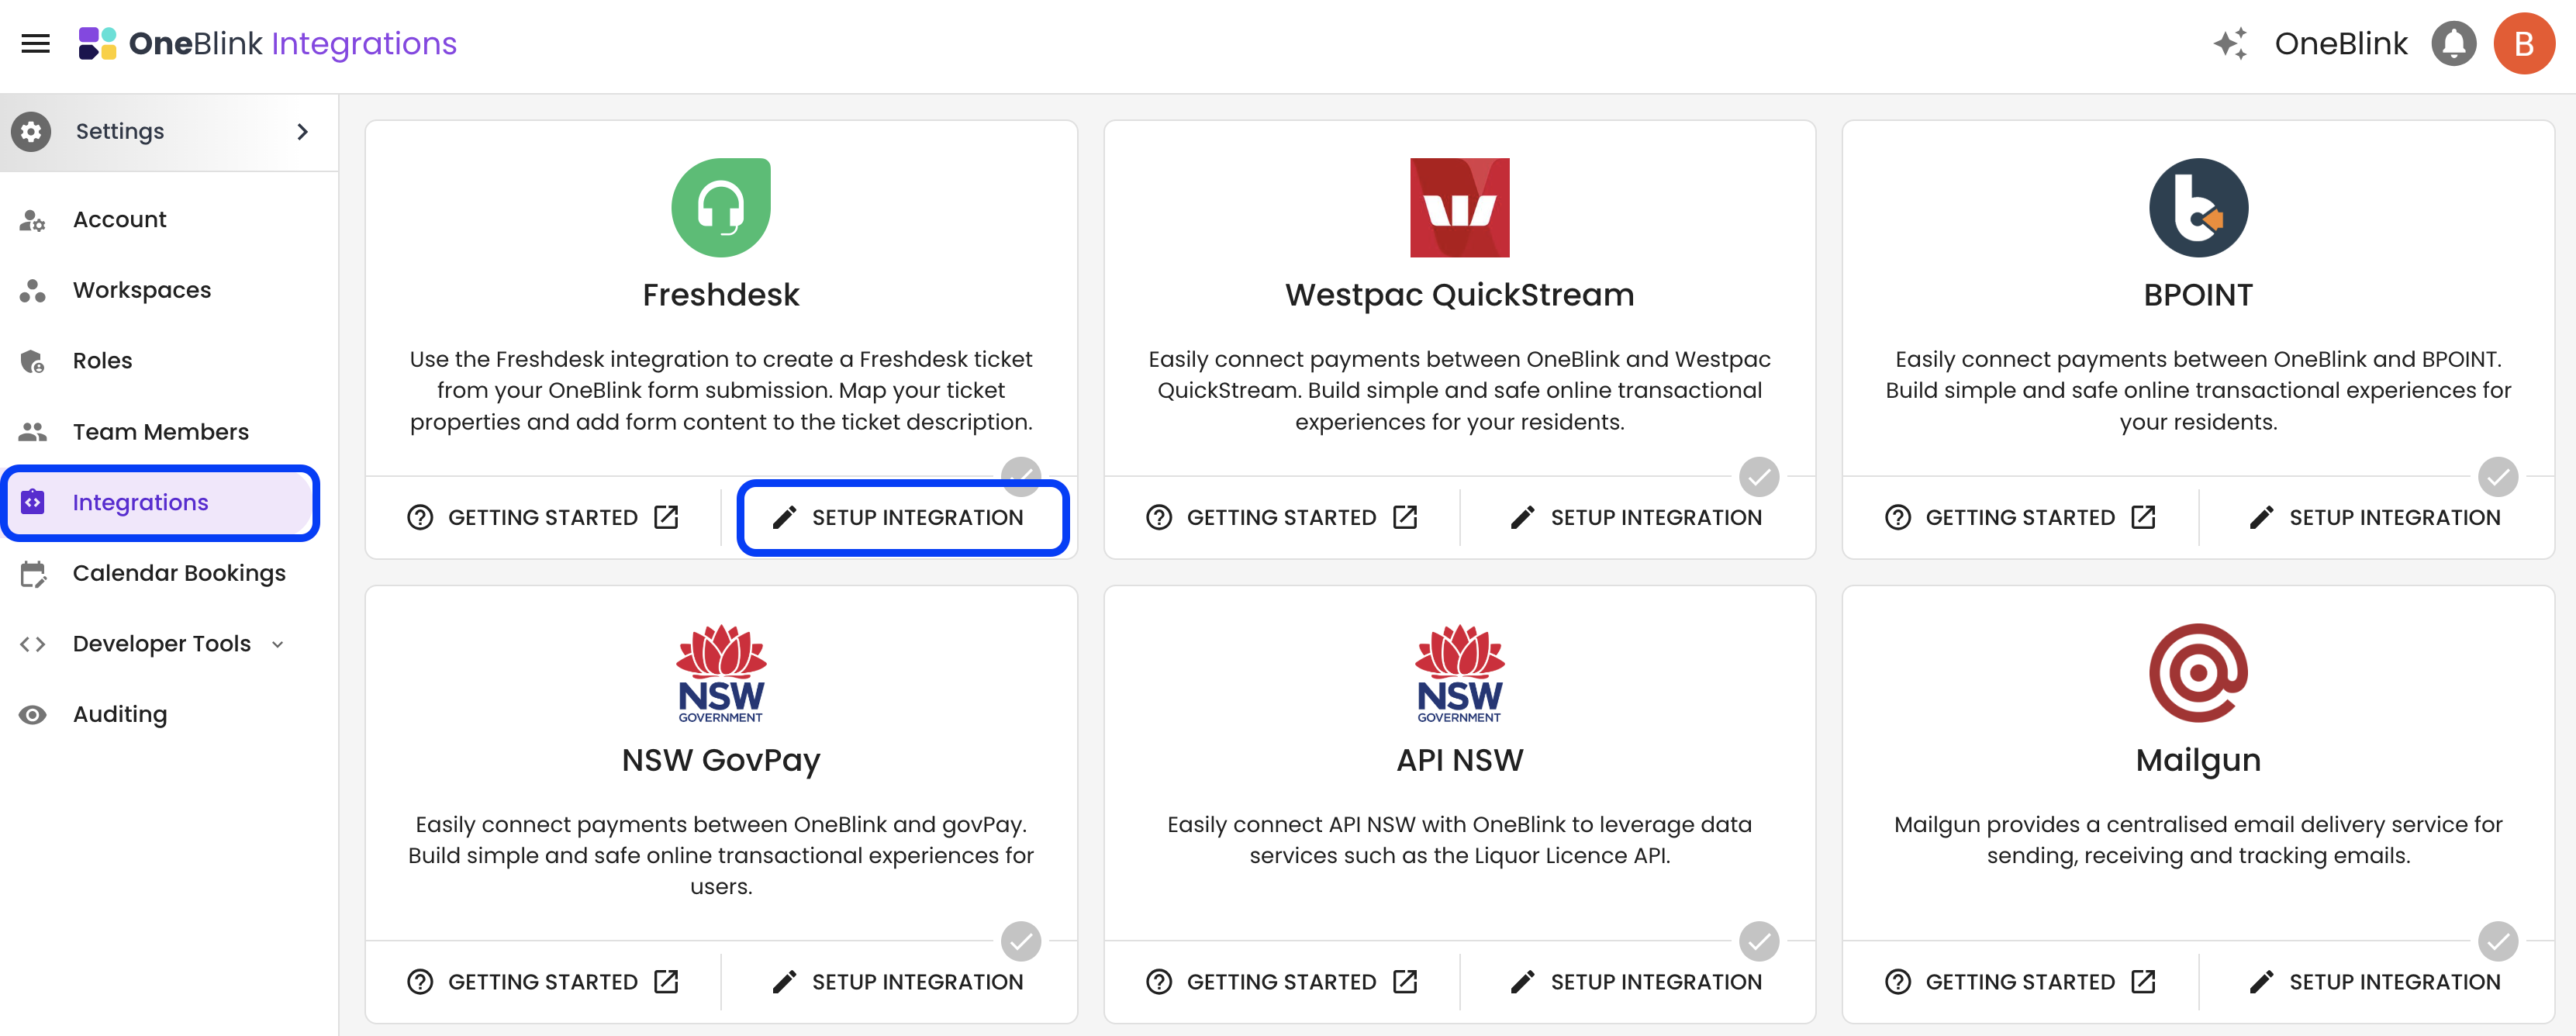
Step 1: Open the Integrations menu and navigate to the Freshdesk integration card.
Step 2: Click Setup Integration.
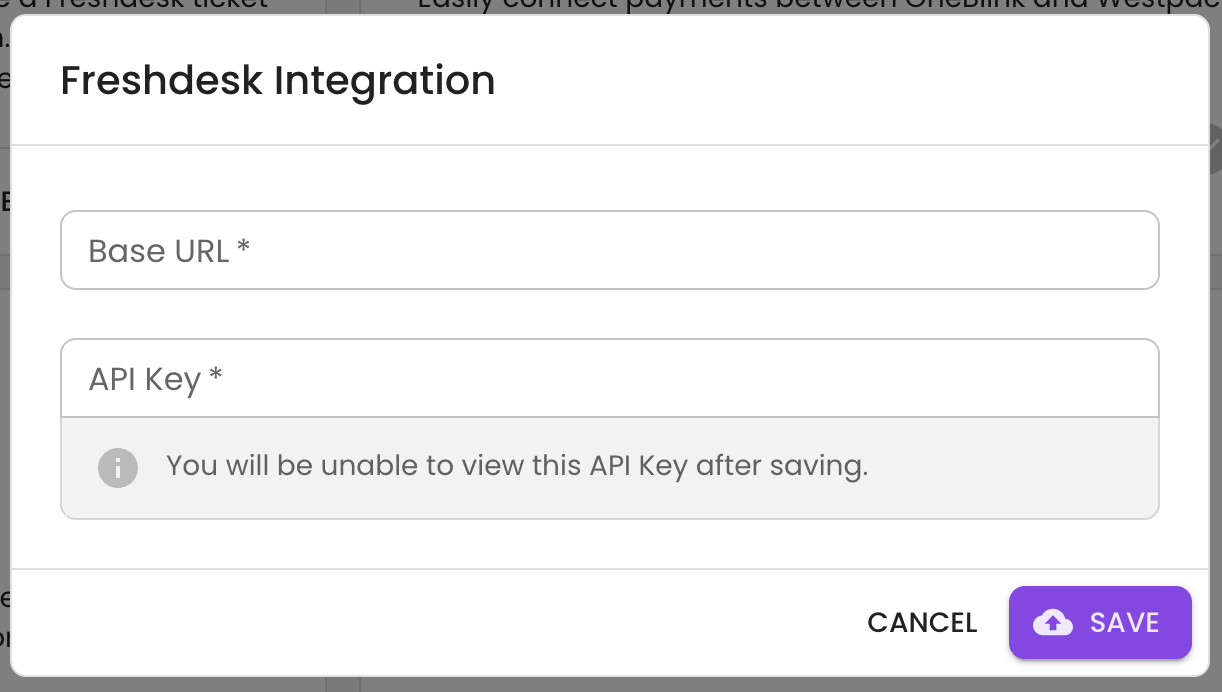
Step 3: Add your Freshdesk base URL and Agent API key, then click SAVE.
If you are using a custom domain for your Freshdesk portal, use the original Freshdesk URL, for example yourcompany.freshdesk.com.
An Agent API key can be found by clicking the agent icon in the top-right corner of your Freshdesk portal and selecting Profile settings.
Note: The Agent API key used for this integration will appear as the agent creating the tickets in Freshdesk. We recommend adding an agent to your Freshdesk account with a generic name, such as “OneBlink Form”. This makes it clear that new tickets were created from a OneBlink form rather than manually added by an agent.
Setting up the Submission Event
Step 1: Open the form you want to use.
Step 2: Open the Workflow tab.
Step 3: Select the Freshdesk: Create Ticket submission event.
Step 4: Configure the ticket properties.
Setting Freshdesk Ticket Properties
Freshdesk ticket properties can be set directly on the submission event or populated from elements in your form.
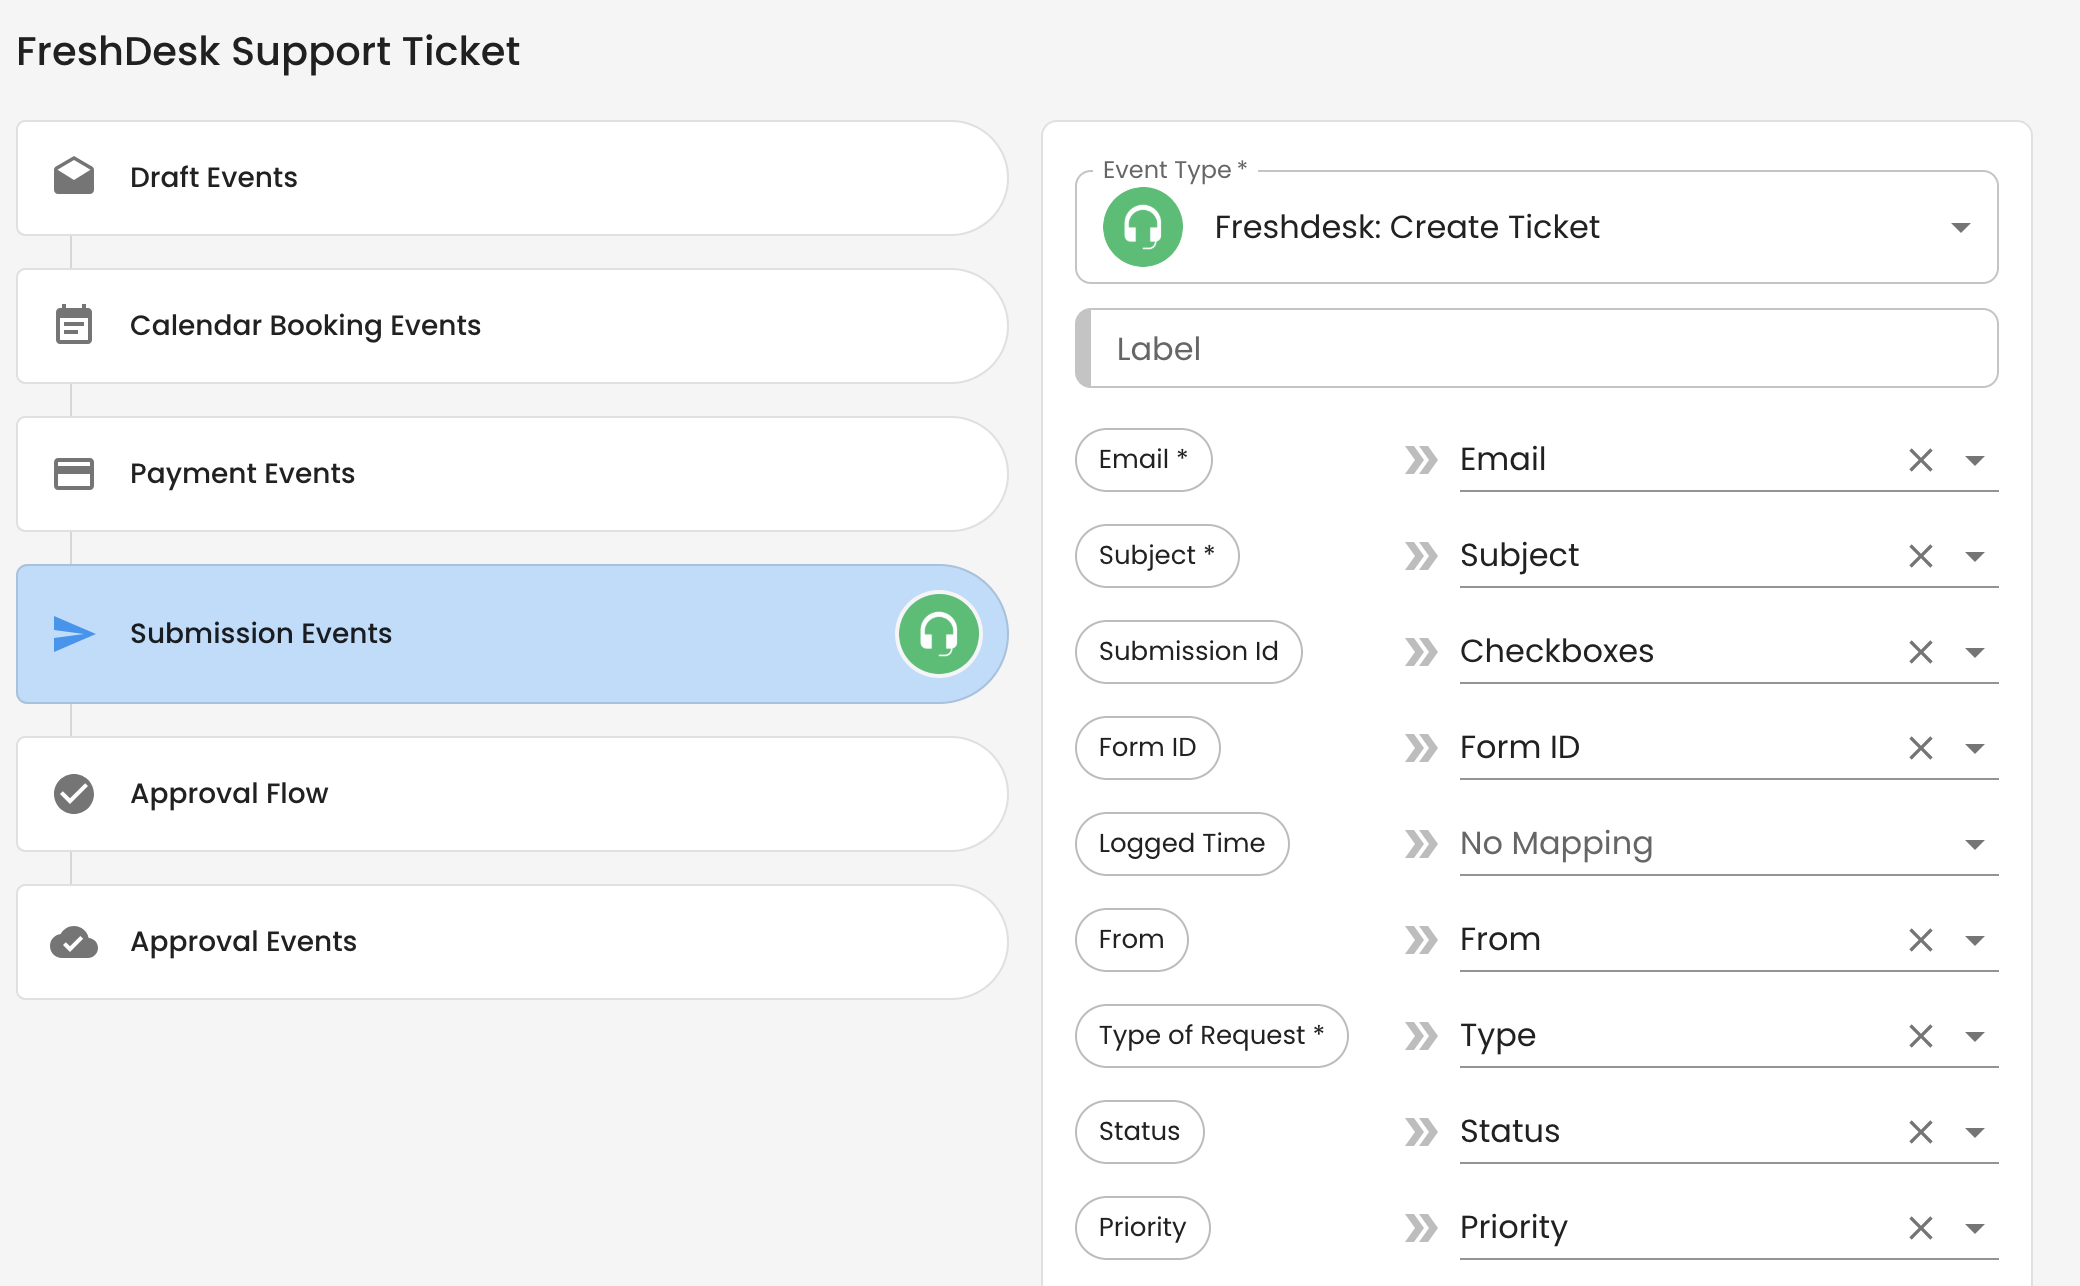
Set on Submission Event
When configuring ticket properties on the submission event, the input type will depend on the type of Freshdesk property.
For example, text properties will show a free text input, date properties will show a date picker, and dropdown properties will display the available options.
When a property is set on the submission event, the same value will be used for every form submission.
In the example below, Priority has been set to Medium, meaning every submission of this form will create a ticket with a Medium priority.
Set in the Form
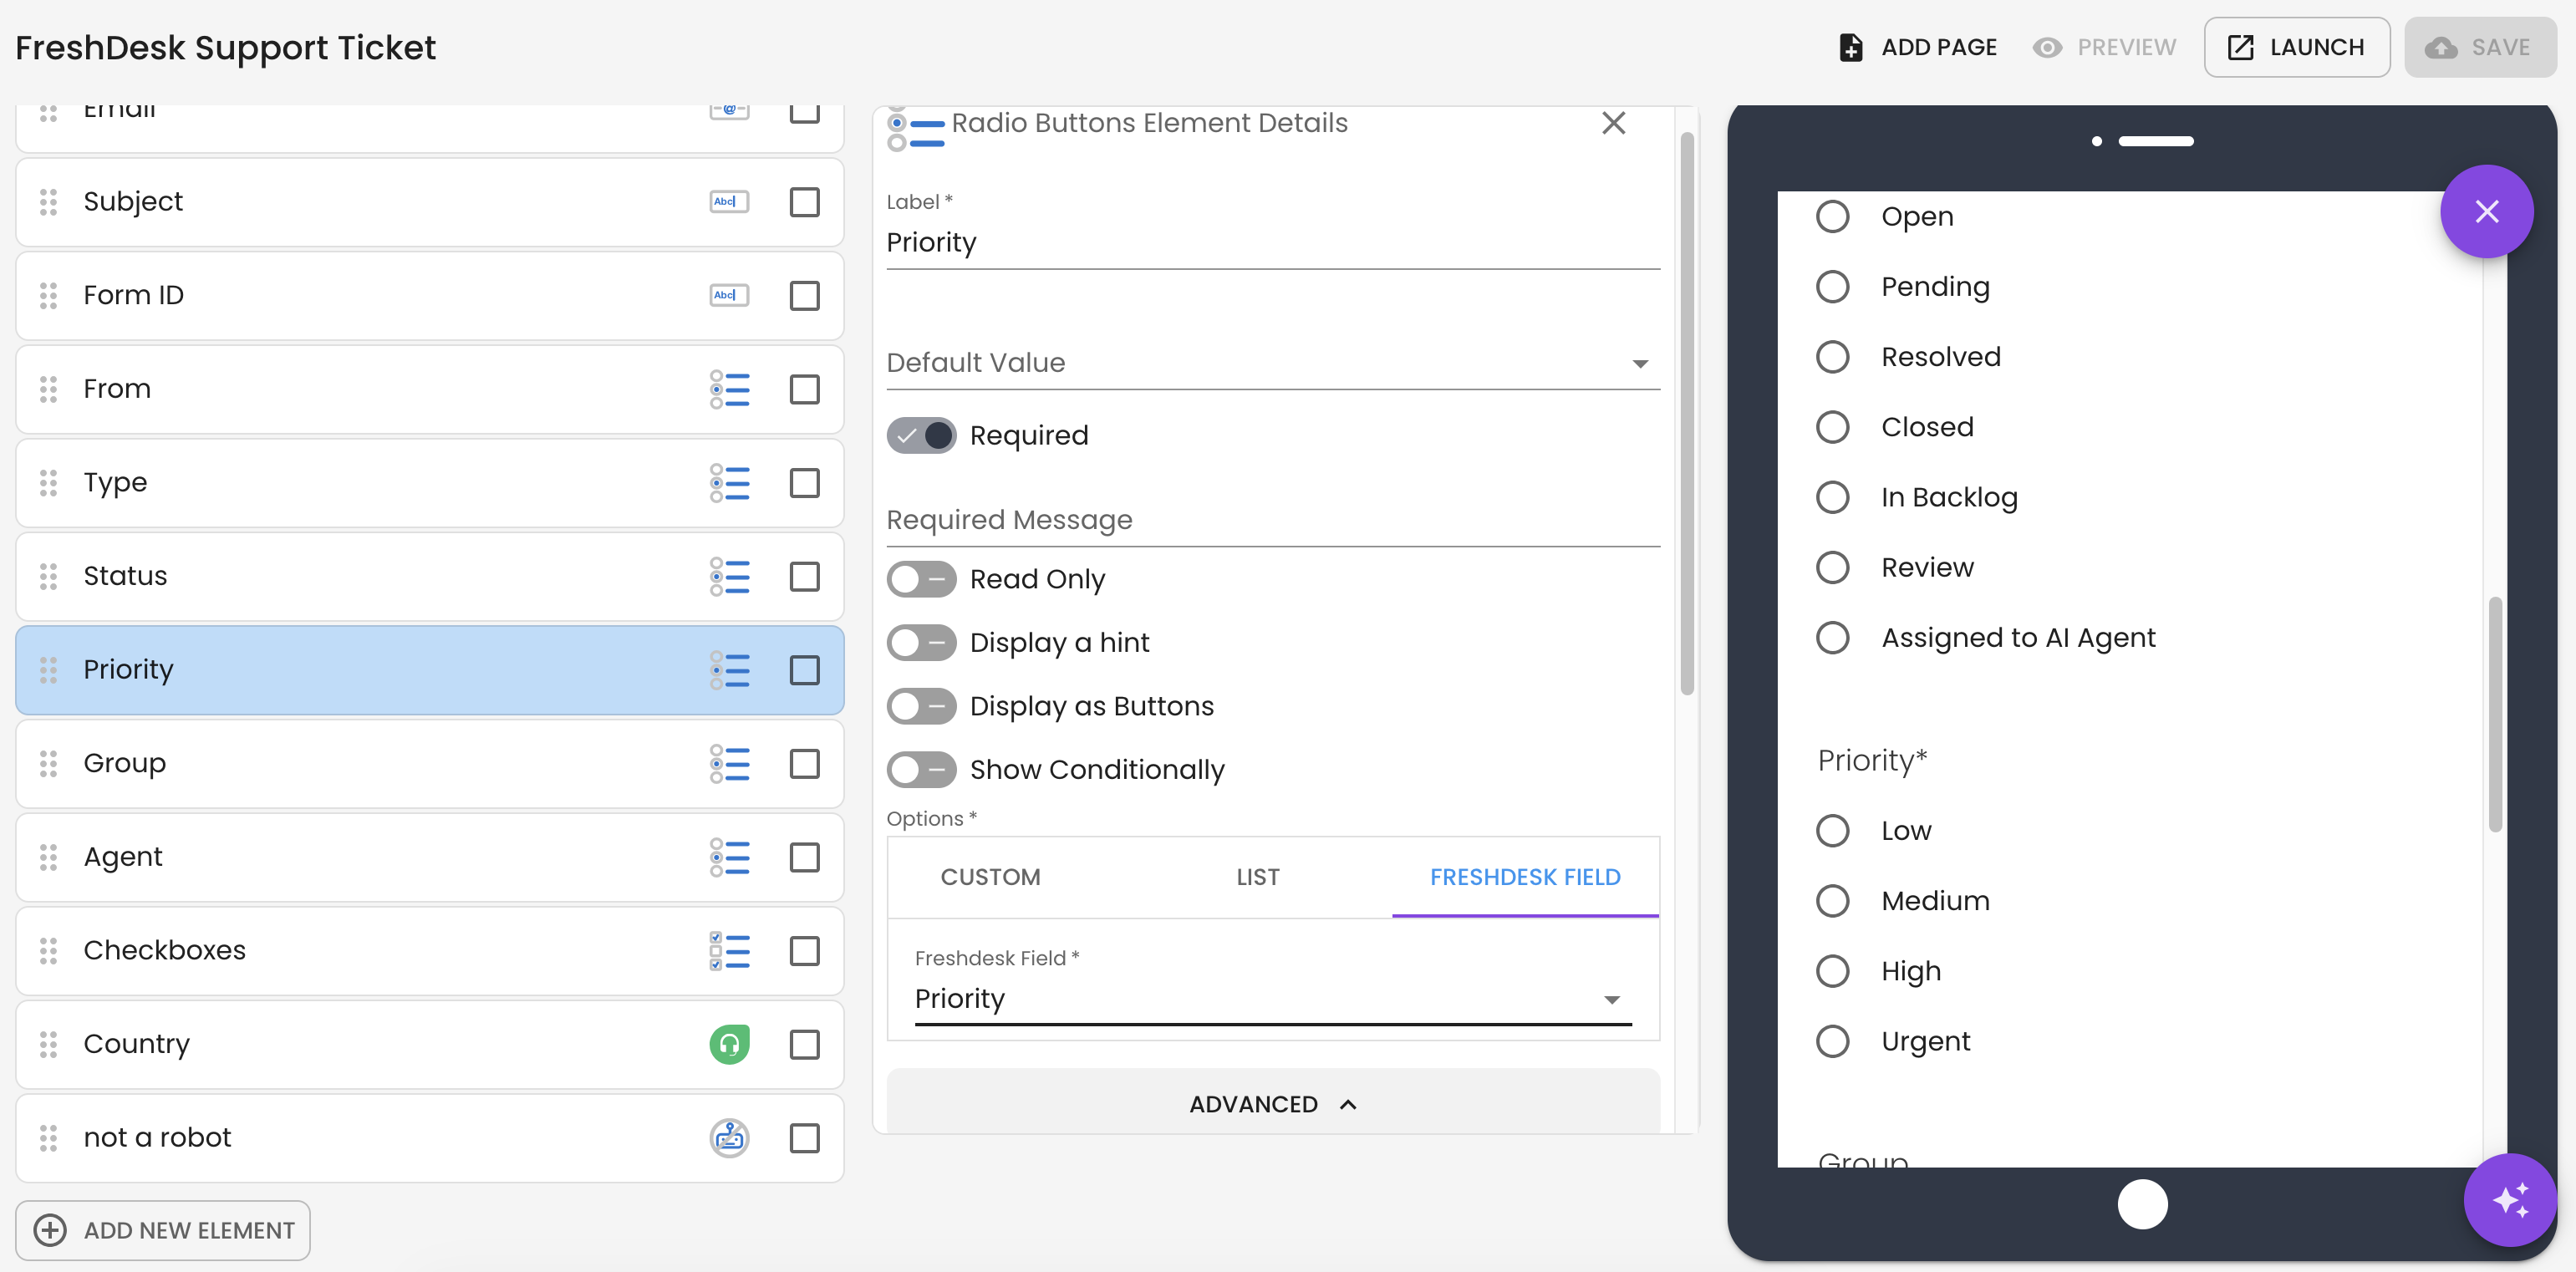
Instead of manually entering or selecting a value on the submission event, you can populate Freshdesk ticket properties from elements in your form.
This allows the person completing the form to set Freshdesk ticket properties, such as selecting the priority of the ticket.
If you have a dropdown Freshdesk property, you can pull the list of options from your Freshdesk account using Freshdesk field options.
Required Properties
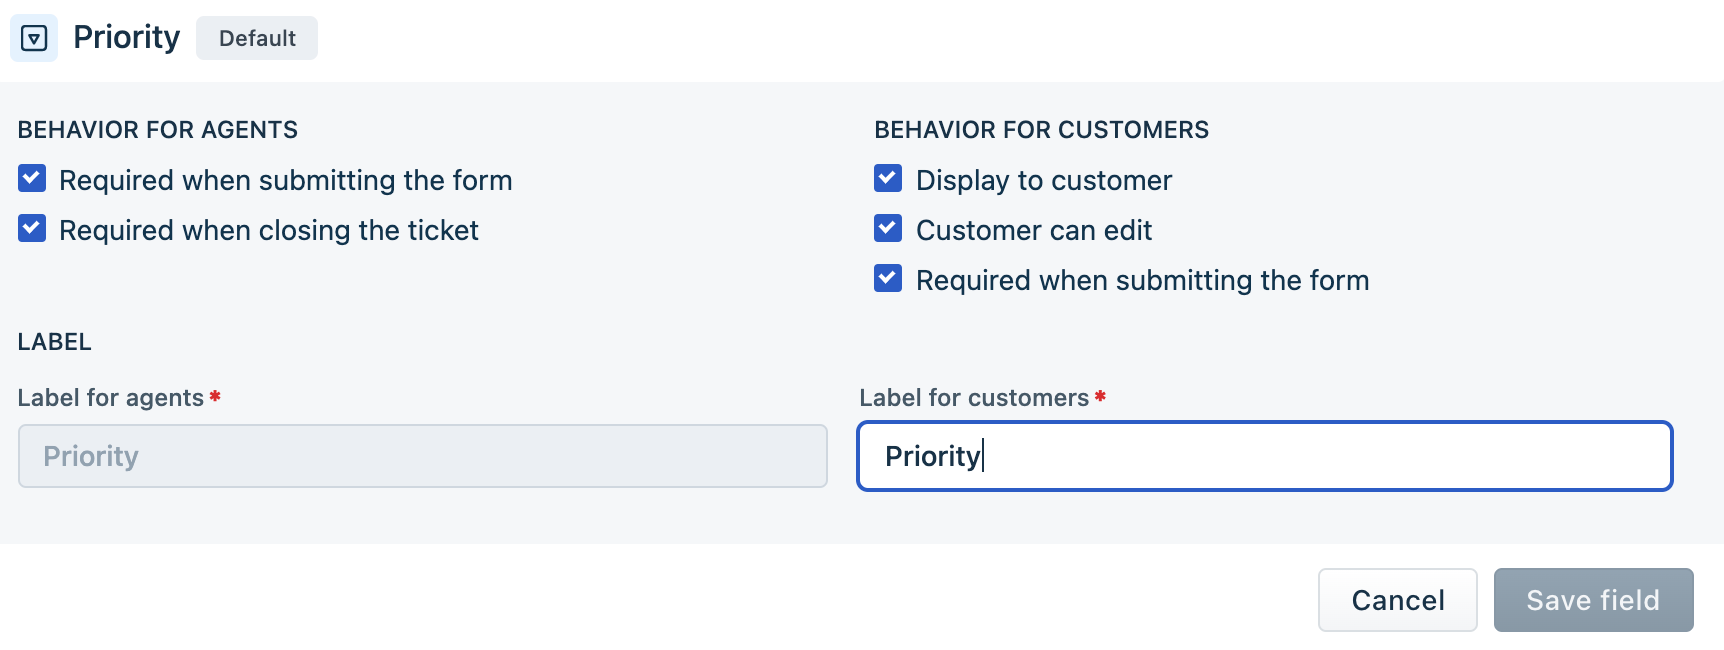
Freshdesk properties must be configured in the submission event if the property has Required when submitting the form turned on for either the agent or the customer.
You can review this configuration in the Ticket Fields menu in Freshdesk.
If a property is not required in Freshdesk, it does not need to be set in the submission event.
Creating a Ticket
Once the submission event has been configured, each submission of the form will create a Freshdesk ticket in your account.
All form elements are included in the ticket description, ensuring the submitted form data is available in the Freshdesk ticket.
Attachments are included in the ticket description as downloadable links. These links expire after 7 days.
Getting Help
If you need any assistance with Freshdesk Create a Ticket, please reach out through the Report Issue menu or email support@oneblink.io.
Was this article helpful?
That’s Great!
Thank you for your feedback
Sorry! We couldn't be helpful
Thank you for your feedback
Feedback sent
We appreciate your effort and will try to fix the article