Secrets allow you to create secure values in the OneBlink LcS platform. They can be used to validate calls received by your API and help confirm that those calls are legitimate.
TABLE OF CONTENTS
Creating a Secret
To create a secret, follow the steps below:
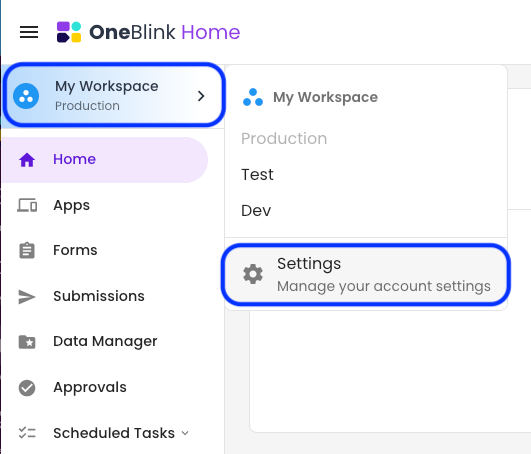
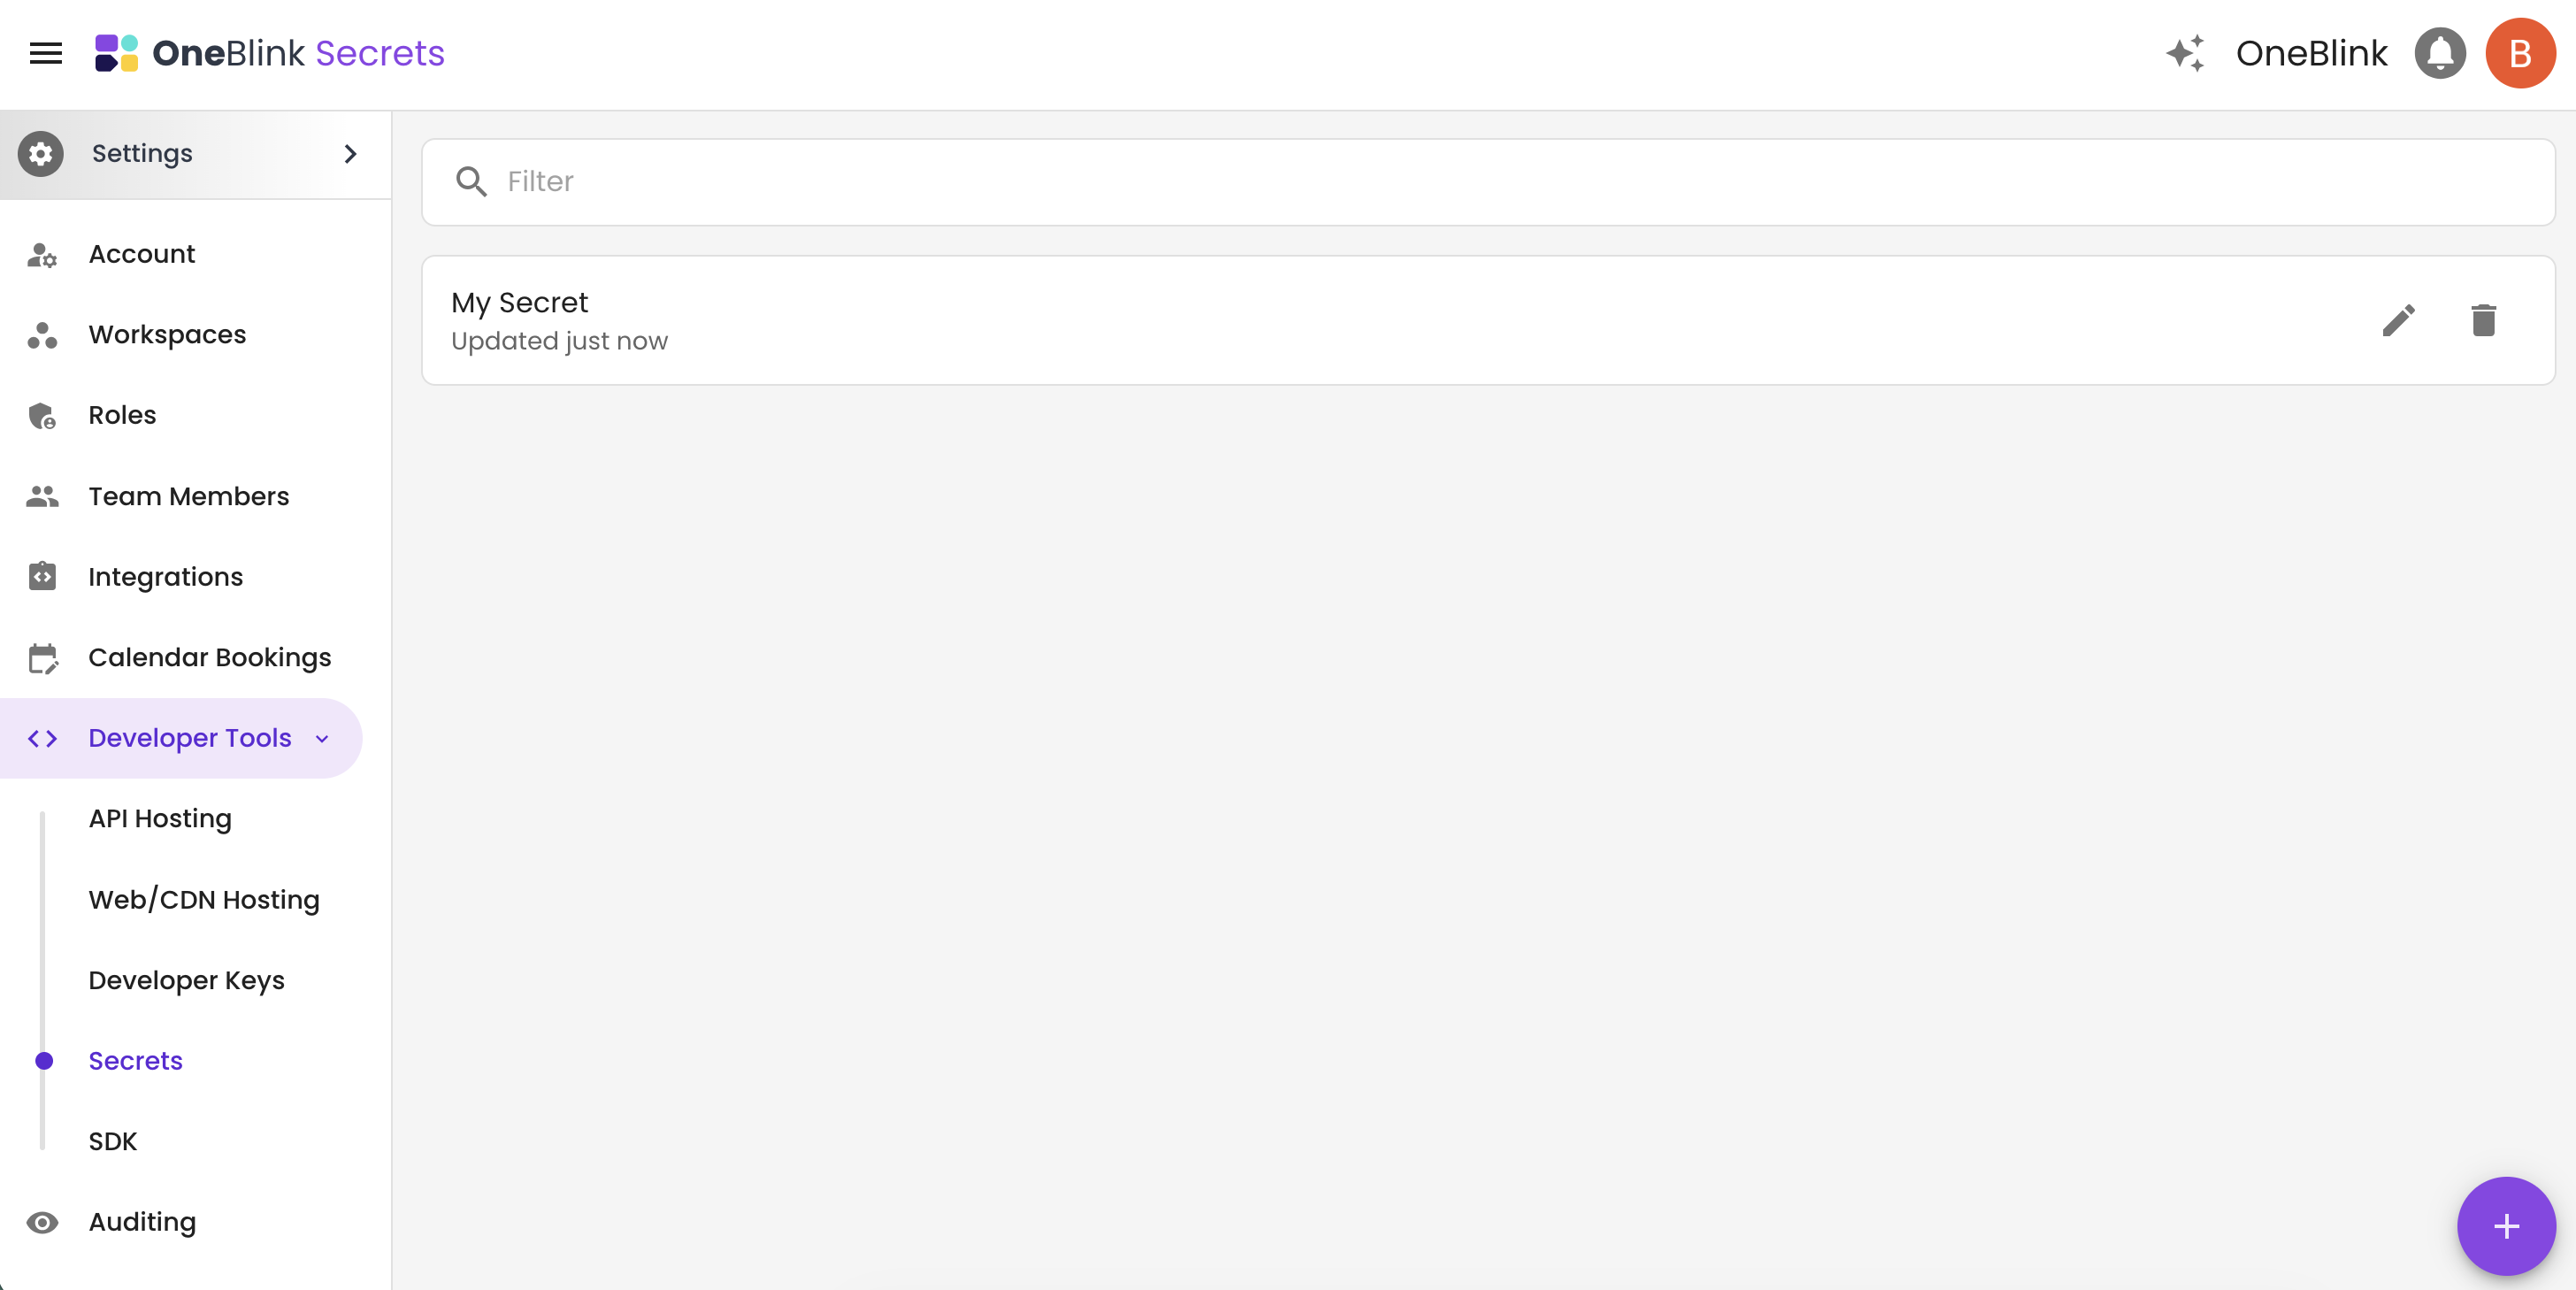
Step 1: Open the Environment Picker and click the Settings option.
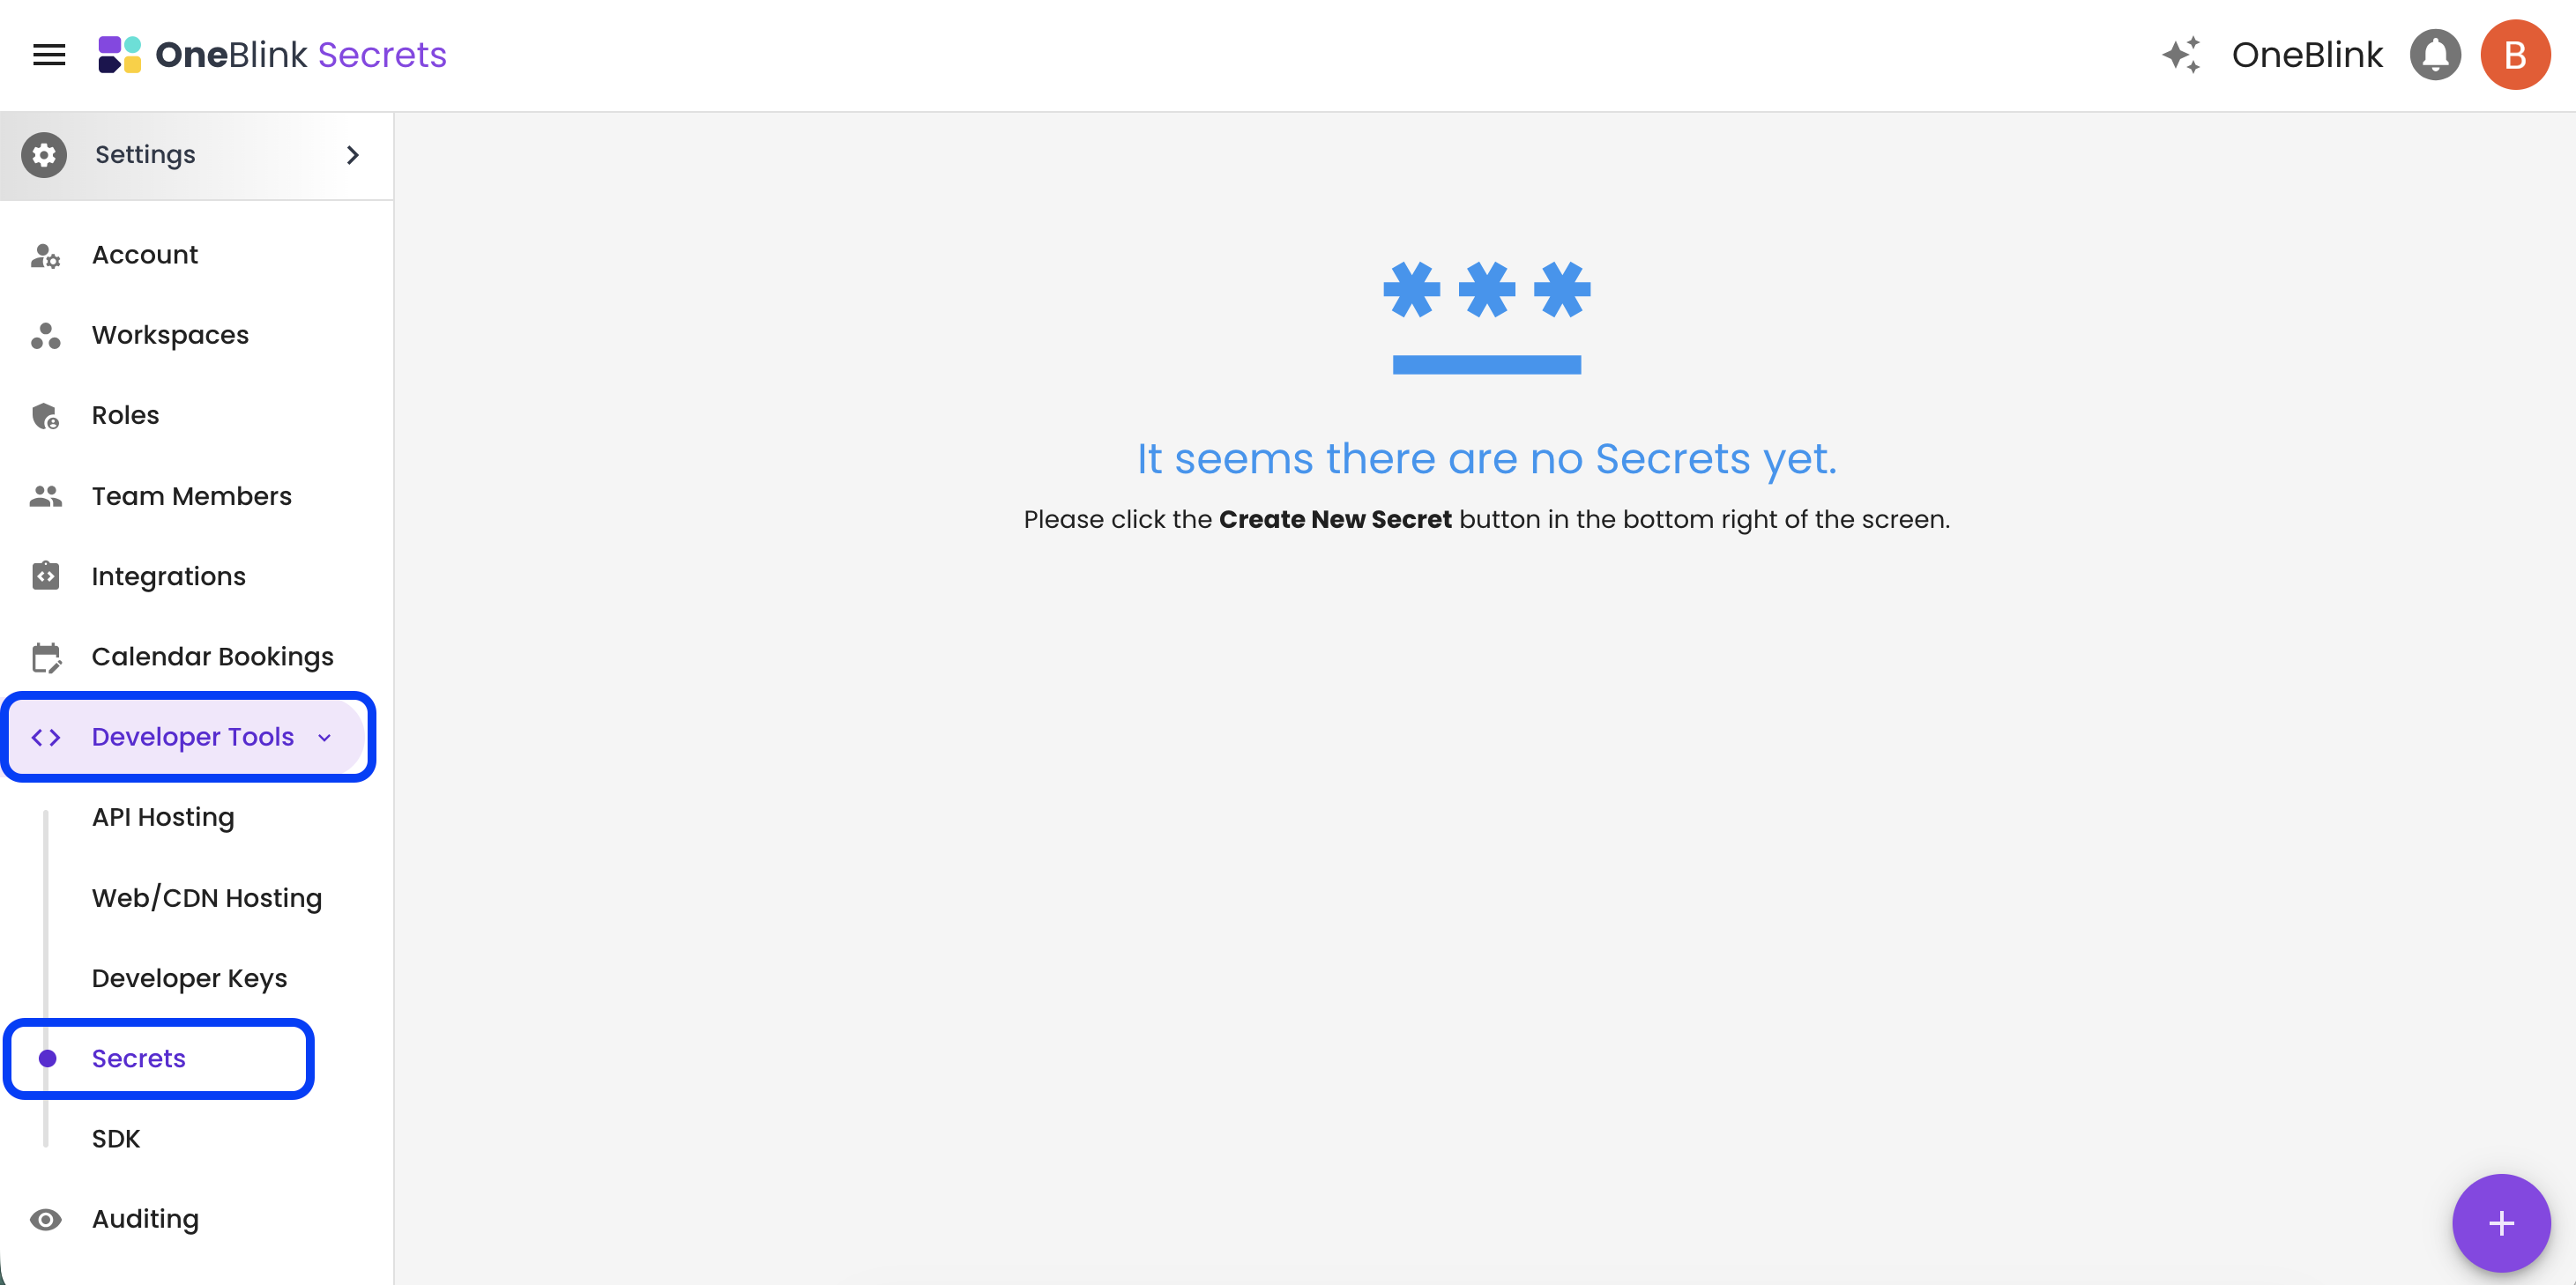
Step 2: Open the Developer Tools menu from the side menu, then select Secrets.
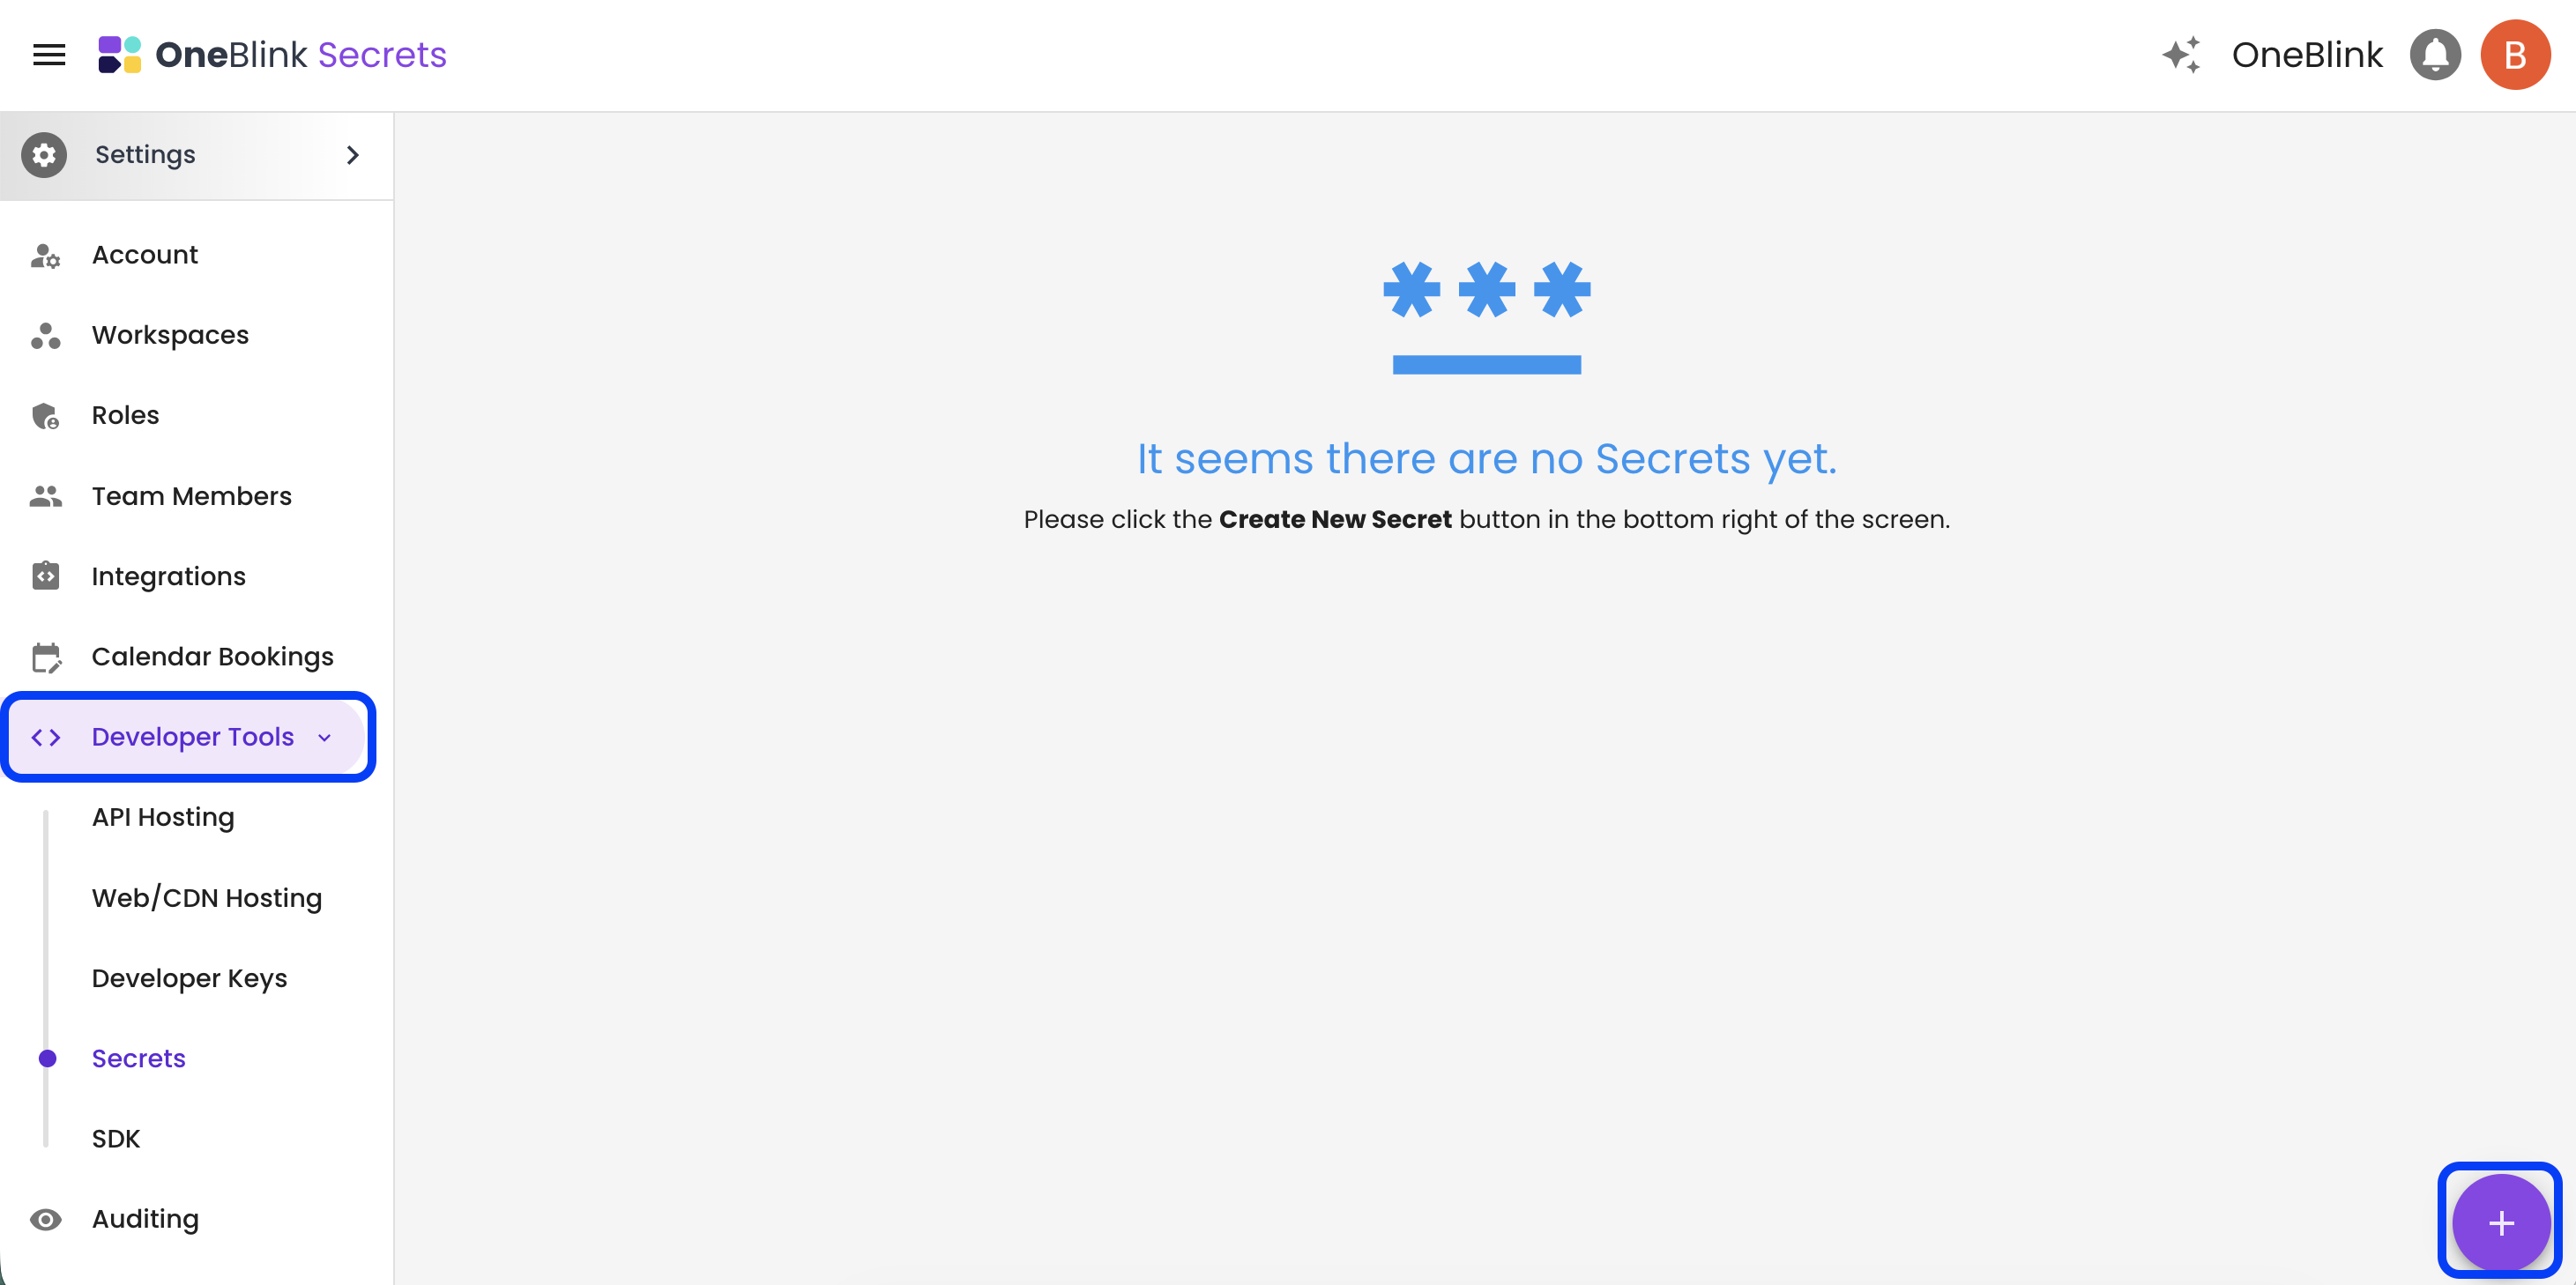
Step 3: Click the purple plus (+) button in the bottom-right corner to create a new secret.
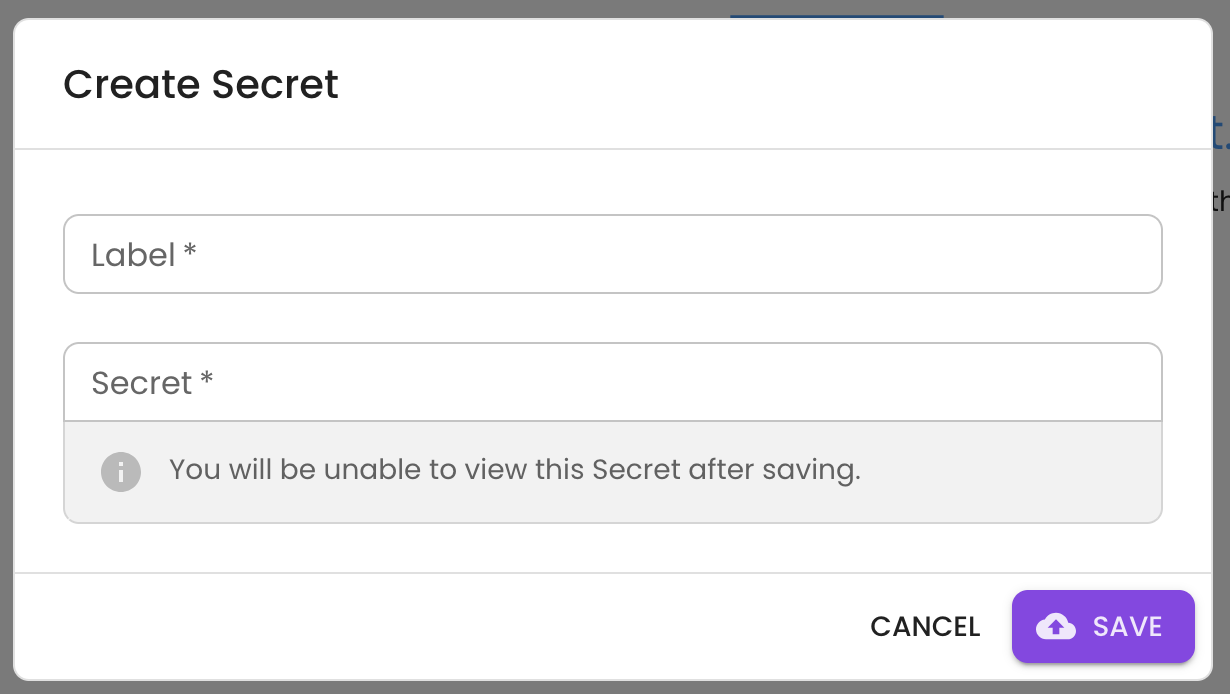
Step 4: Configure the secret details.
- Label: Enter a name for the secret. This label is used when selecting the secret elsewhere in the platform.
- Secret: Enter the secret value.
You will not be able to view the secret value after it has been created.
Step 5: Once the secret has been created, it will appear in the list of available secrets.
Using a Secret
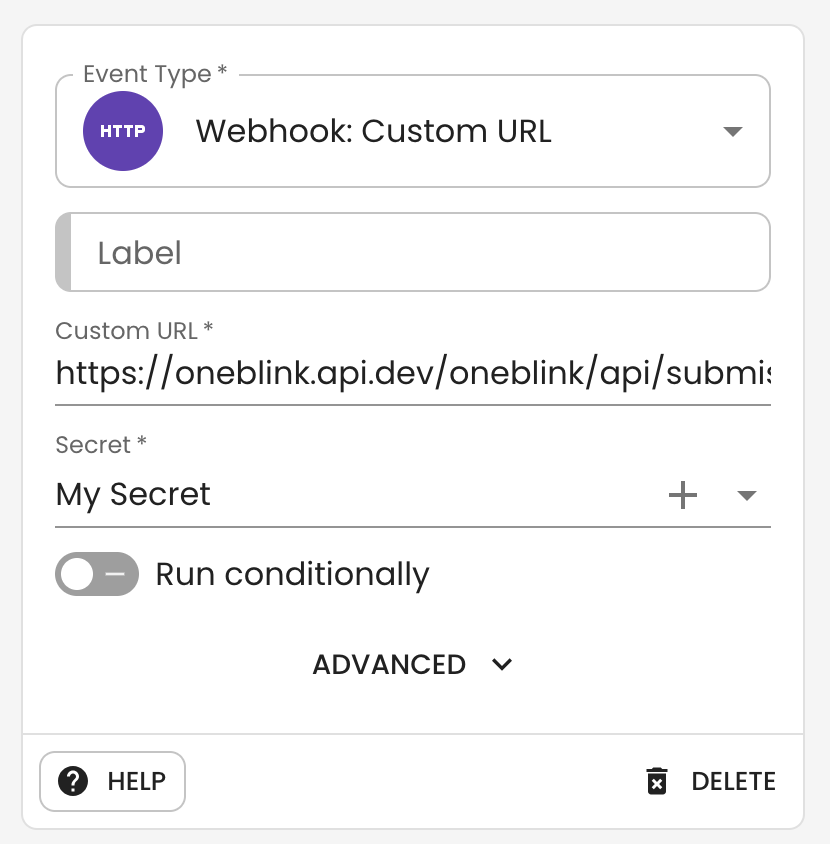
After a secret has been configured, it can be used whenever connecting to a Custom API. Some of these areas include:
- Dynamic Lists
- Dynamic Lookups
- Form Personalisation
- Form Validation
- Form Webhooks
- Approval Webhooks
To use a secret, open the area where you would like to add the secret, then select it from the list of available secrets.
You can also create a secret directly from any of these secret input fields.
Managing a Secret
From the Secrets menu, you can see whether a secret is currently in use.
If a secret is in use, it will display a Forms tag and/or an Approval Webhook tag. These tags include a number that shows how many forms or approval webhooks are using the secret.
You can also edit a secret to update either the label or the secret value.
Secrets can be deleted from the Secrets menu. However, you cannot delete a secret while it is currently in use. Before deleting a secret, remove it from any forms or approval webhooks where it is being used.

Getting Help
If you need any assistance with secrets, please reach out through the Report Issue menu or email support@oneblink.io.
Was this article helpful?
That’s Great!
Thank you for your feedback
Sorry! We couldn't be helpful
Thank you for your feedback
Feedback sent
We appreciate your effort and will try to fix the article