The SharePoint integration allows you to create SharePoint List items from form submissions and store submission PDFs and form attachments in SharePoint.
TABLE OF CONTENTS
Entra ID Configuration
To use the SharePoint integration, you will first need to configure your Entra ID application. Entra ID was previously known as Active Directory.
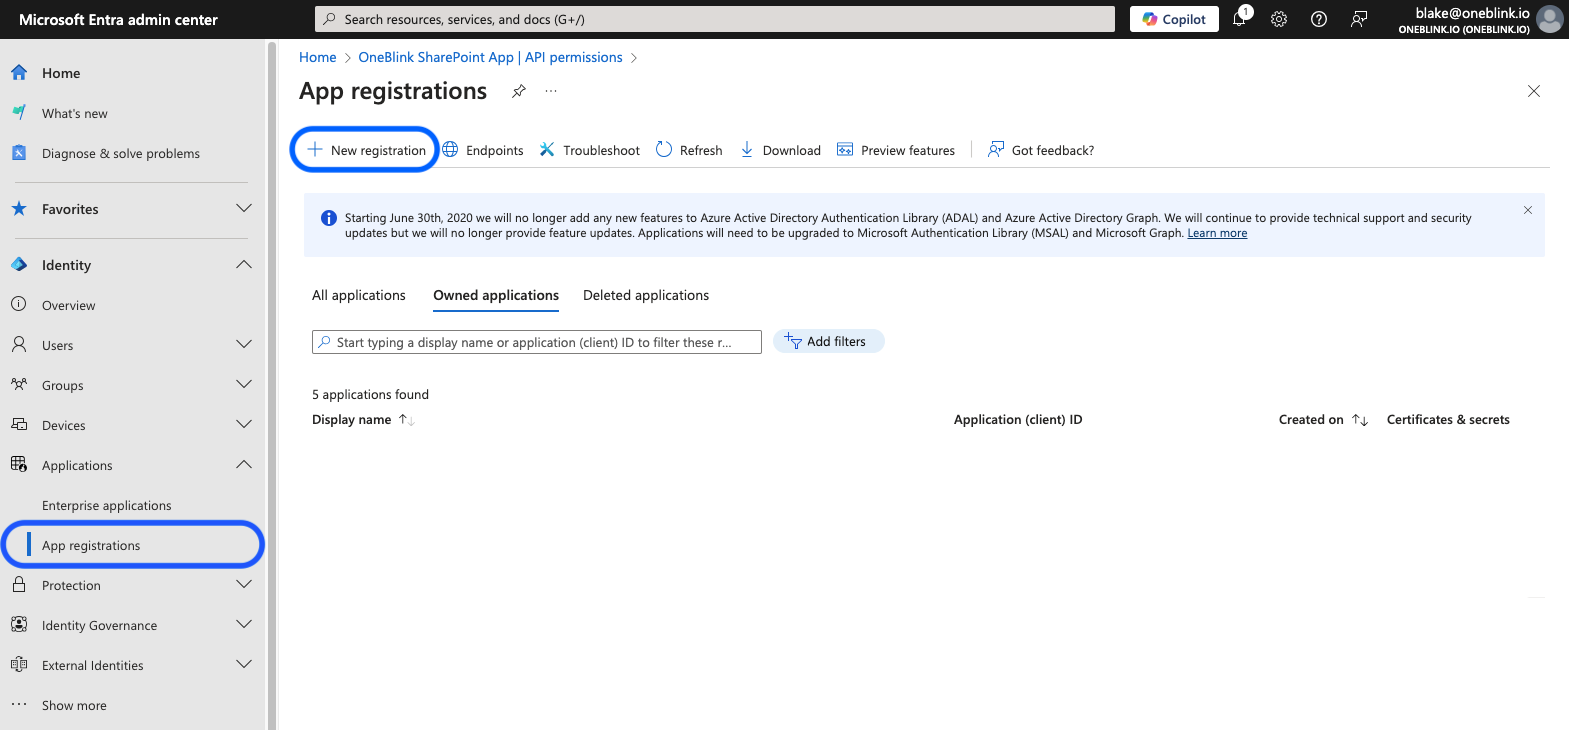
Step 1: Open the Entra website, navigate to App registrations, and click New registration.
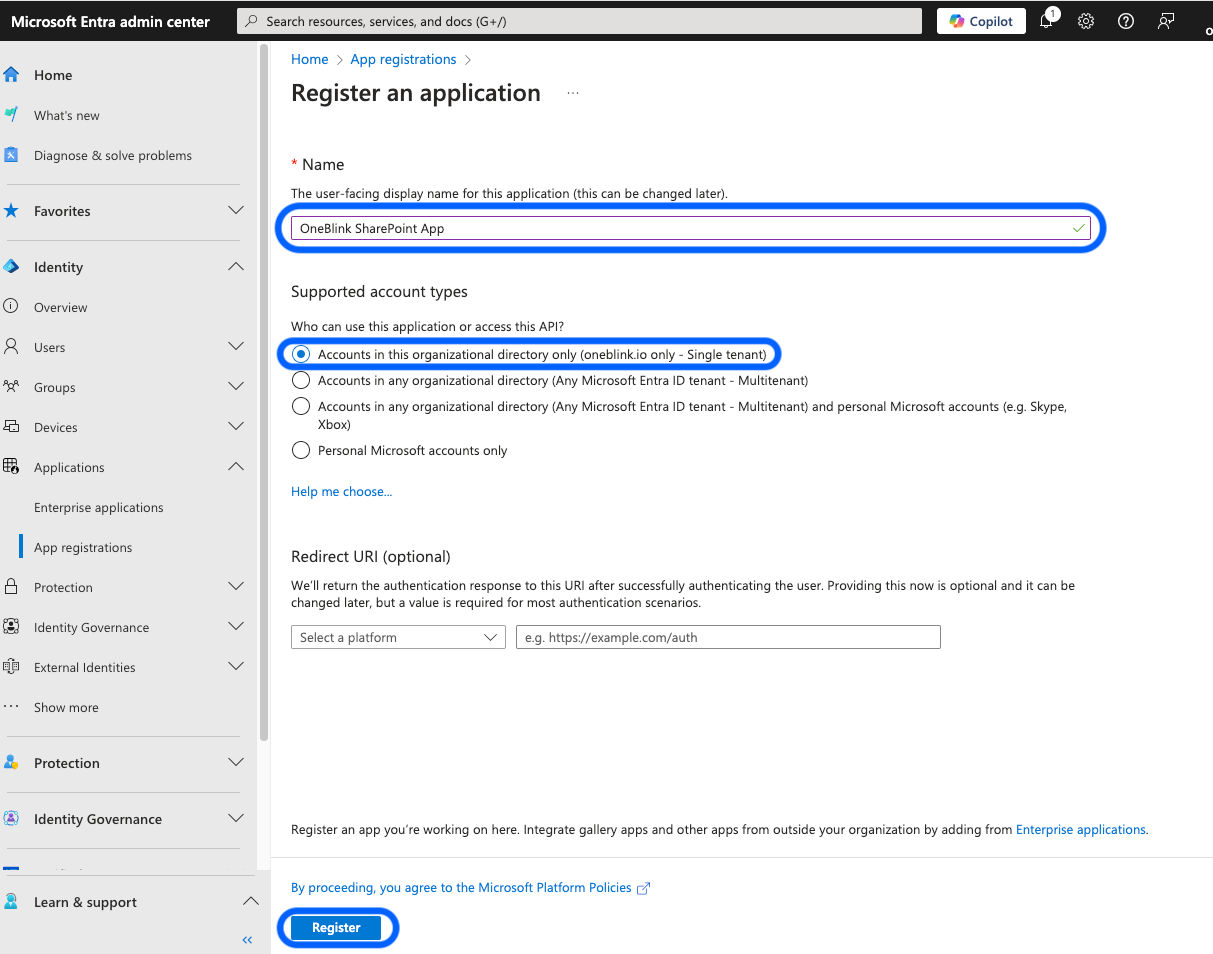
Step 2: Enter a name for the application, set the supported account type to Single tenant, and click Register.
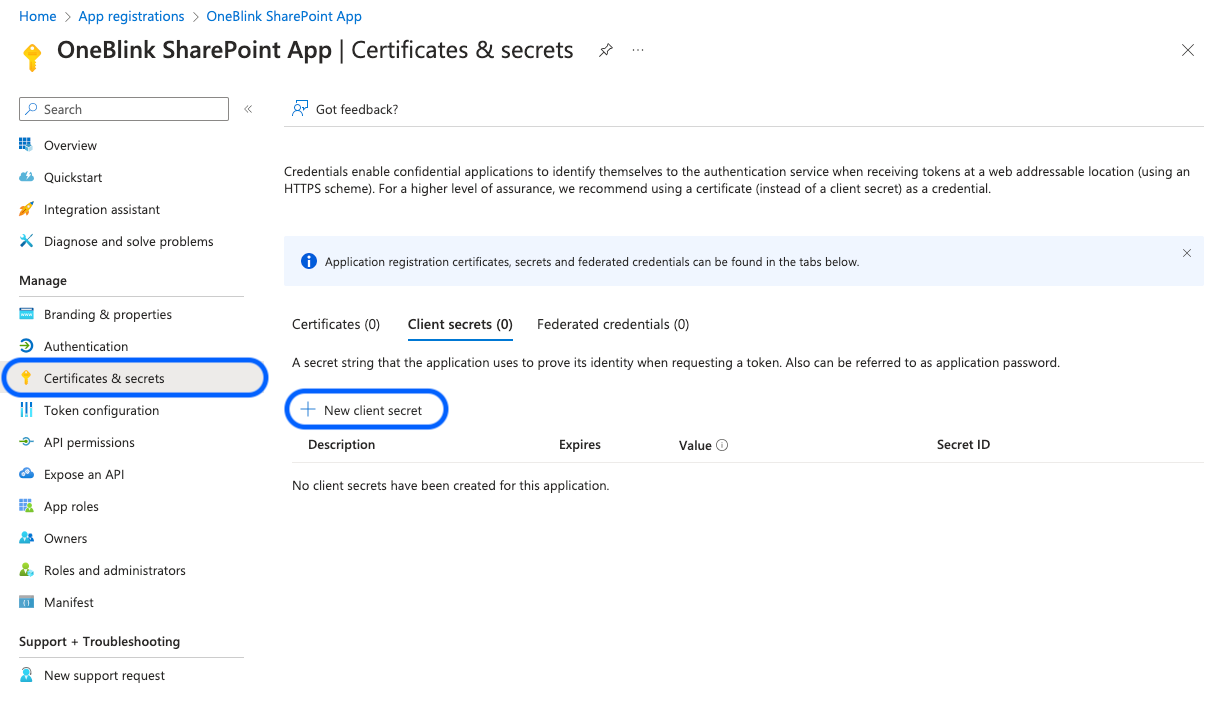
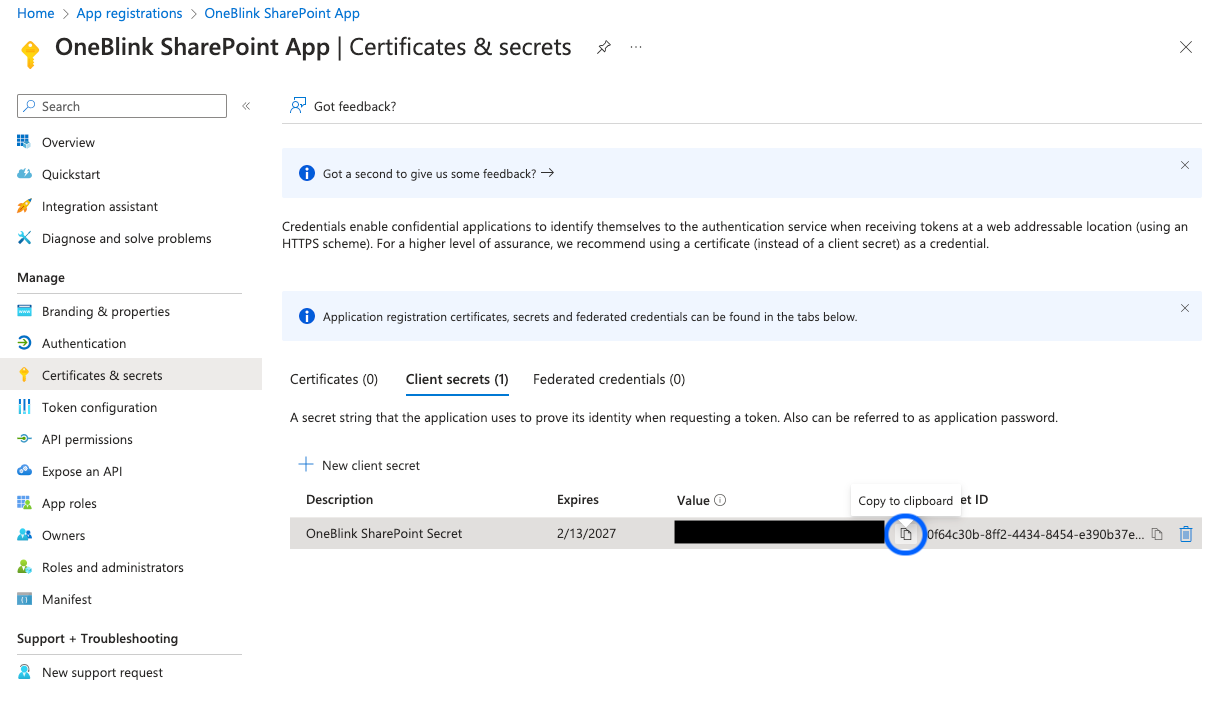
Step 3: Open the Certificates & secrets menu and click New client secret.
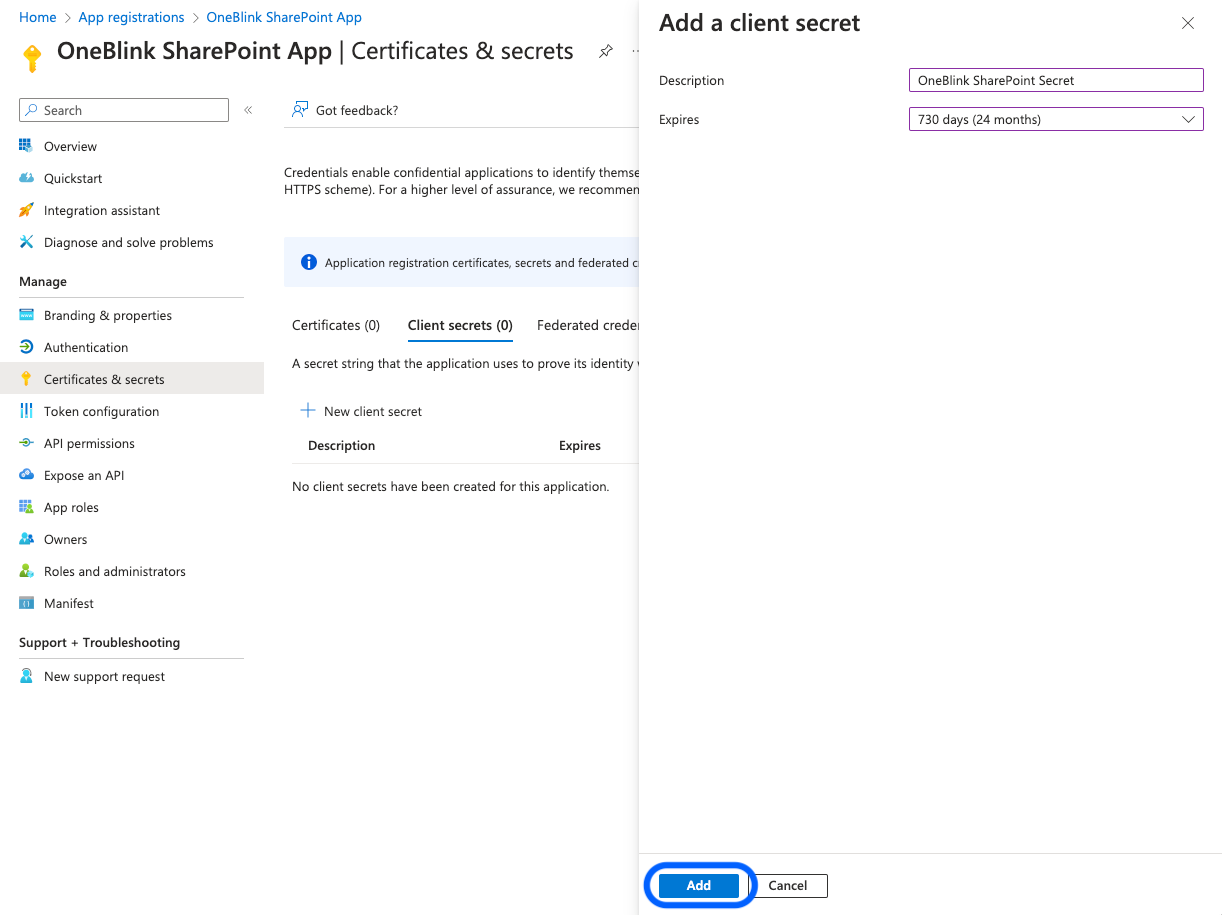
Step 4: Enter a description, choose an expiry, and click Add.
Entra requires an expiry date for client secrets. Make sure you are aware of when the client secret expires, as it will need to be recreated after the expiry period.
Step 5: Copy the client secret value and store it somewhere temporarily.
The client secret value will not be available after this point.
Step 6: Open API permissions and click Add a permission.
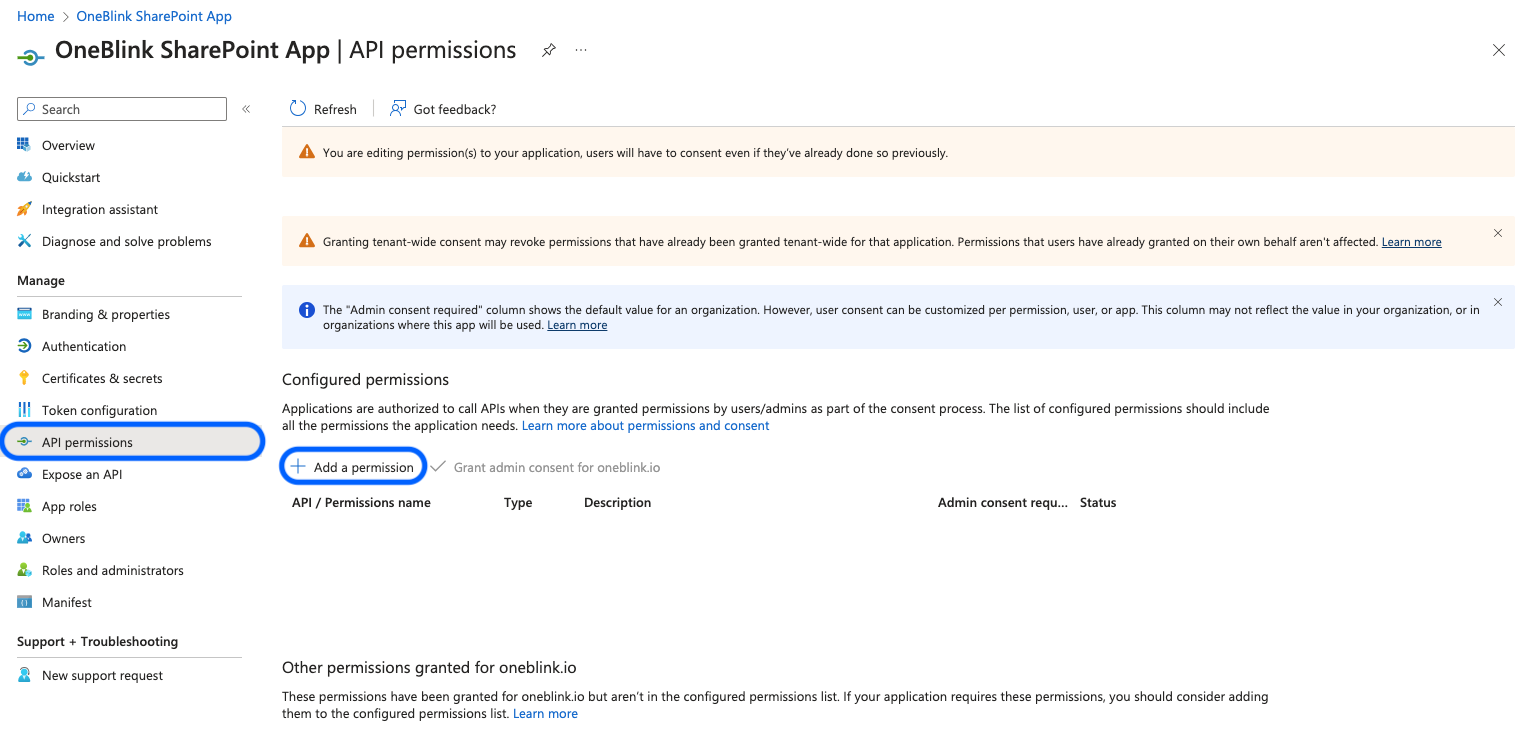
Step 7: Select Microsoft Graph, choose Application permissions, then add the following permissions:
Sites.Manage.AllSites.Read.All
Click Add permissions.
| If you do not want to provide the application with the Sites.Manage.All permission. The PDF attached to the bottom of the article will walk through the steps to configure the Sites.Selected permissions. |


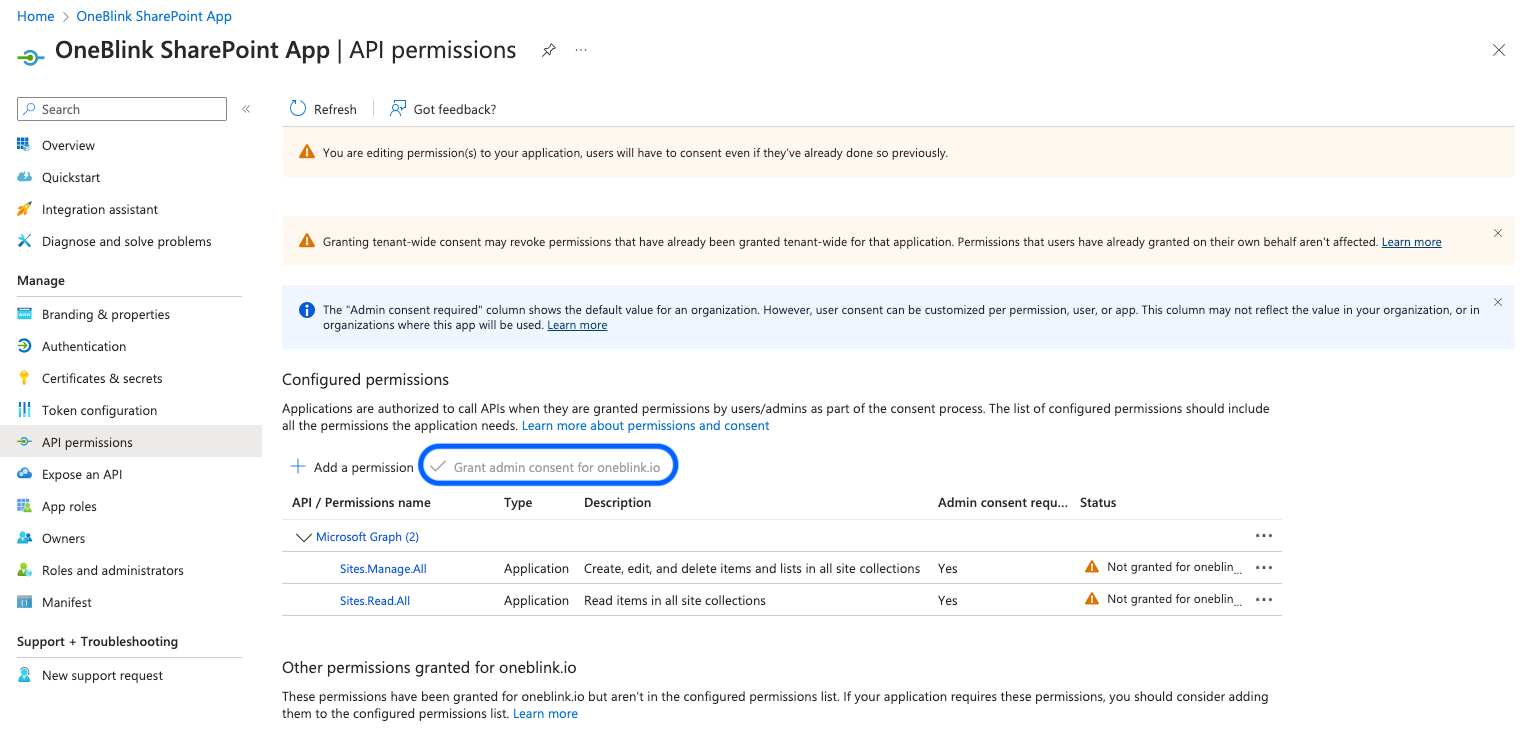
Step 8: Click Grant admin consent for the domain.
You will need Entra admin permissions to use this option.
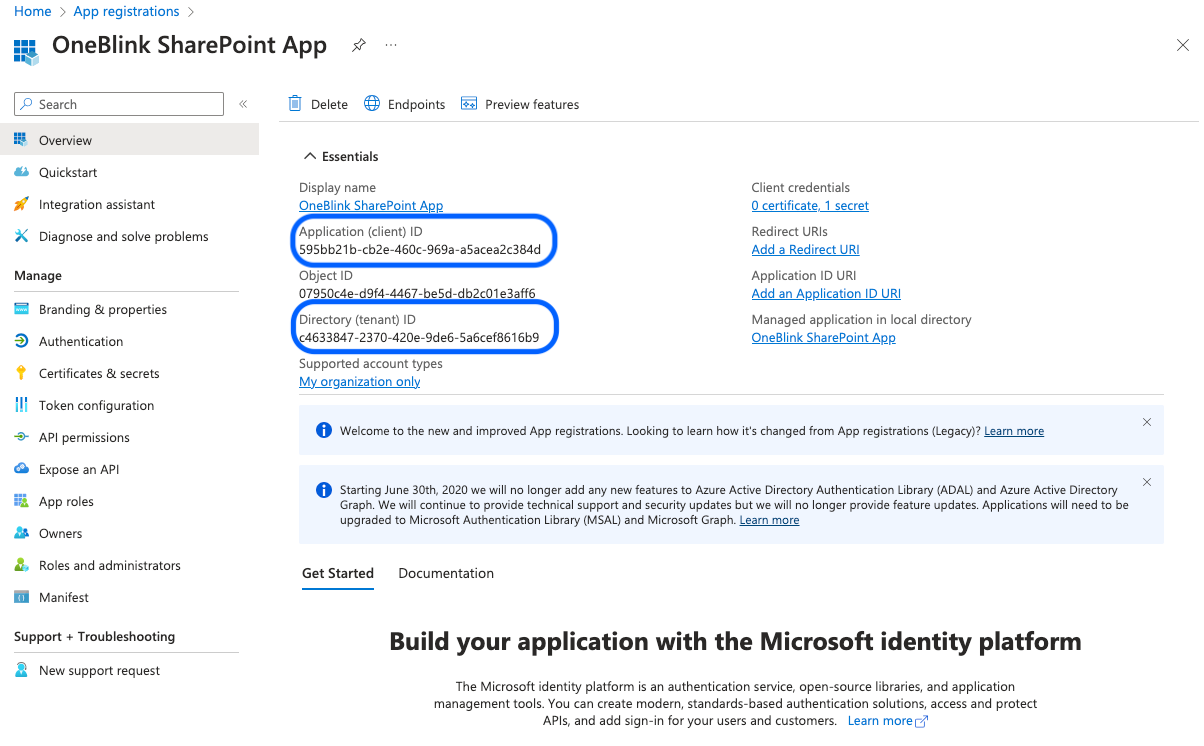
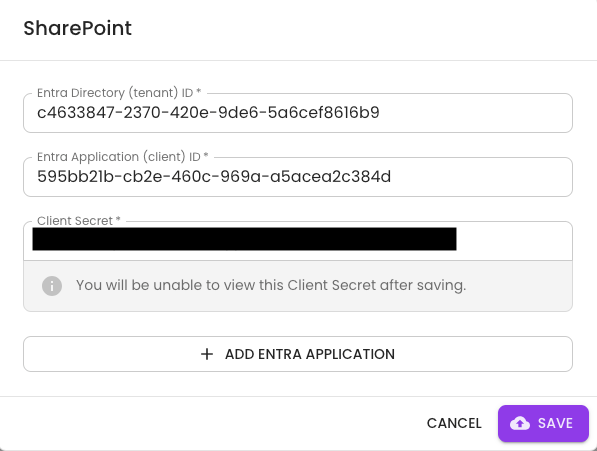
Step 9: Open the App Overview menu. Copy the Client ID, Tenant ID, and the client secret value from Step 5 into the OneBlink integration card.

Workflow Events
Once the integration card has been configured, you can use the SharePoint workflow events in your forms.
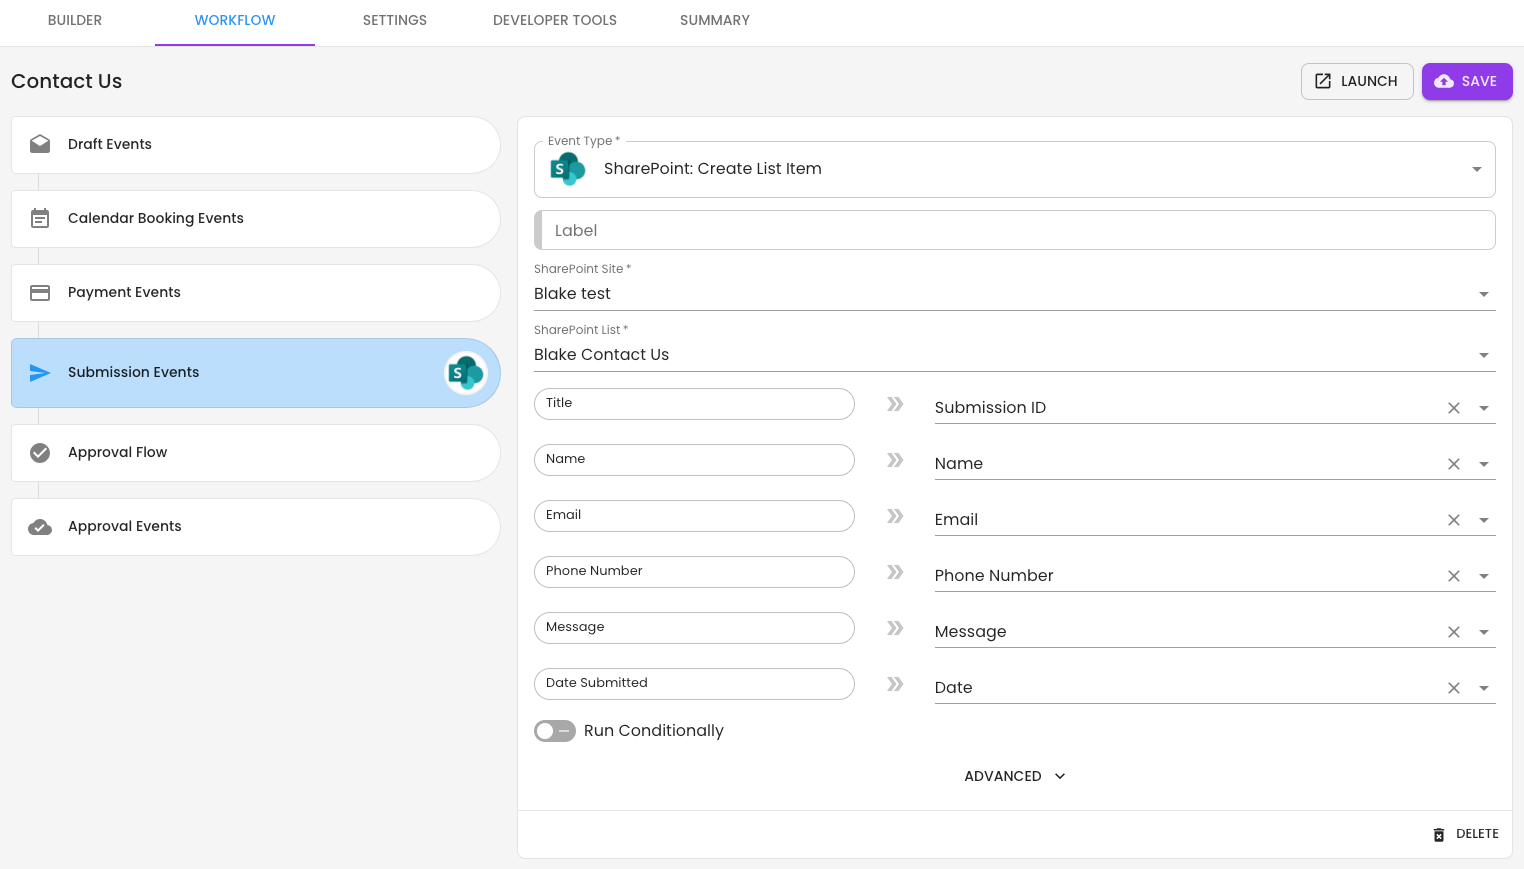
SharePoint: Create List Item
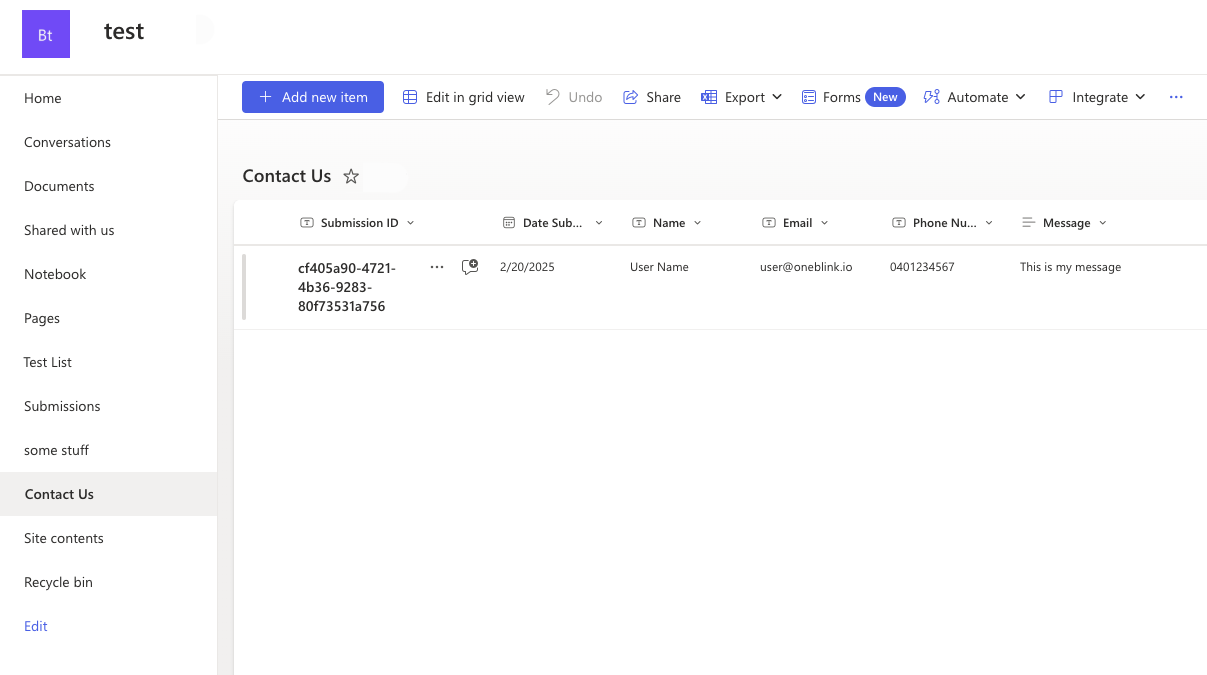
The SharePoint: Create List Item workflow event allows you to connect to an existing SharePoint List and add new rows using form submission data.
Workflow Event Configuration
SharePoint Site: Select the SharePoint Site where your list is located.
SharePoint List: Choose the SharePoint List you would like to populate with form data. This can be done by selecting the element that uses a SharePoint list configured on the form.
List Mapping: After you select a list, the platform will load the columns in that list so you can map form data to them. The SharePoint: Create List Item workflow event currently supports the following SharePoint List column types:
- Text
- Choice
- Date and time
- Multiple lines of text
- Number
- Yes/No
For more information on mapping choice columns to form elements, see the Lists article.
Run Conditionally: Allows the workflow event to run only when specific conditions are met. For more information, see the conditional workflow event article.
Advanced
Retry on failure: Allows the platform to retry the call to your SharePoint instance if there are issues on the first attempt.
SharePoint: Store PDF
The SharePoint: Store PDF workflow event allows you to store the submission PDF and any form attachments in a folder within your SharePoint site.
Workflow Event Configuration
SharePoint Site: Select the SharePoint Site where the PDF will be stored.
SharePoint Drive: Select the SharePoint Drive where the PDF will be stored.
Folder Path: Choose the folder where the PDF will be stored. The default folder path is:
/{FORM_NAME}/{SUBMISSION_ID}
Include Attachments: Choose whether to store form attachments with the submission PDF.
Attachment file names will use the following format:
{element-name}-{ATTACHMENT_ID}-{filename}.{file-extension}
Run Conditionally: Allows the workflow event to run only when specific conditions are met. For more information, see the conditional workflow event article.
Advanced
PDF Configuration: For more information, see the Submission PDF article.
Retry on failure: Allows the platform to retry the call to your SharePoint instance if there are issues on the first attempt.
Important Notes
When storing PDFs, make sure the PDF has a unique file name or is stored in a uniquely named folder. If a PDF is created with the same name in the same location, the new PDF will overwrite the original PDF content.
The best way to keep the PDF file name or folder path unique is to include the submission ID:
{SUBMISSION_ID}

Getting Help
If you need any assistance with SharePoint integration, please reach out through the Report Issue menu or email support@oneblink.io.
Was this article helpful?
That’s Great!
Thank you for your feedback
Sorry! We couldn't be helpful
Thank you for your feedback
Feedback sent
We appreciate your effort and will try to fix the article