Mailgun is an email delivery service for sending, receiving and tracking emails. If you have a Mailgun account, you can configure the Mailgun integration in OneBlink to send app emails through your Mailgun domain.
TABLE OF CONTENTS
Configuring the Mailgun Integration
Follow the steps below to configure Mailgun in the OneBlink LcS console.
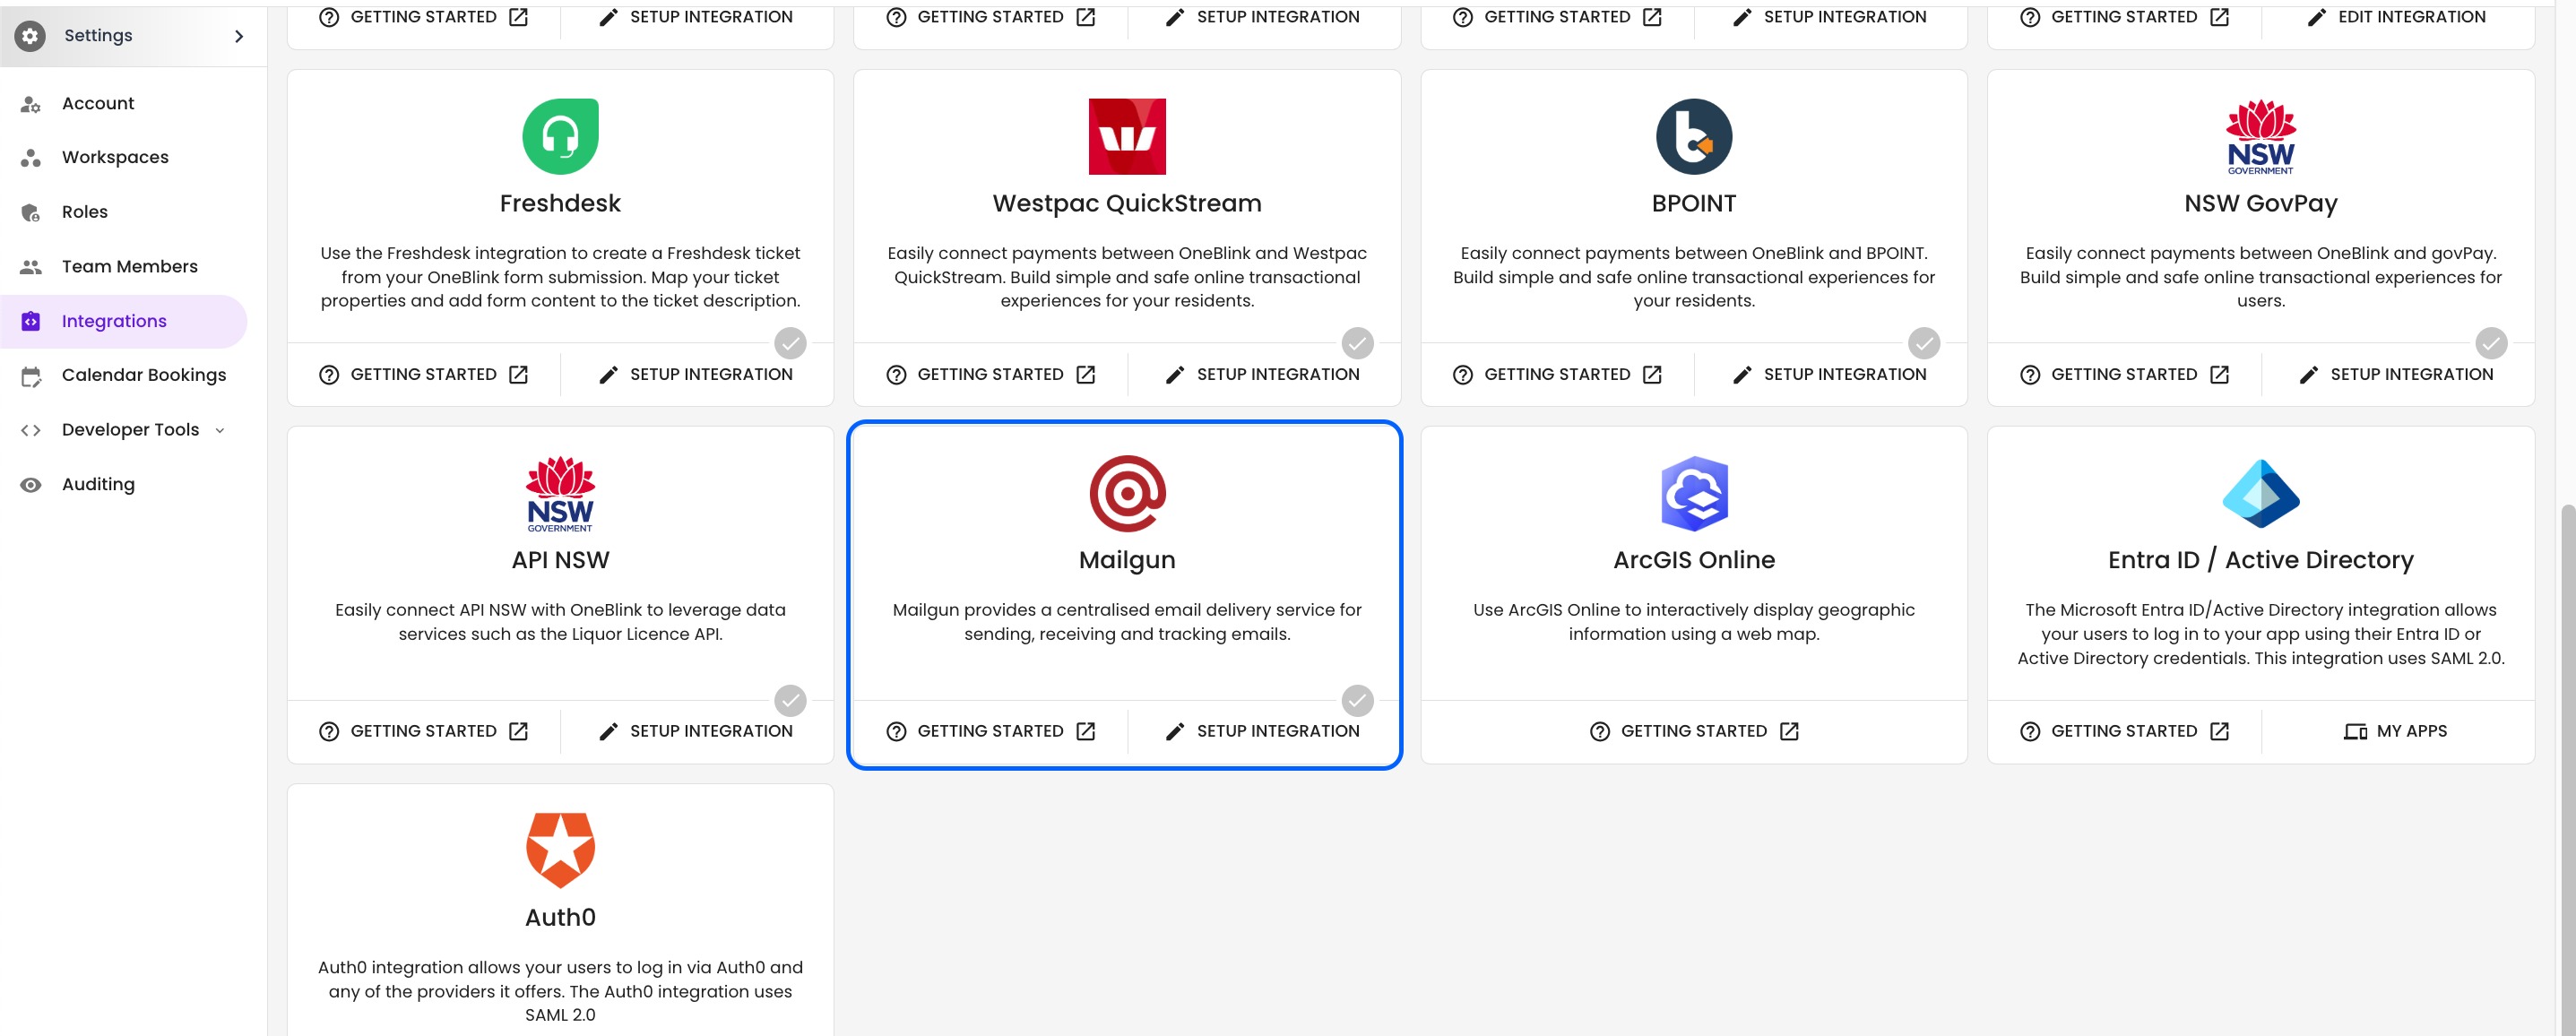
Step 1: Open the Integrations menu and click Setup Integration.
Step 2: Enter your Mailgun domain and API Key.
Make sure you whitelist the required IP addresses in your Mailgun account.
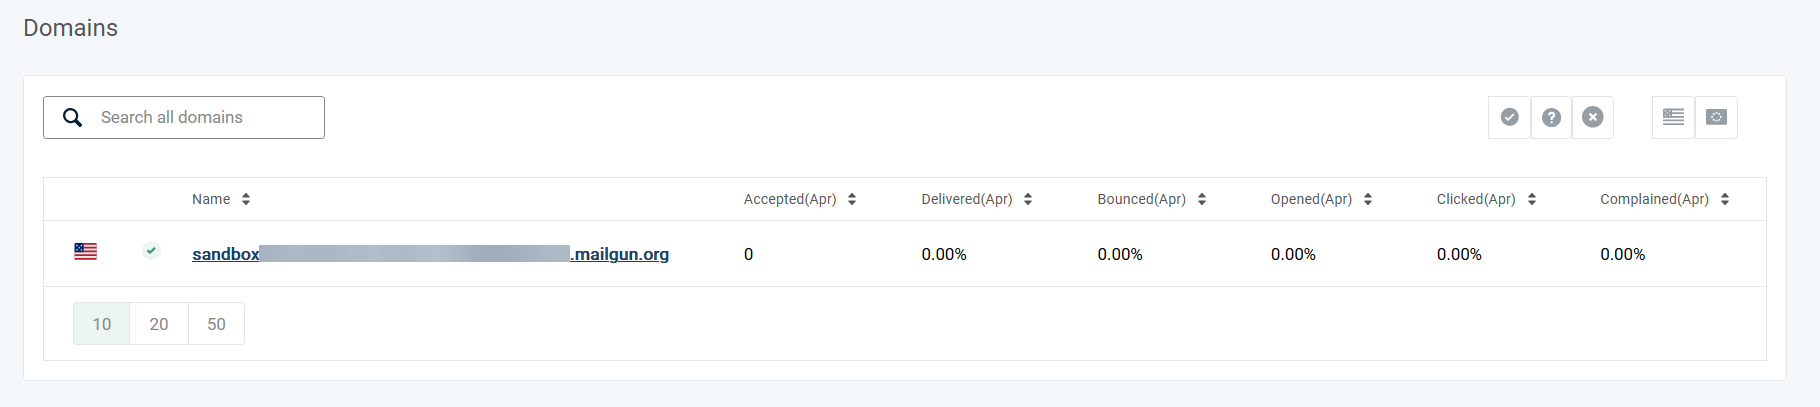
Step 3: To find your sending domain in Mailgun, open Sending from the left-hand menu, then click Domains.
[placeholder - screenshot of the Sending and Domains menu in Mailgun]
Step 4: Copy your sending domain, for example sandbox########################.mailgun.org, and add it to the Mailgun integration setup in OneBlink.
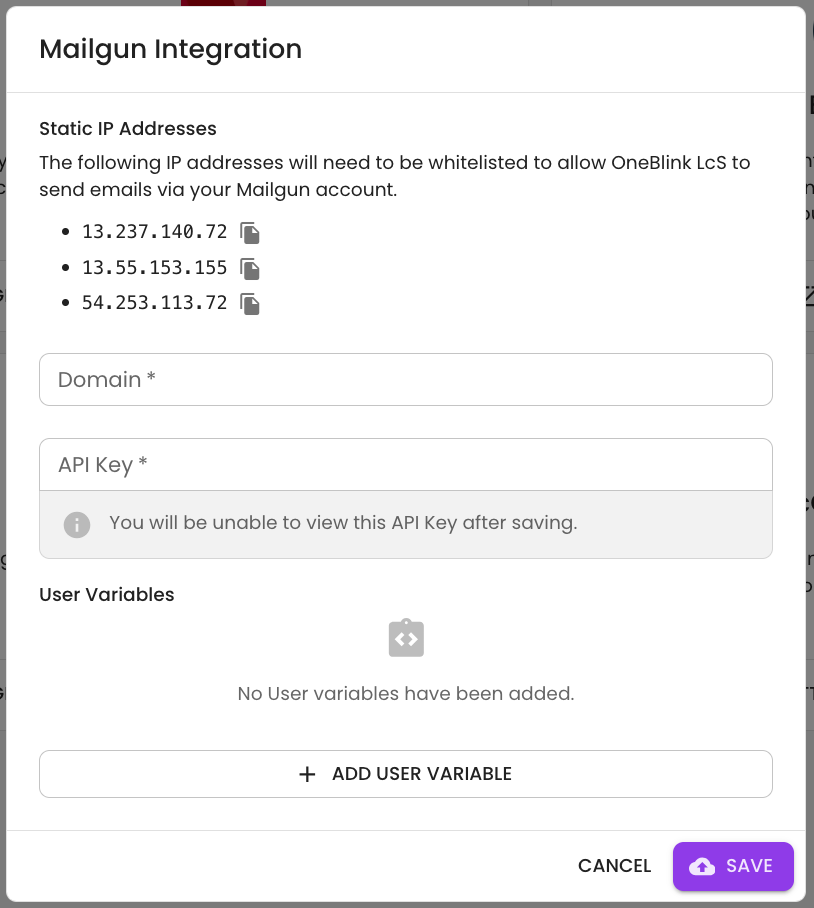
Once the domain and API Key have been added and validated, the Mailgun integration will show as configured.
Configuring Email Sending for an App
After Mailgun has been configured, you can update an app to send emails using your Mailgun sending address.
Step 1: Open the app you want to use with Mailgun.
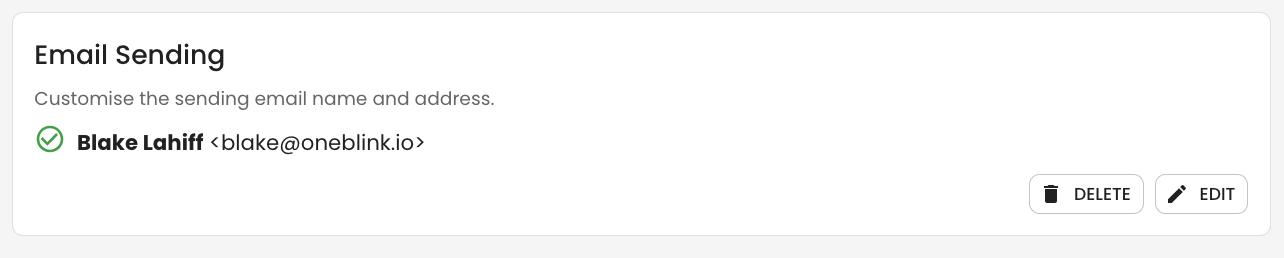
Step 2: In the app settings, find Email Sending and click EDIT.
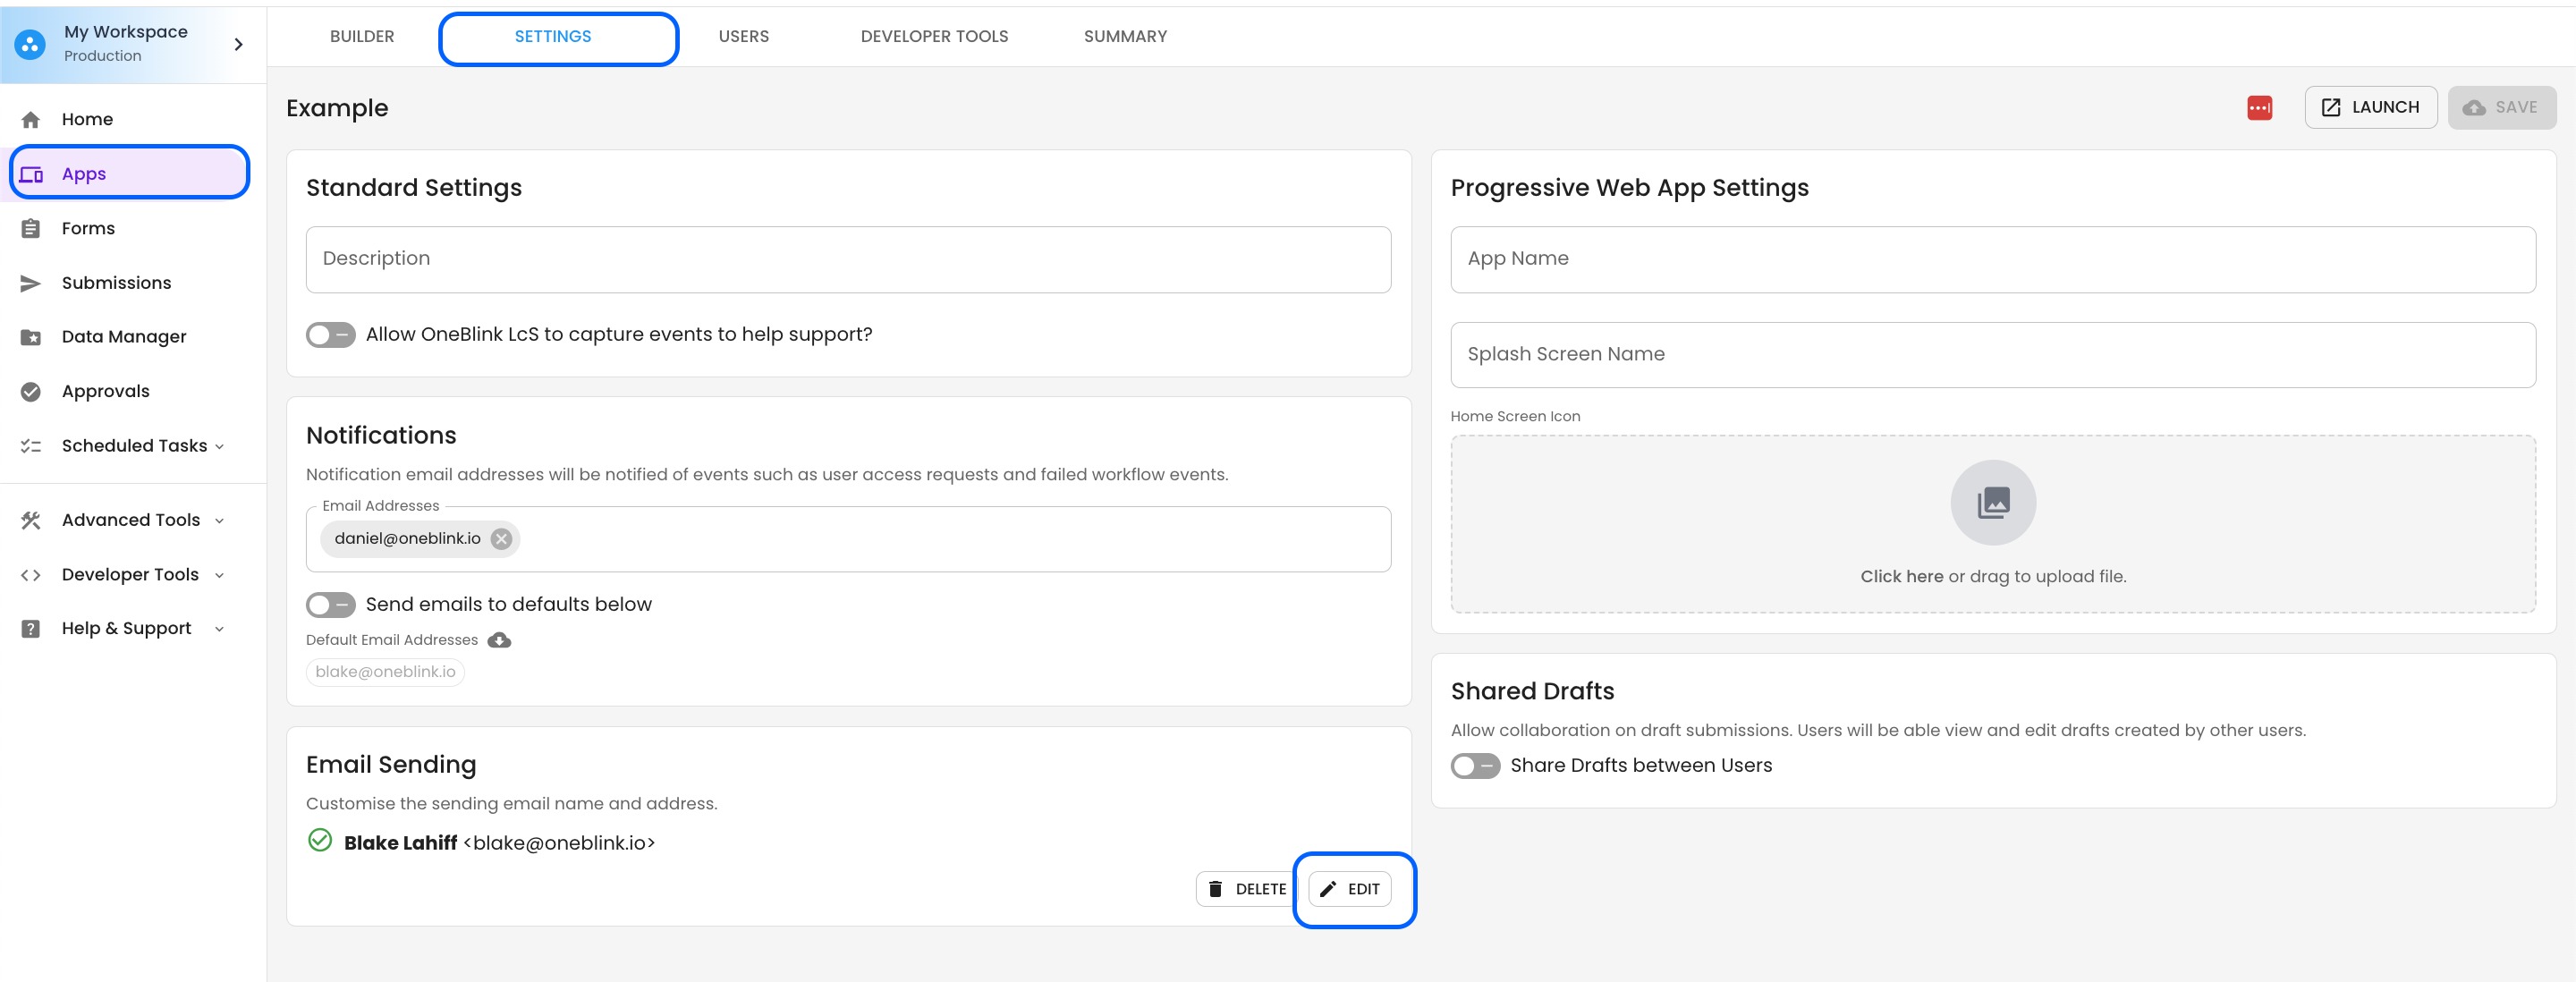
Step 3: Enter the email address and name you want to use as the sending address.
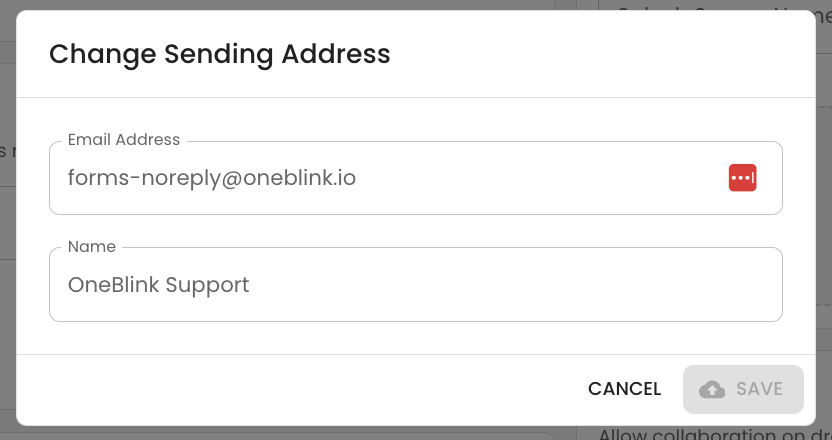
Once the email address and name have been added, the configuration is complete. Emails sent from the app will use your configured sending address through Mailgun.
Getting Help
If you need any assistance with Mailgun integration, please reach out through the Report Issue menu or email support@oneblink.io.
Was this article helpful?
That’s Great!
Thank you for your feedback
Sorry! We couldn't be helpful
Thank you for your feedback
Feedback sent
We appreciate your effort and will try to fix the article