The OneBlink LcS supports custom Google reCAPTCHA keys. Custom keys are required when using custom domain apps or when embedding forms that include a reCAPTCHA, or “not a robot”, element on a website.
TABLE OF CONTENTS
- reCAPTCHA types
- Creating a reCAPTCHA key in Google
- Adding reCAPTCHA to the OneBlink LcS
- Adding another domain
- Environment and app configuration
- Environment reCAPTCHA configuration
- App reCAPTCHA configuration
- Getting Help
- reCAPTCHA
- Steps to create
- Add reCAPTCHA to LcS
- Adding a new domain
- Environment and App Configuration
reCAPTCHA types
OneBlink supports the following Google reCAPTCHA types.
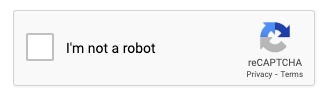
I’m not a robot reCAPTCHA
This option requires the user to tick a checkbox before they can submit the form. If suspicious activity is detected, the user may also need to complete an additional challenge before submitting.
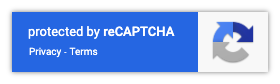
Invisible reCAPTCHA badge
This option works behind the scenes and allows most users to submit forms without any interaction. A small badge is displayed on the form to indicate that reCAPTCHA is active. If suspicious activity is detected, the user may be asked to complete an additional challenge.
Creating a reCAPTCHA key in Google
To create a custom reCAPTCHA key, follow the steps below.
Step 1: Navigate to the Google reCAPTCHA admin page: https://www.google.com/recaptcha/admin
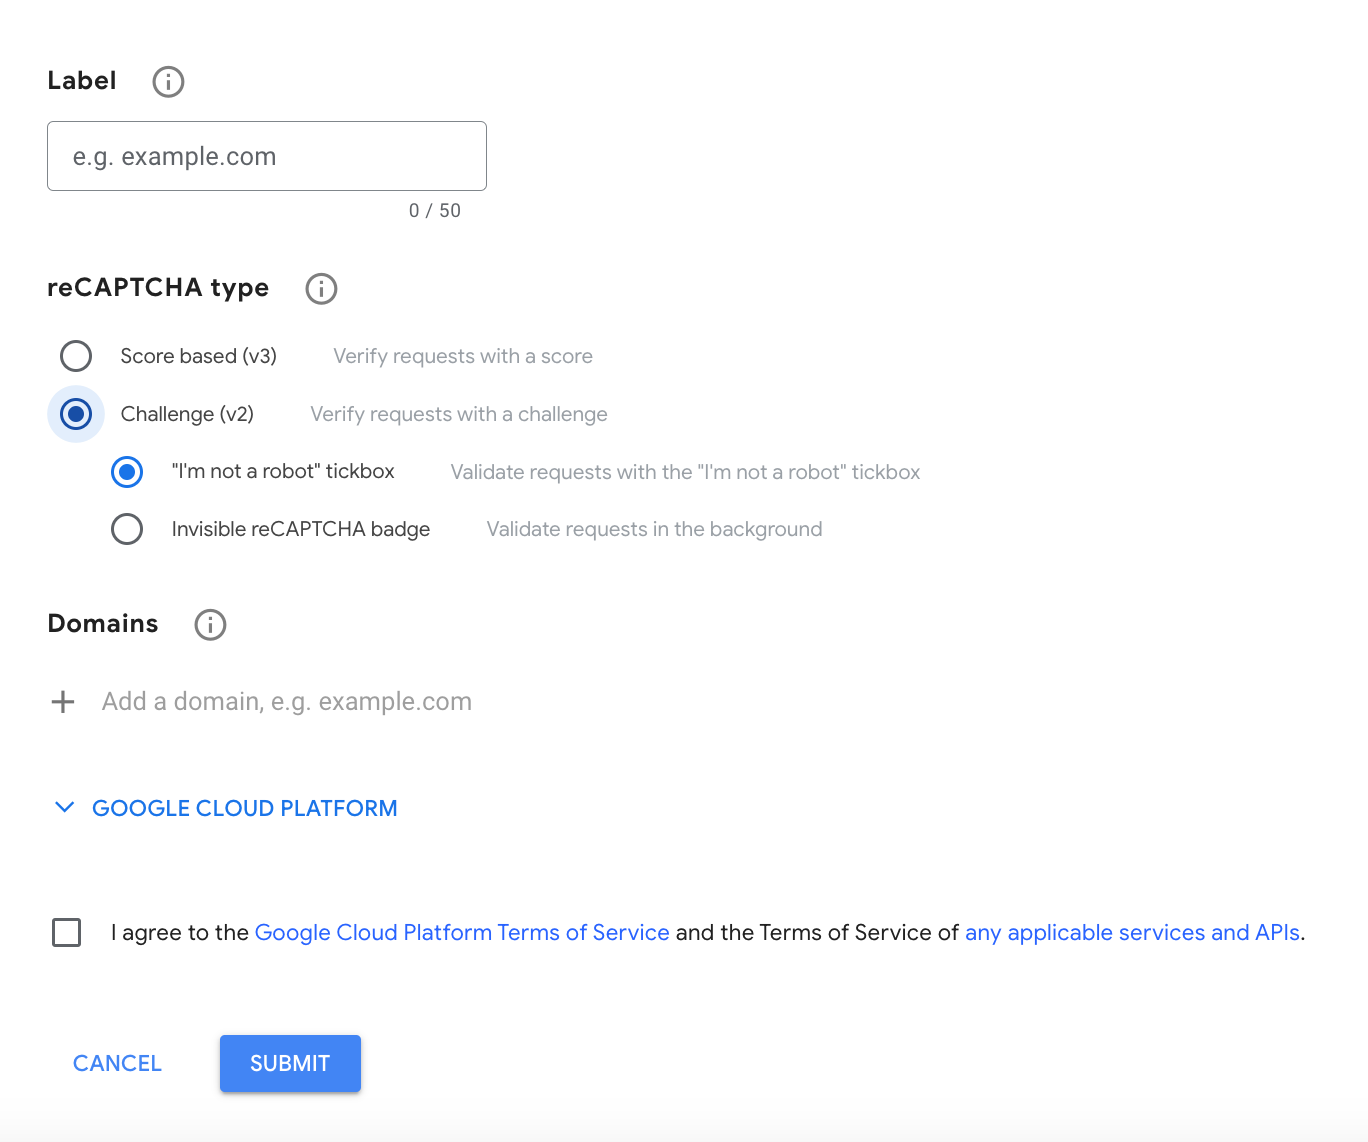
Step 2: Click the plus (+) button to add a new key.

Step 3: Add a label for the key.
Step 4: Select reCAPTCHA v2, then choose either “I’m not a robot” Checkbox or Invisible reCAPTCHA badge.
Step 5: Add the required domains and owners, then accept the terms of service.
You will need to allowlist any domain that is used to access the form. For example, if the form is embedded on your website, the website domain must be allowlisted. If the form is also used within a OneBlink app, such as forms that include approval workflows, the relevant app URLs must also be allowlisted.
Step 6: Click Submit.
Adding reCAPTCHA to the OneBlink LcS
Once the reCAPTCHA key has been created in Google, it can be added to the OneBlink LcS.
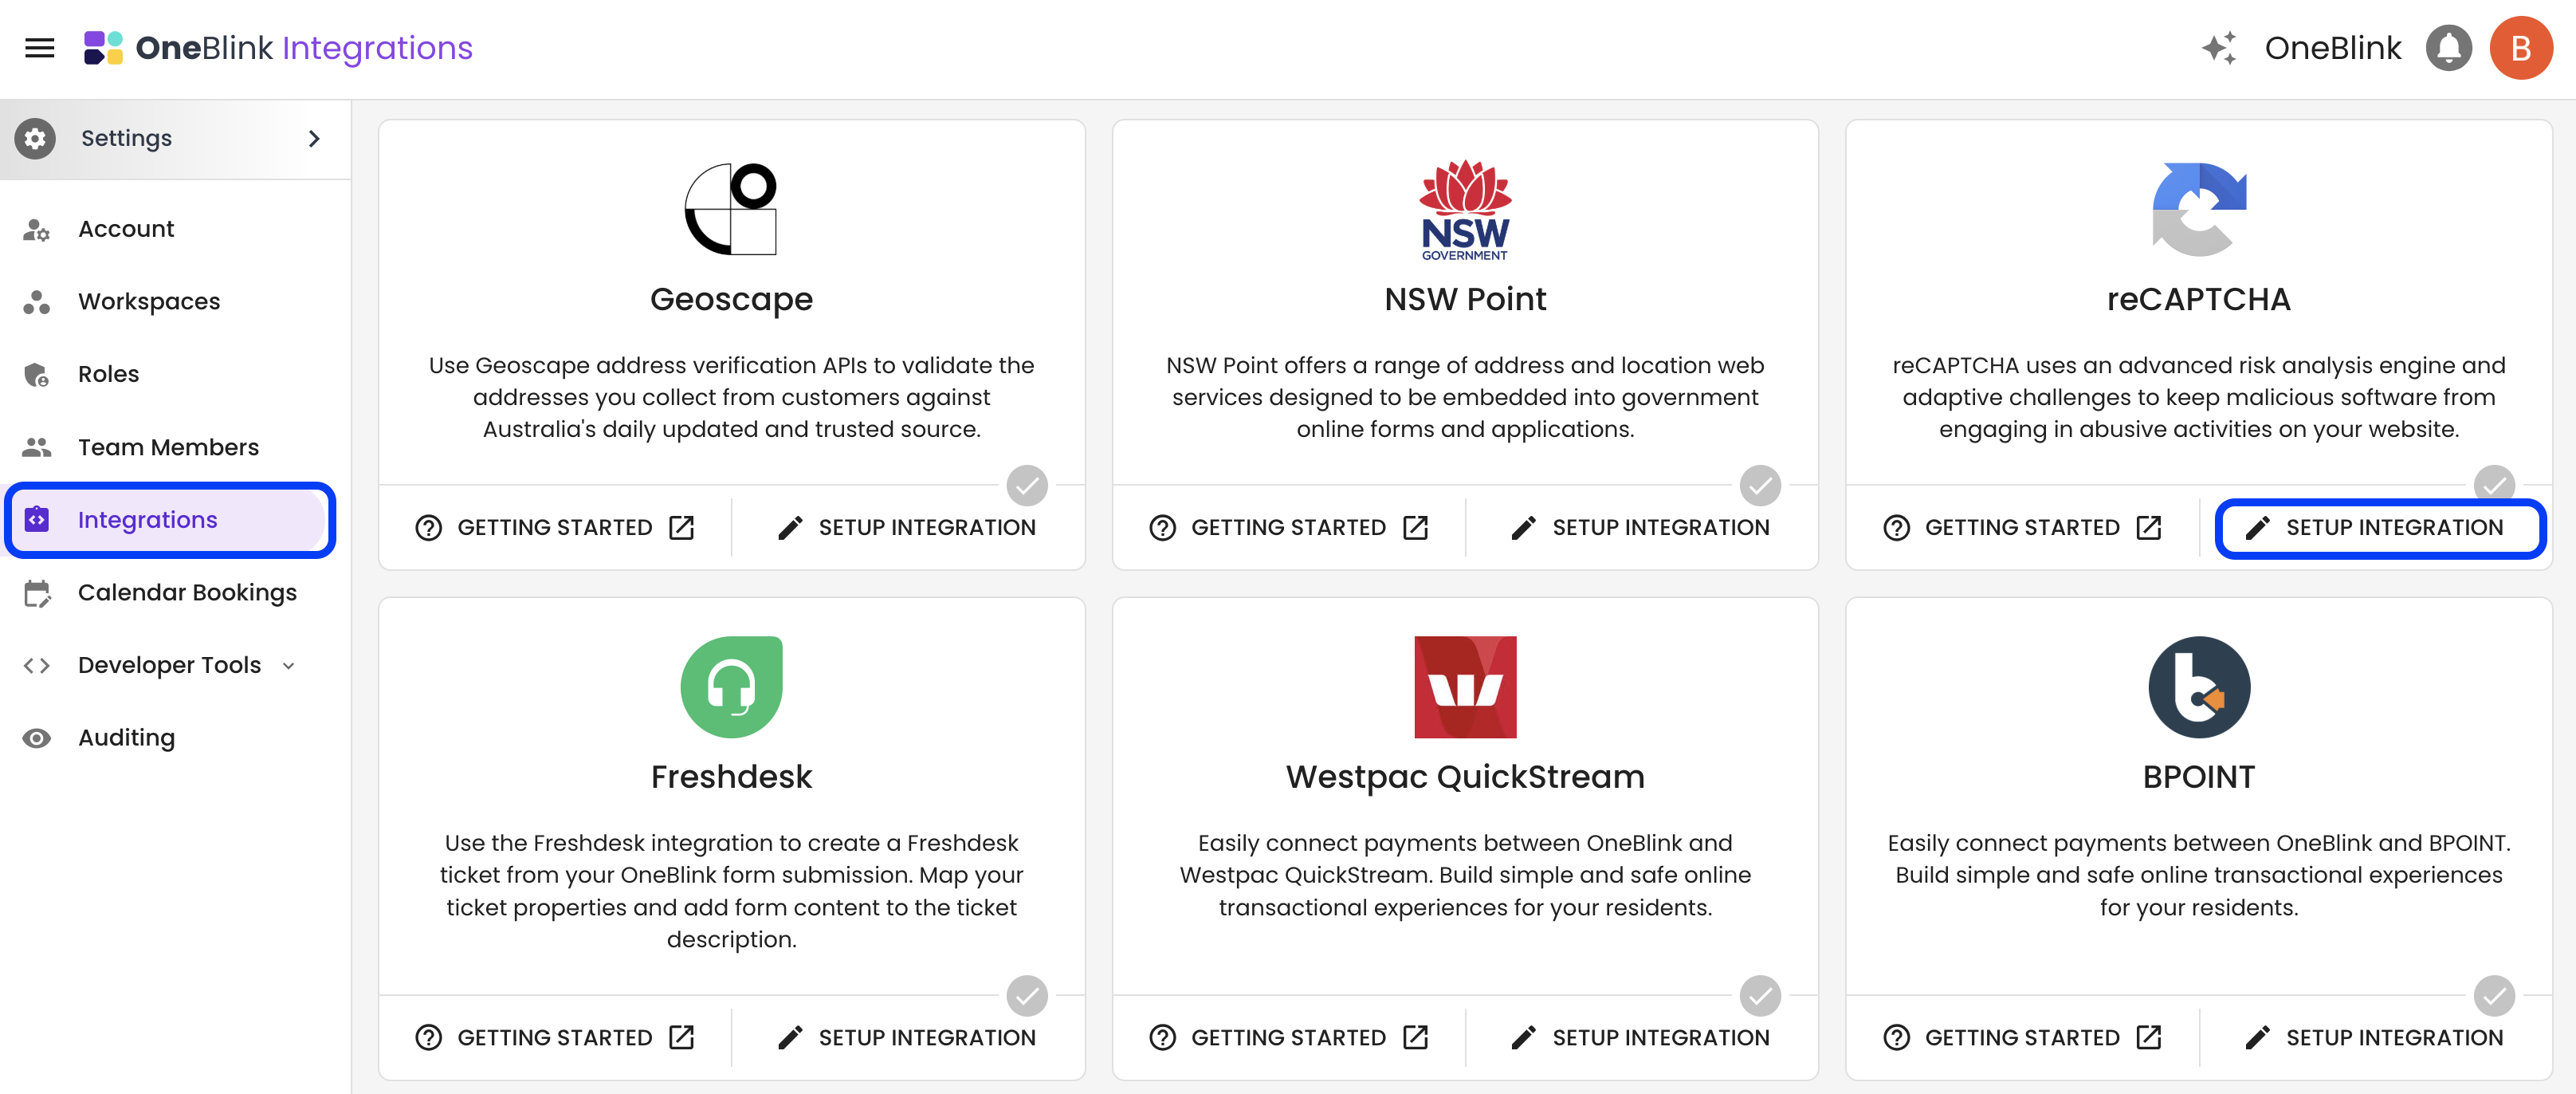
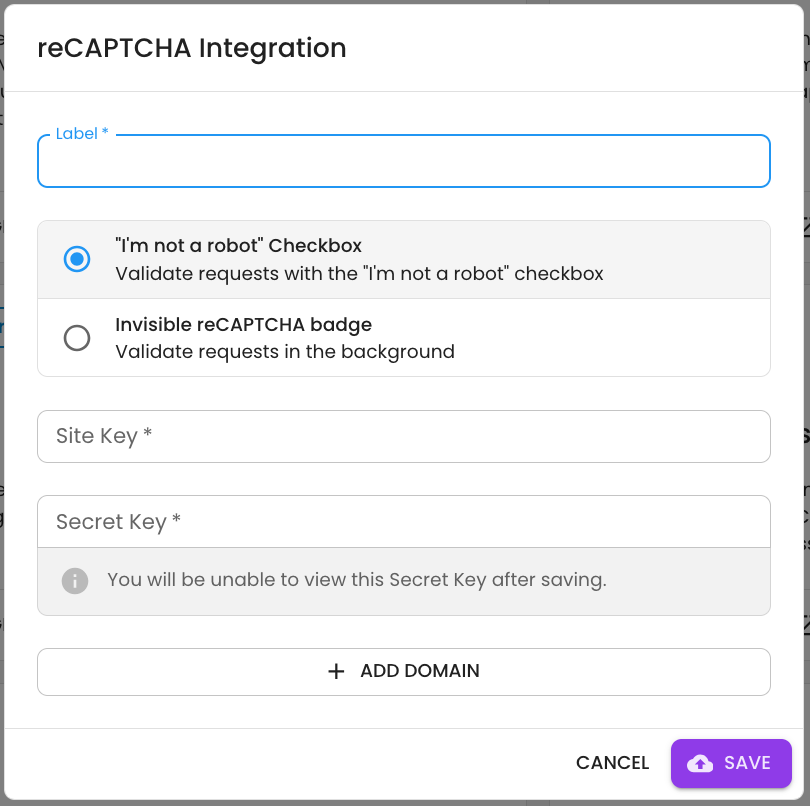
Step 1: Open the OneBlink LcS, navigate to the Integrations menu, and select Setup Integration.
Step 2: Enter a label for the key.
Step 3: Select either “I’m not a robot” Checkbox or Invisible reCAPTCHA badge.
Step 4: Enter the Site Key and Secret Key, then click Save.
Adding another domain
Additional domains can be added to the reCAPTCHA integration if required.
Step 1: From the reCAPTCHA integration modal, click Add Domain.
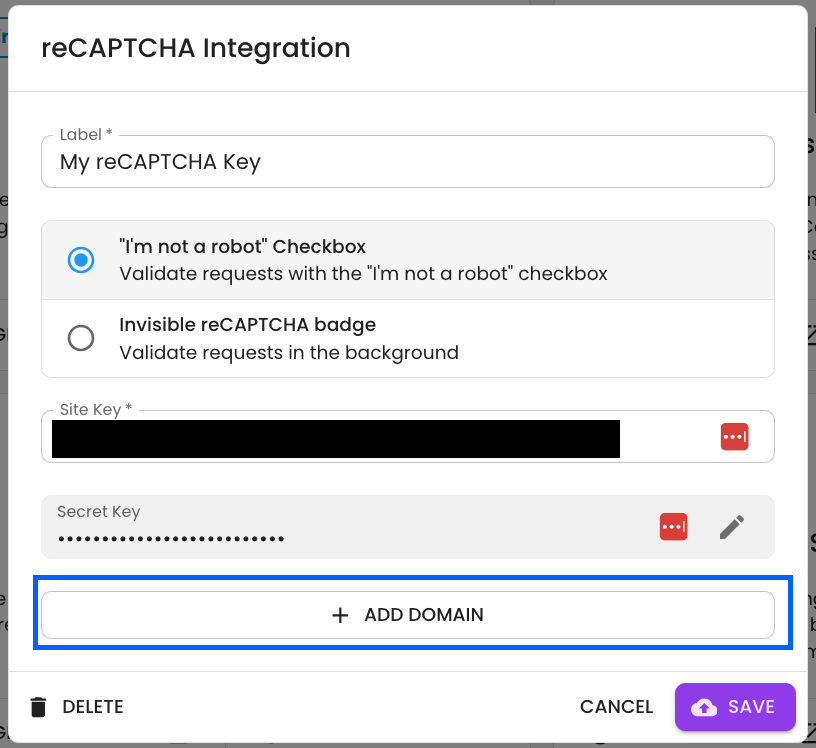
Step 2: Complete the required fields:
- Label
- reCAPTCHA key type
- Site Key
- Secret Key
Step 3: Click Save.
After the new domain has been added, you can select between the available domains when configuring the reCAPTCHA key for an app or environment.
Environment and app configuration
After the integration has been configured, the reCAPTCHA key must be linked to either an environment or an app.
If the form is being embedded into another website, configure the reCAPTCHA key from the Environment menu. If the form is being used within an app, configure the reCAPTCHA key from the App menu.
The reCAPTCHA key used by an embedded form depends on whether the embed script contains a formsAppId.
- If the embed script does not include a
formsAppId, the environment reCAPTCHA key will be used. - If the embed script includes a
formsAppId, the app reCAPTCHA key will be used.
Environment reCAPTCHA configuration
Step 1: Open the Advanced Tools menu, select Environments, and then select the relevant environment.
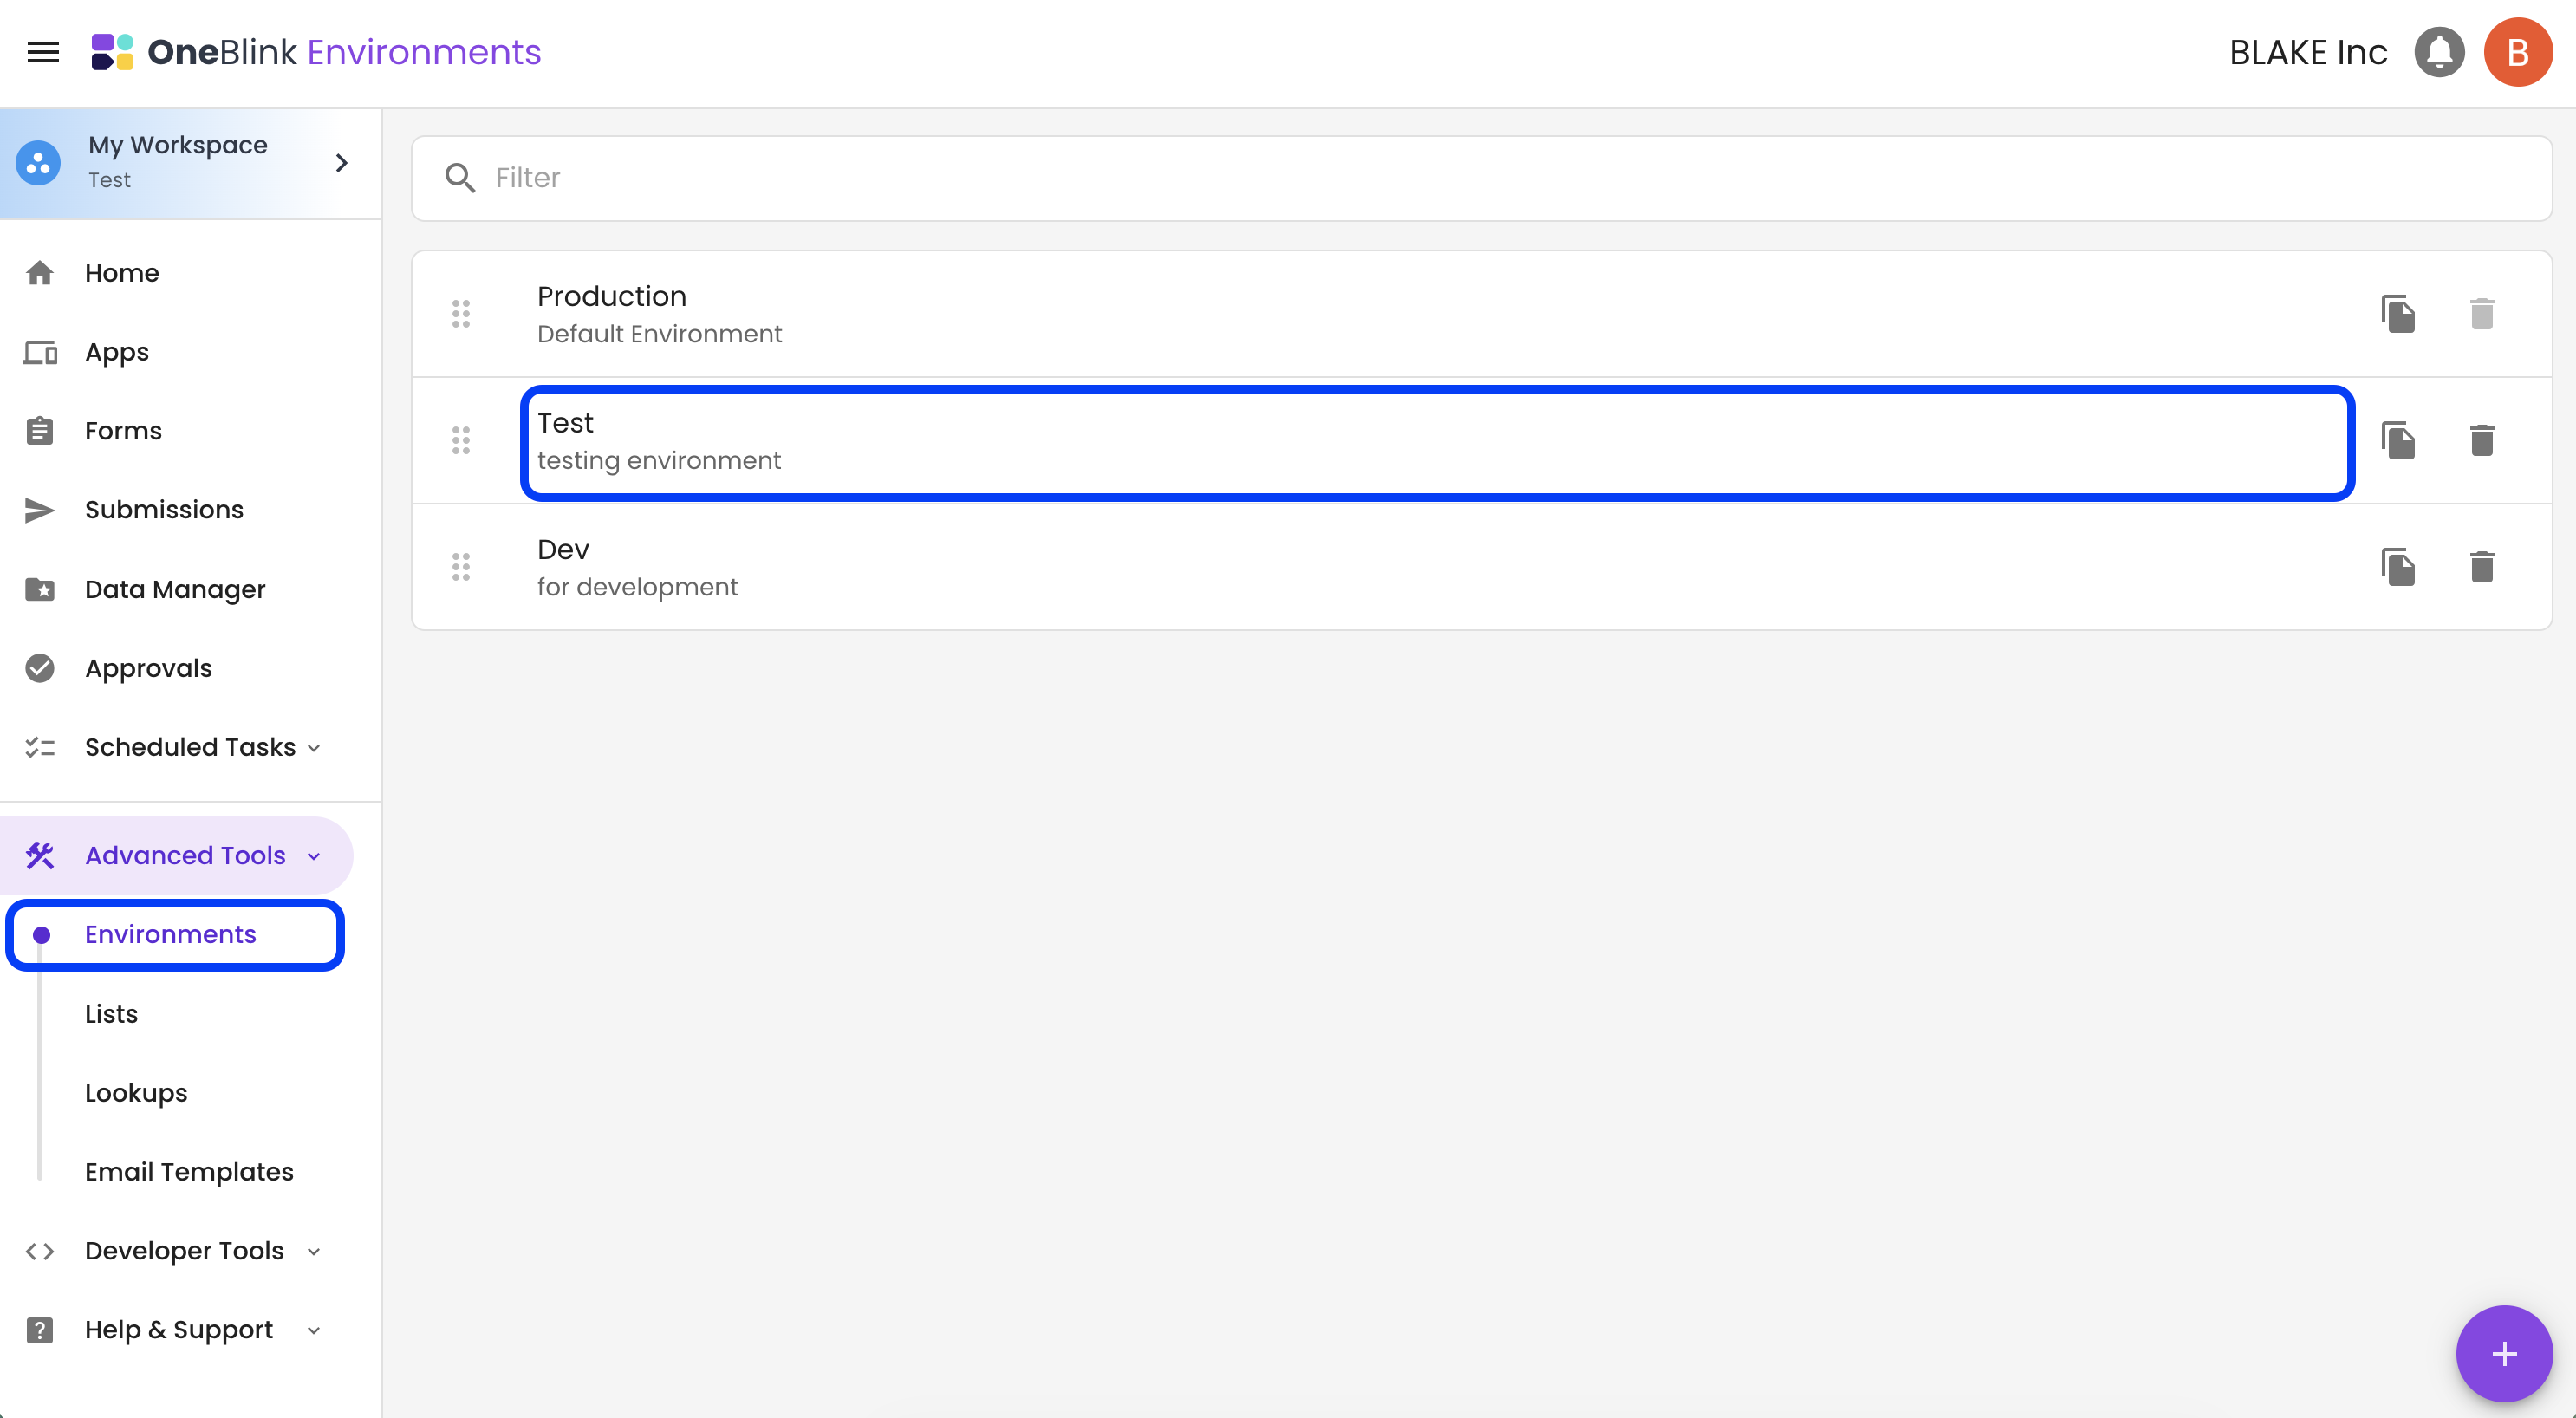
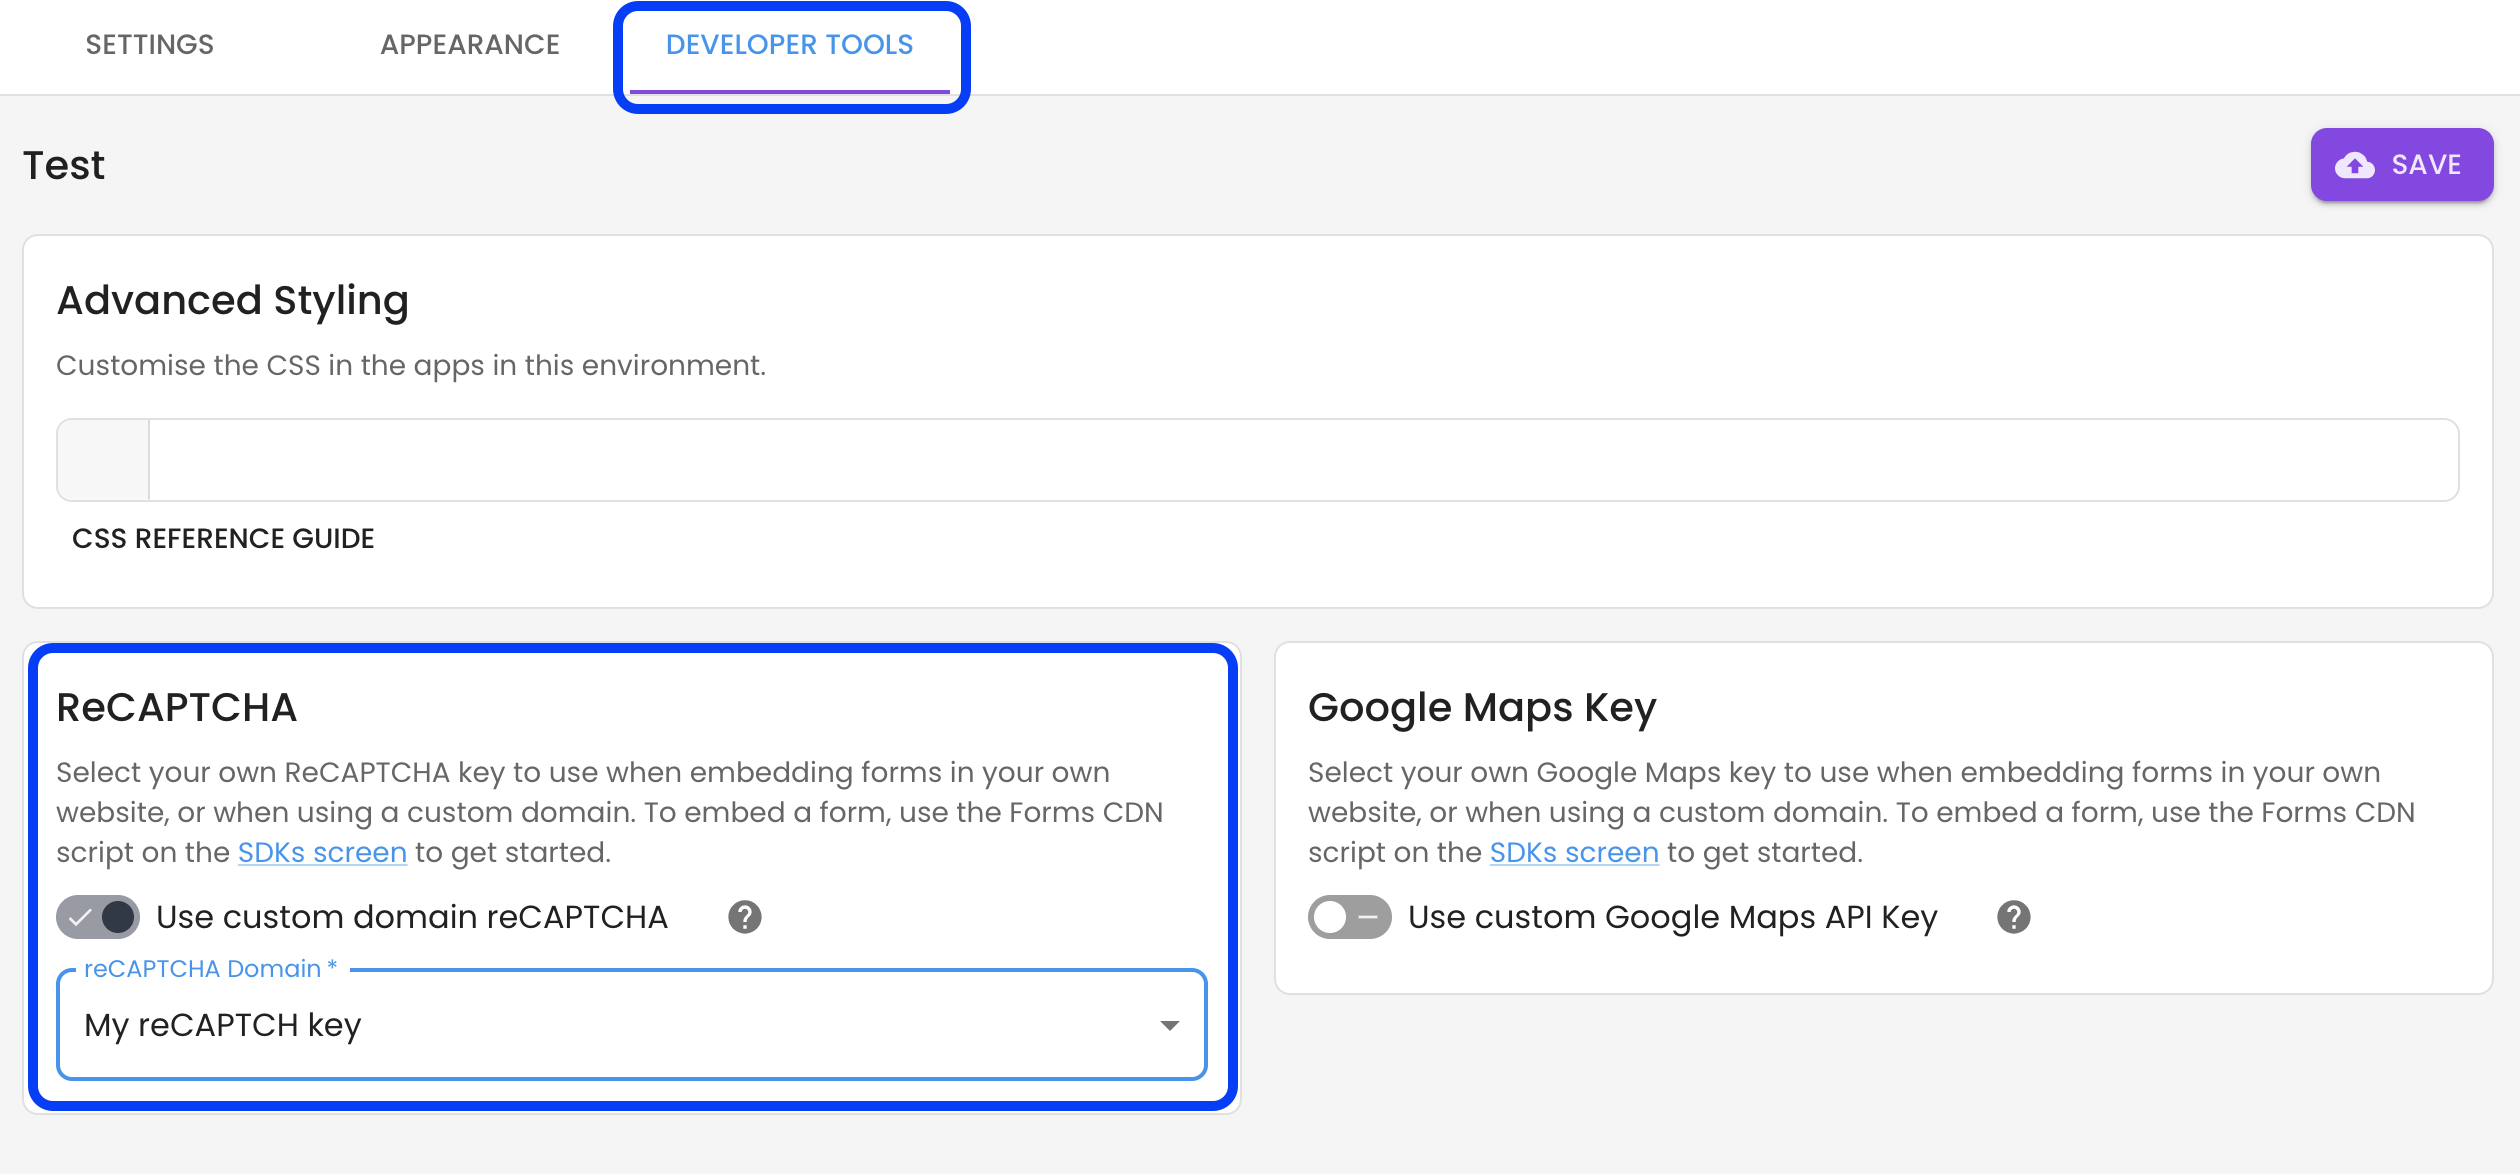
Step 2: Open the Developer Tools tab.
Step 3: Enable the reCAPTCHA option, select the reCAPTCHA key and click Save.
App reCAPTCHA configuration
Step 1: Open the Apps menu and click Manage on the relevant app.
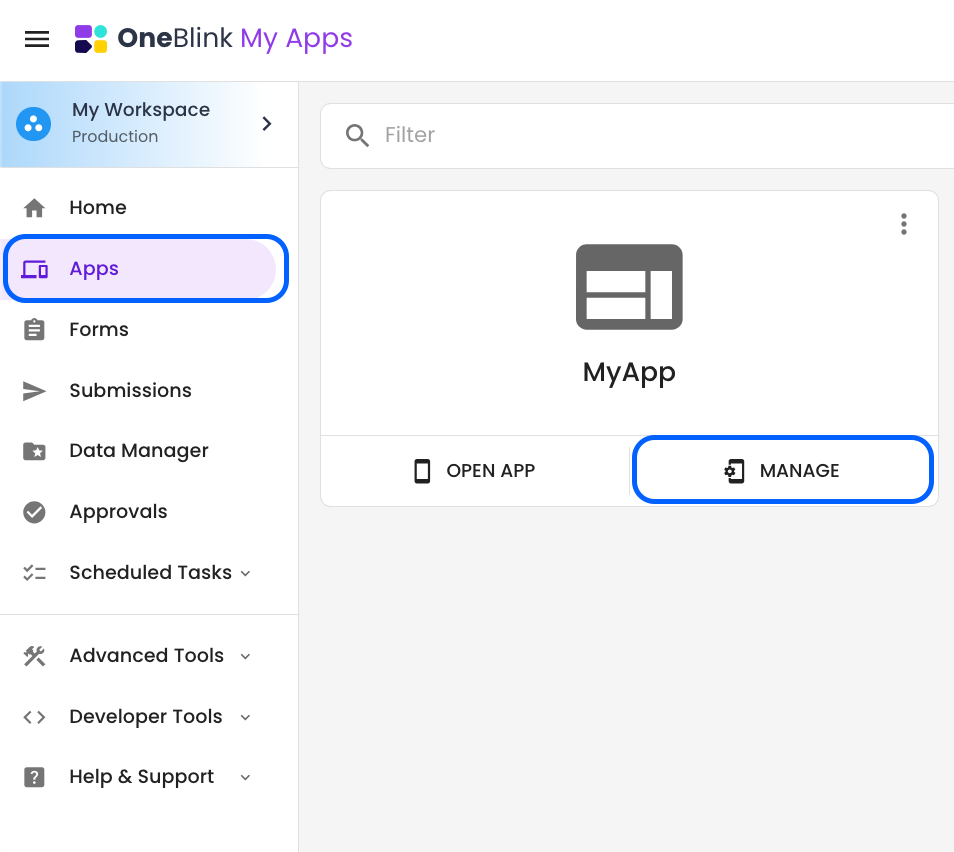
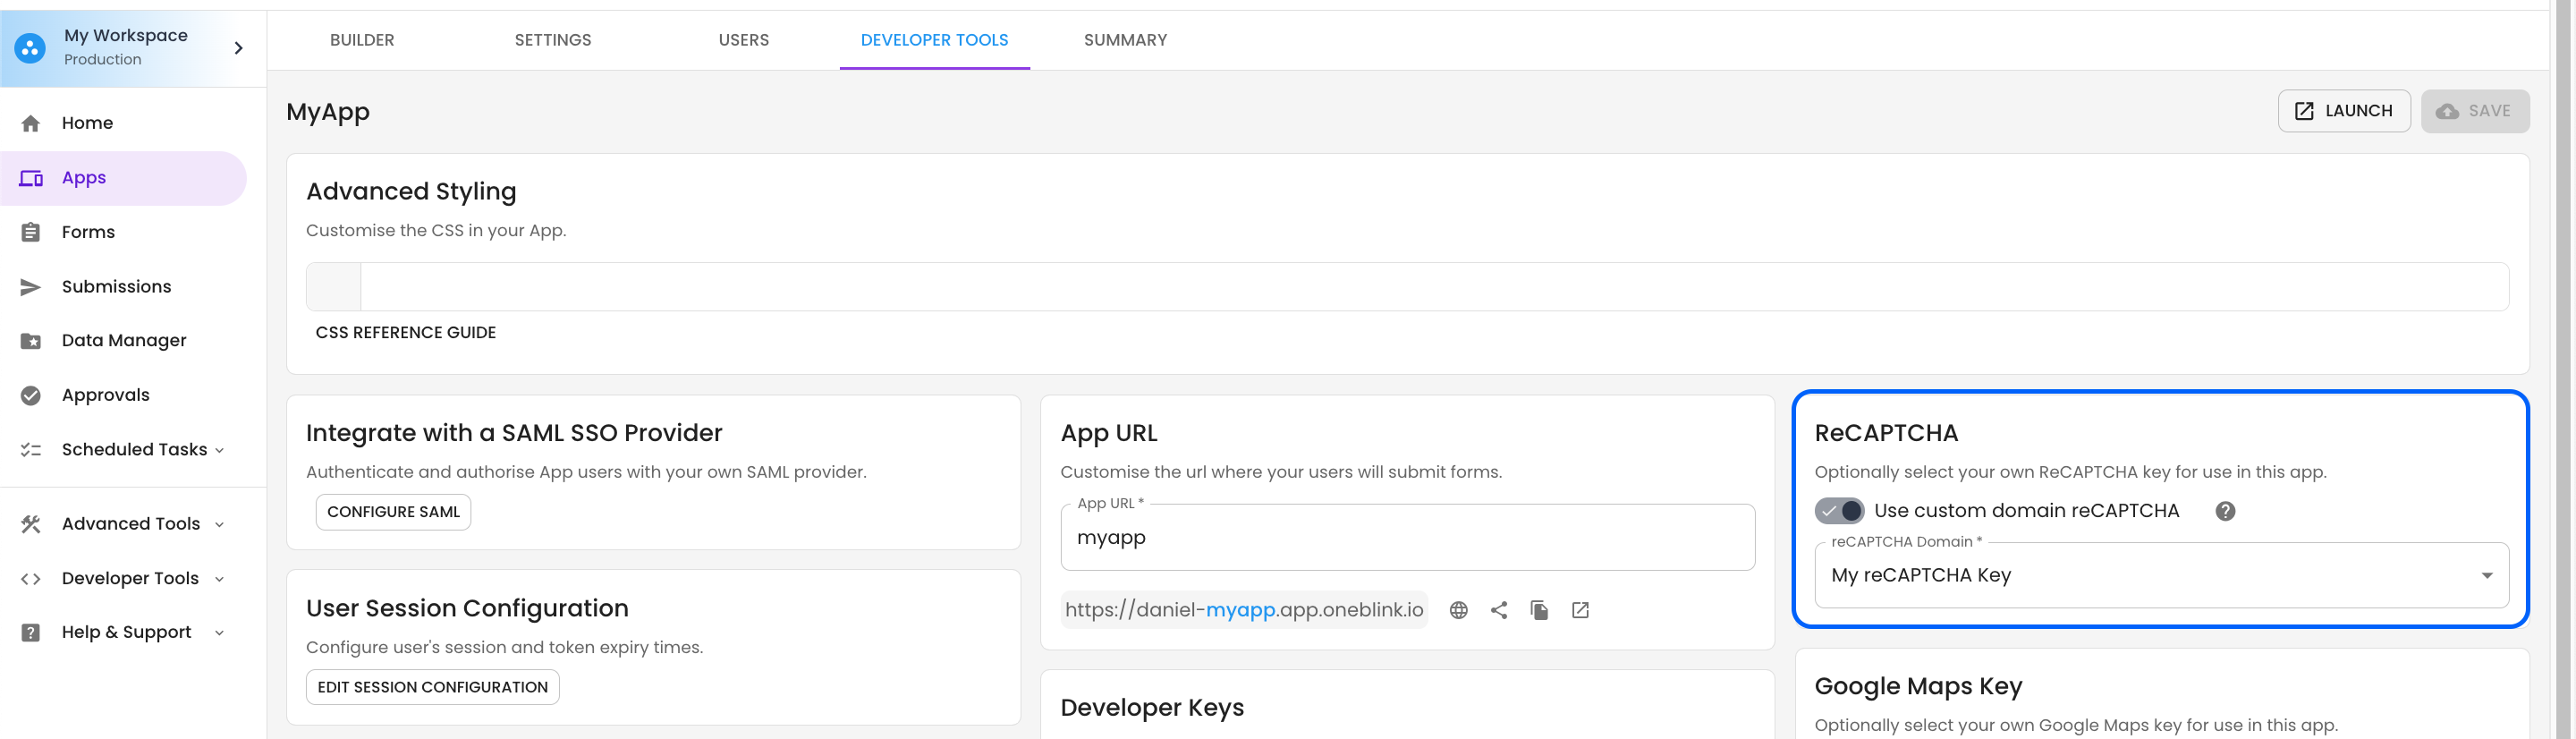
Step 2: Open the Developer Tools tab.
Step 3: Enable the ReCAPTCHA option.
If more than one reCAPTCHA domain has been configured, select the domain you would like to use.
Getting Help
If you need any assistance with custom reCAPTCHA, please reach out through the Report Issue menu or email support@oneblink.io.
Was this article helpful?
That’s Great!
Thank you for your feedback
Sorry! We couldn't be helpful
Thank you for your feedback
Feedback sent
We appreciate your effort and will try to fix the article